AI Note Taker: Meeting Notes Done for You
Autorecord every call and get an accurate transcript, smart summary and action list immediately - delivered straight to your CRM.
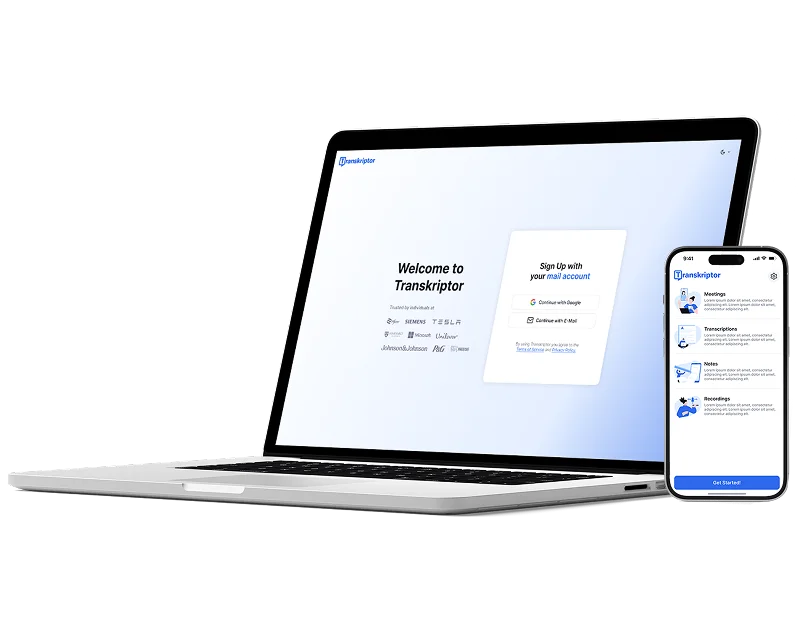
300 free minutes for teams - just sign up with your corporate email
Trusted by individuals at
Instant AI Summary & Action Items
Get a polished recap - key decisions, next steps, owners - delivered immediately after the call.
OneClick FollowUps & CRM Sync
Autodraft followup emails, push action items to Salesforce/HubSpot, and post summaries to Slack - no copypaste required. Keep every stakeholder aligned before the next meeting starts.
Turn Meetings into Searchable Notes In 4 Simple Steps
- 1STEP 1
Connect Your Calendar or Paste Meeting Link
- 2STEP 2
Transkriptor Automatically Joins & Records
- 3STEP 3
AI Generates Complete Meeting Notes
- 4STEP 4
Share Insights with Your Team
Who Benefits Most from AI Note Taking?

Business Executives
Transform strategy meetings and board discussions into concise summaries and actionable items without dividing attention between leading and documenting.

Project Managers
Convert daily standups and project meetings into organized task lists, milestones, and responsibility assignments with zero manual documentation.

Sales & Account Managers
Turn client conversations and deal negotiations into accurate records of commitments, requirements, and follow-up items while maintaining relationship focus.

HR Professionals
Capture candidate interviews and performance reviews with precision, creating searchable records while focusing on human assessment and engagement.
Transform Your Meetings with AI-Powered Note Taker
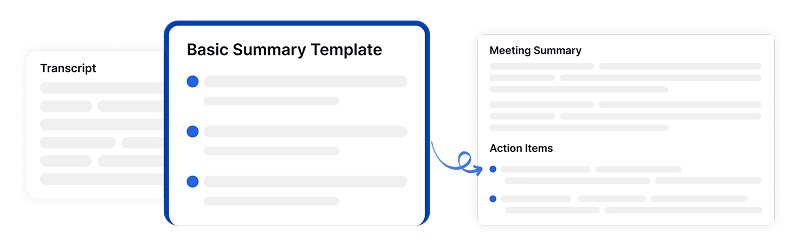
Customizable AI Meeting Summaries
Transkriptor automatically creates tailored summaries of your meetings using AI technology. Choose from industry-specific templates or create your own custom formats for interviews, team discussions, or sales calls. This ensures your summaries highlight exactly what matters most for your specific context and needs.

Calendar Integration for Automatic Recording
Sync Transkriptor with Google and Outlook Calendars to automate meeting recordings for all or selected events. Join meetings directly from your Transkriptor Calendar and eliminate manual setup, ensuring no important conversation goes undocumented without requiring extra steps.
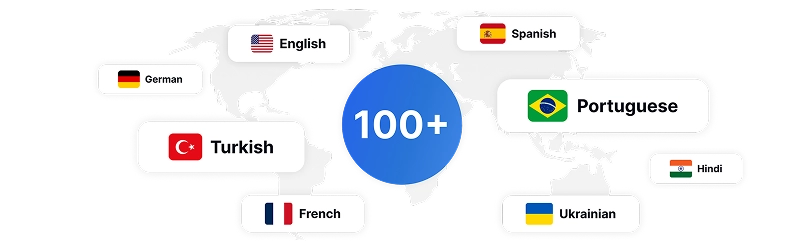
Multilingual Transcription in 100+ Languages
Capture meeting content accurately in over 100 languages, ensuring global team communication is properly documented. Support international collaboration with precise transcription regardless of the languages spoken, making the solution truly global in scope.
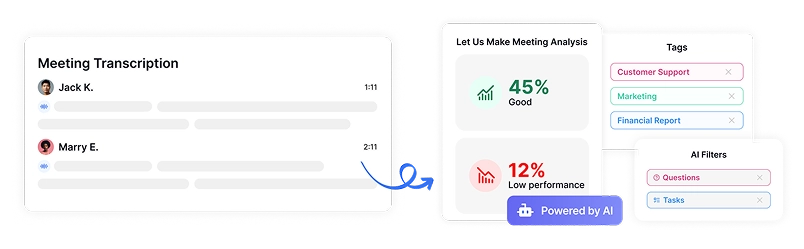
Smart Meeting Content Organization
Access meeting content organized into meaningful categories with Transkriptor's AI-powered Insight Tab. Content is automatically grouped into segments such as Questions, Tasks, Decisions, and Key Topics, ensuring quick navigation to exactly what you need without scrolling through entire transcripts.
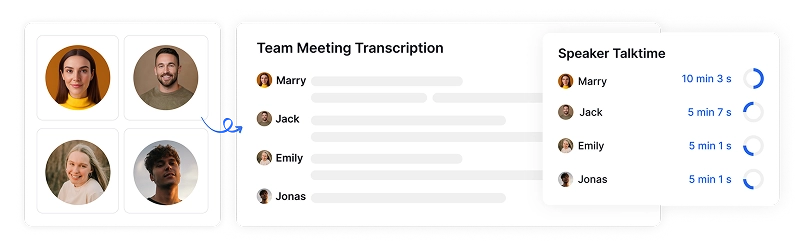
Speaker Recognition and Attribution
Transkriptor accurately identifies different speakers in your meetings, even with multiple participants. Each statement is automatically attributed to the correct person, maintaining clear accountability and context in your meeting notes regardless of conversation complexity.
Enterprise-Grade Security
Security and customer privacy is our priority at every step. We comply with SOC 2 and GDPR standards and ensuring your information is protected at all times.


What Our Users Say
Focus on Strategy, Not Notes
As someone who leads strategy meetings daily, Transkriptor's AI note taker has been revolutionary. I no longer split my attention between guiding discussions and documenting decisions. The automatic categorization of action items and key points means I can follow up immediately after meetings without reviewing entire transcripts.

Sarah Chen
Executive Director
Alignment Across Projects
I've been using Transkriptor for about 6 months across multiple complex projects. The calendar integration makes recording our daily standups effortless. Invaluable for keeping distributed teams aligned!

Marcus Andersson
Senior Project Manager
Frequently Asked Questions
Transkriptor's AI note taker is an advanced tool that automatically captures, transcribes, and organizes meeting content. It joins your virtual meetings, creates accurate transcriptions, generates summaries, and categorizes information like action items and key decisions without requiring any manual notetaking.
Transkriptor achieves over 99% accuracy in transcription across 100+ languages, even with multiple speakers. The AI is specifically trained to recognize industry terminology, technical jargon, and can distinguish between different participants in a conversation.
Yes, Transkriptor integrates directly with Google and Outlook Calendars to automatically join and record your scheduled meetings on platforms like Zoom, Microsoft Teams, and Google Meet. Simply connect your calendar once, and Transkriptor handles the rest.
Meeting notes and summaries are typically available within minutes after your meeting concludes. Transkriptor processes your call instantly, so you can quickly review, edit, or share your notes without delay.
Absolutely. Transkriptor offers custom AI summary templates for different meeting types like interviews, team discussions, or client calls. You can select from pre-built templates or create your own to ensure the notes match your specific requirements.
Yes, Transkriptor makes sharing meeting content simple. You can distribute notes, summaries, or full transcripts to anyone via email or shareable links, with options to control viewing and editing permissions for sensitive information.
Access Transkriptor Anywhere
Record live or upload audio & video files to transcribe. Edit your transcriptions with ease, and use the AI assistant to chat with or summarize transcriptions.