Key Benefits of Transkriptor + OneNote Integration
Seamless Note Organization: Automatically add meeting transcripts to designated OneNote sections and pages, integrating seamlessly with your existing note-taking structure and workflow.
Enhanced Searchability: Every transcript becomes searchable within OneNote's powerful search engine, making it easy to find specific discussions, decisions, or action items across all your notebooks.
Rich Formatting Support: Transcripts are saved with proper formatting, speaker labels, timestamps, and highlights, maintaining readability and context within OneNote's flexible page layout.
Cross-Device Synchronization: Access your meeting transcripts on any device through OneNote's cloud sync, ensuring your team can review notes from desktop, mobile, or web browsers.
How to Set Up OneNote Integration in Transkriptor
Easily connect your OneNote account to Transkriptor in just a few clicks to automatically save transcripts, summaries, and meeting insights to your notebooks.
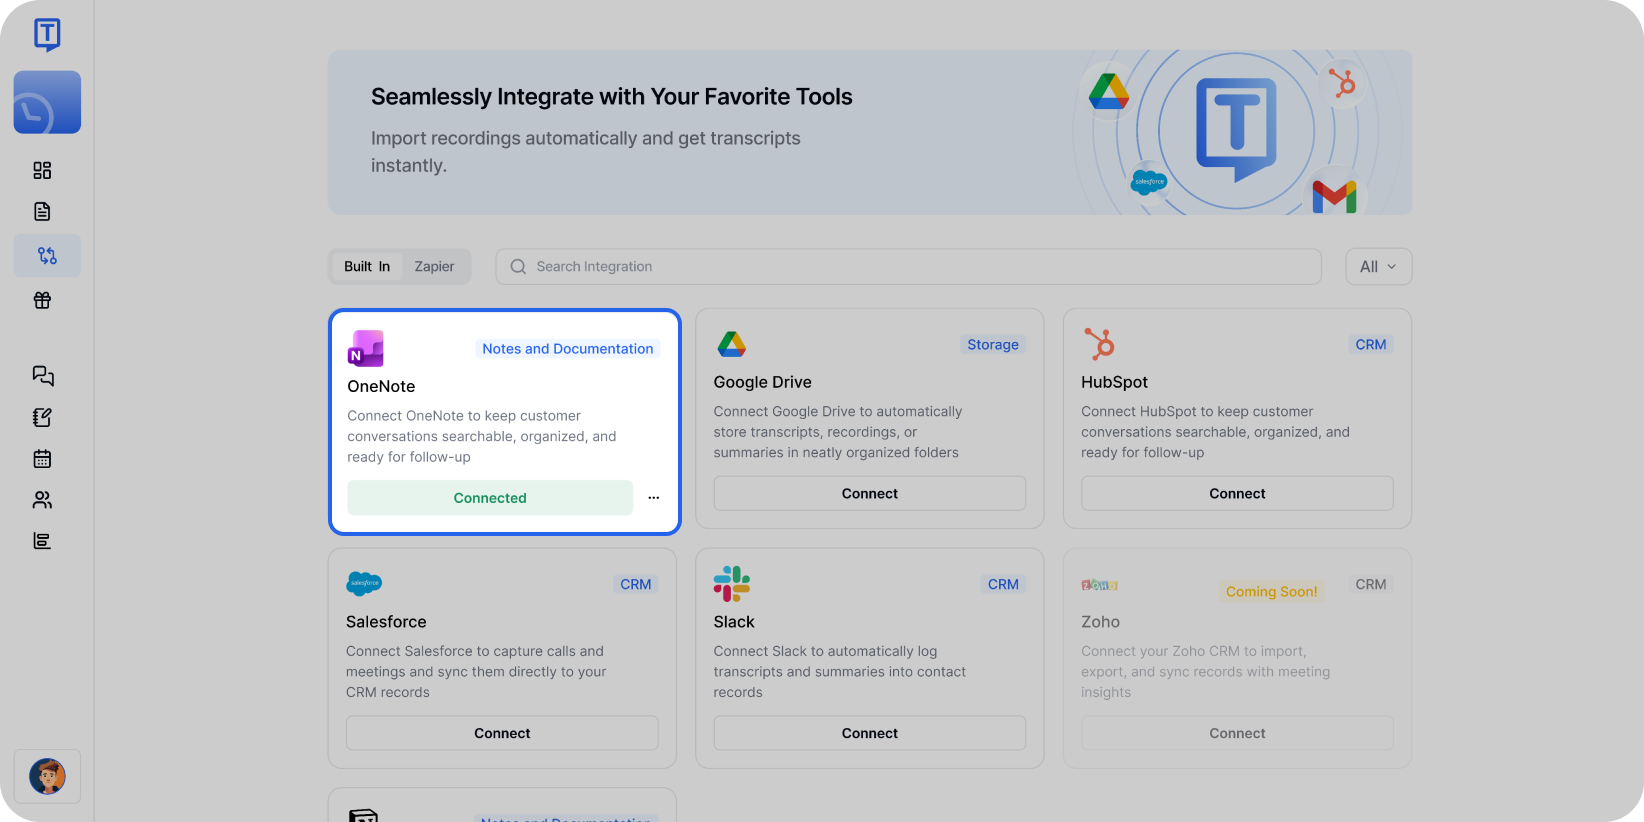
Connect OneNote
Go to the Integrations tab in your Transkriptor dashboard. Find OneNote and select it.
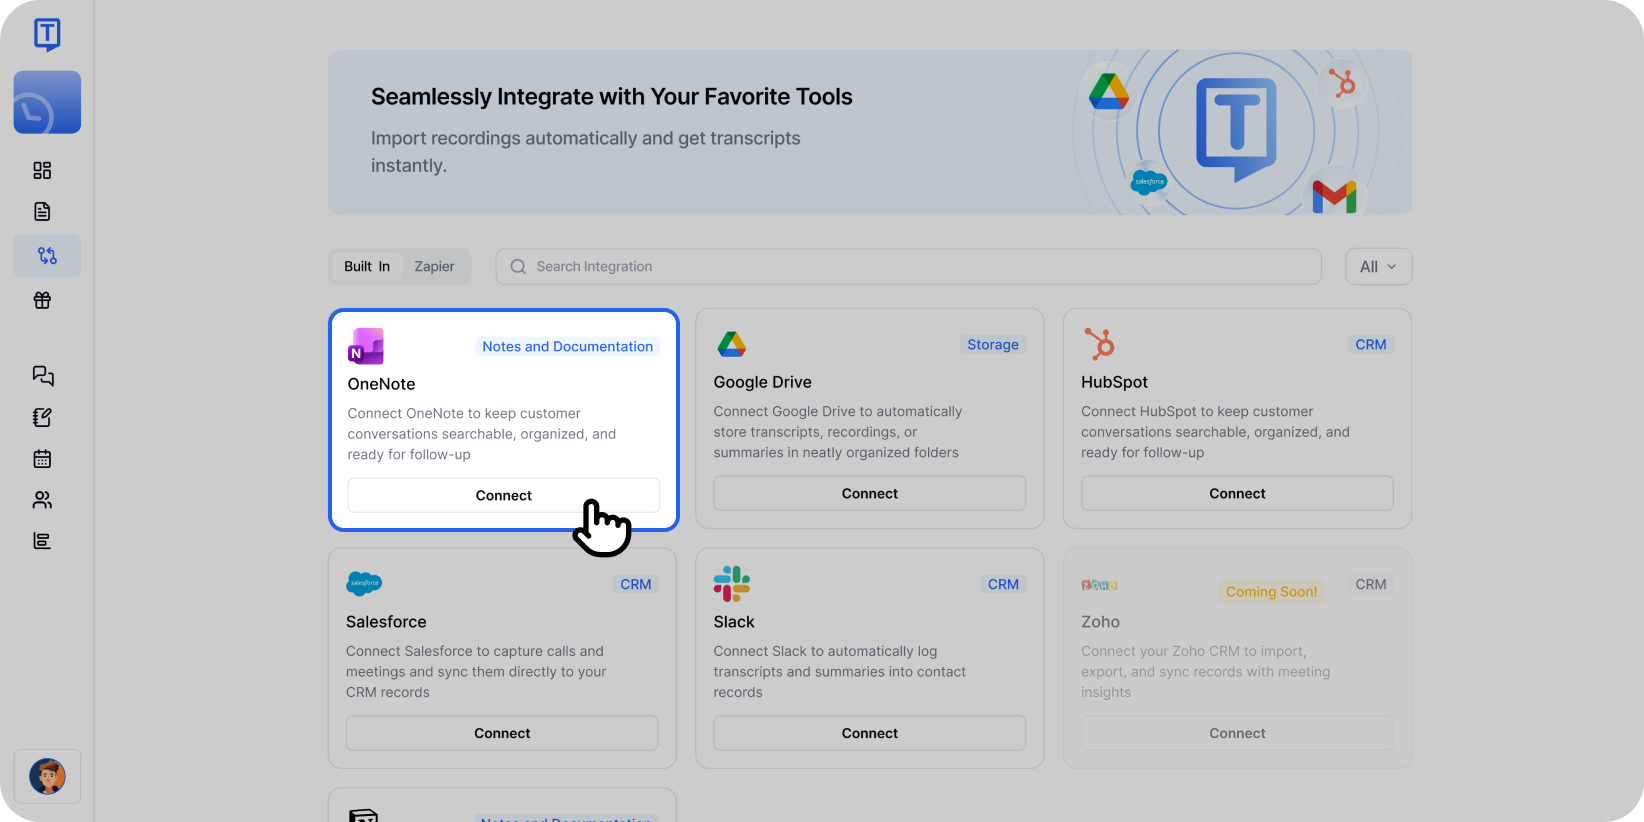
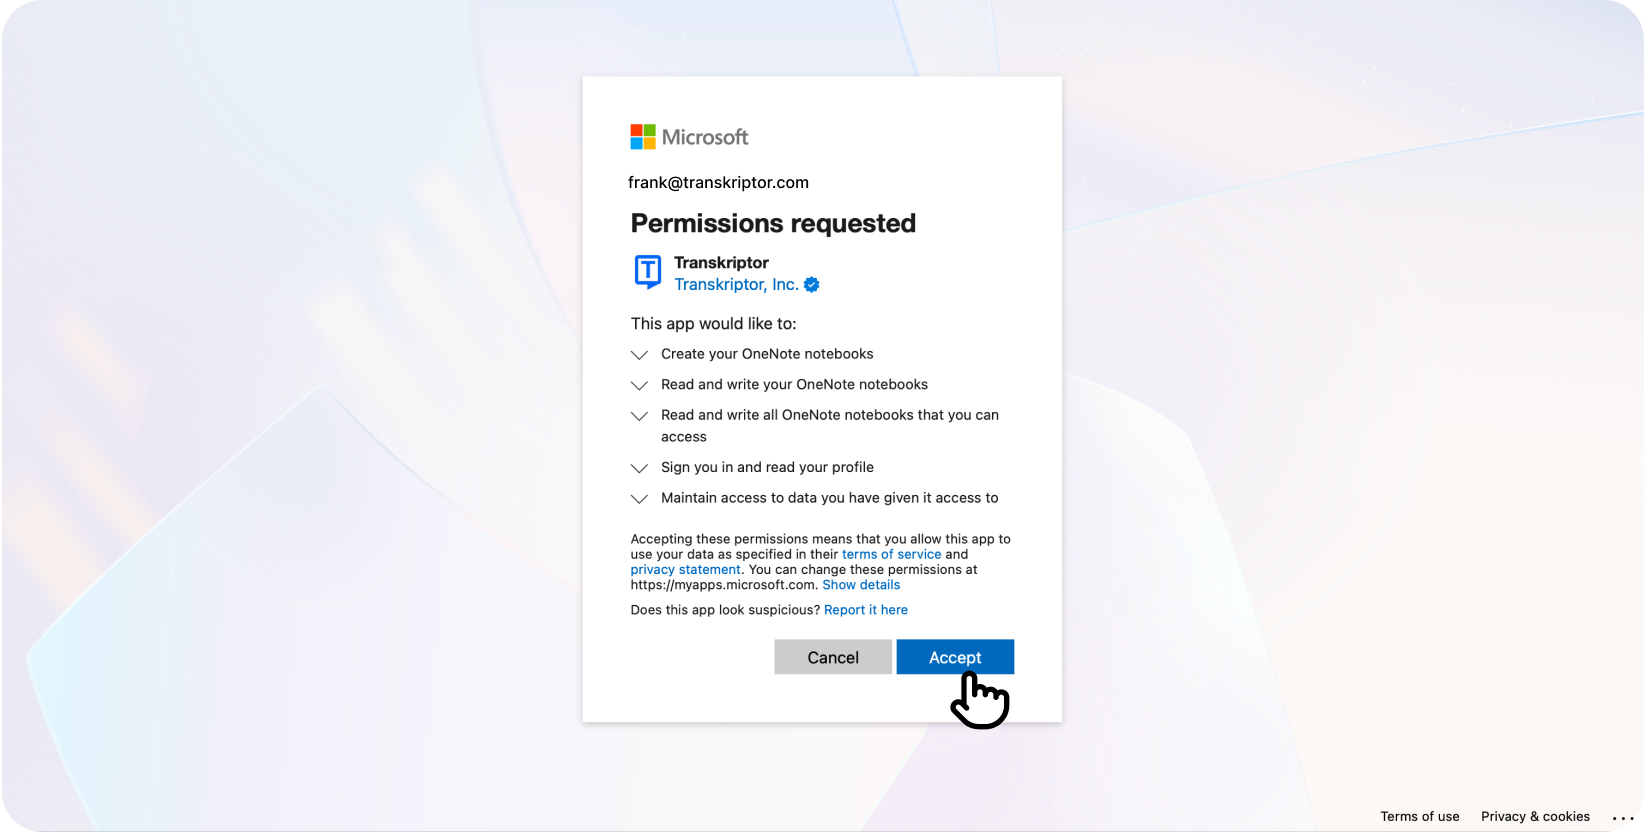
Explore the OneNote integration with Transkriptor to automate your transcription and note-taking processes. Click Connect, then sign in with your Microsoft account and approve the necessary permissions.
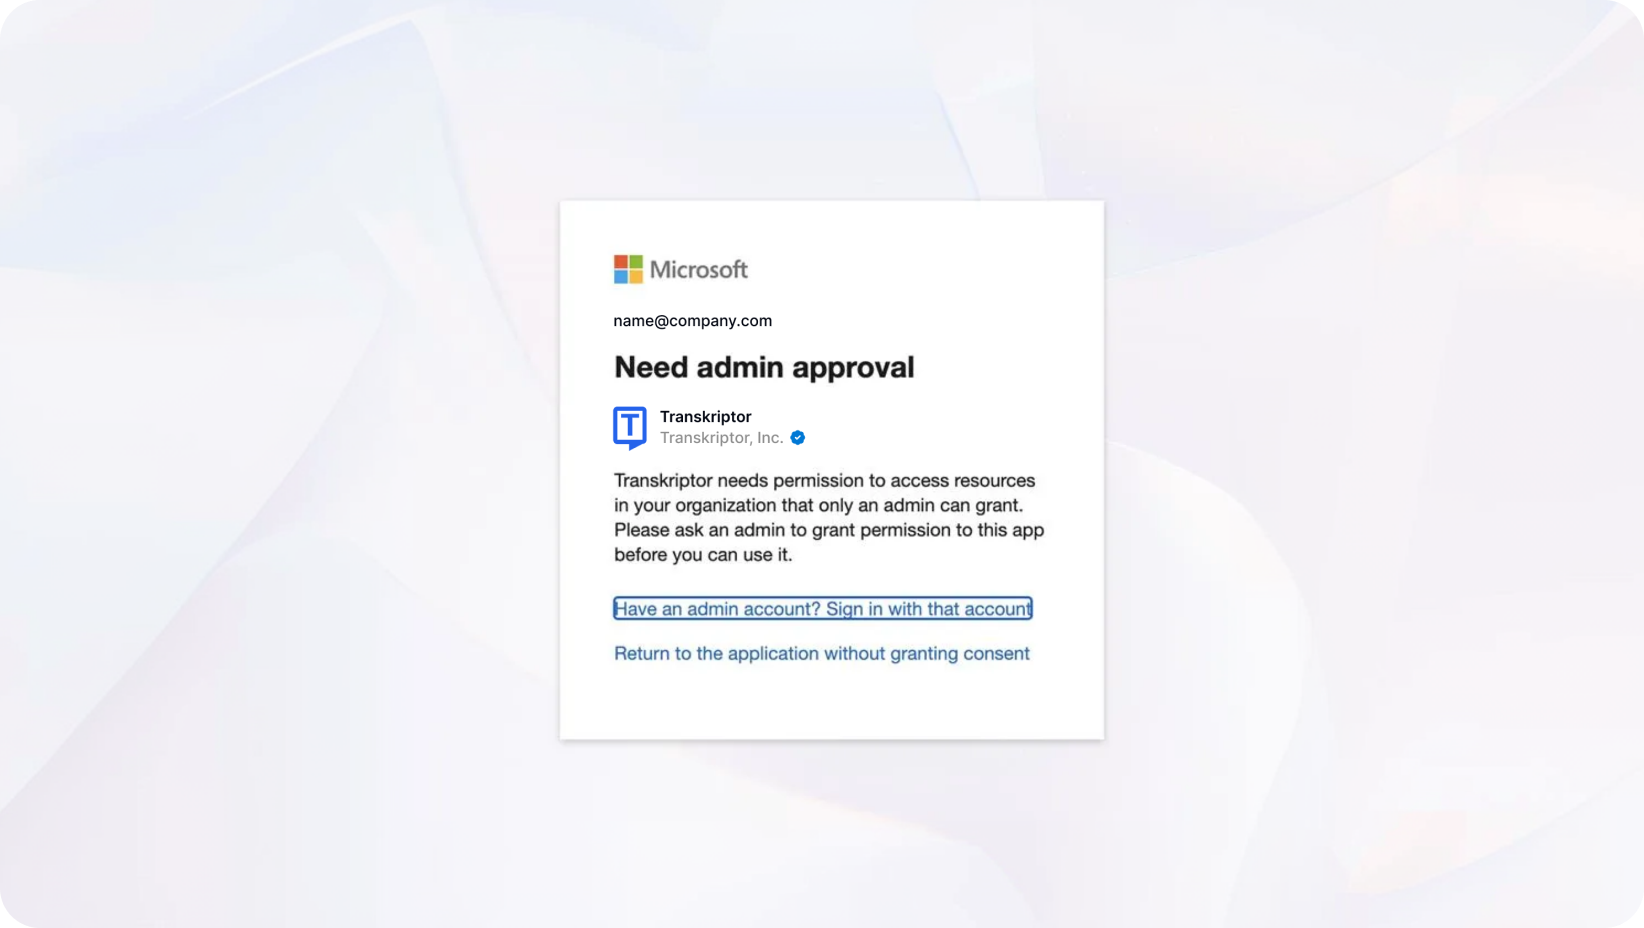
Note for Workspace Email Users: If you're using a workspace or organization email, you may see an "Admin approval required" message. In this case, your organization's admin needs to grant consent:
Navigate to Azure Portal → Enterprise Applications → Transkriptor → Permissions
Click "Grant admin consent" to authorize Transkriptor for your organization
After granting consent, return to Transkriptor and click Connect again to complete the setup
If you encounter similar permission issues, you can refer to the troubleshooting resources provided in the Microsoft error message or contact our support team for additional assistance.
You'll be redirected back to Transkriptor where you can finalize and configure your integration settings.
You're connected!
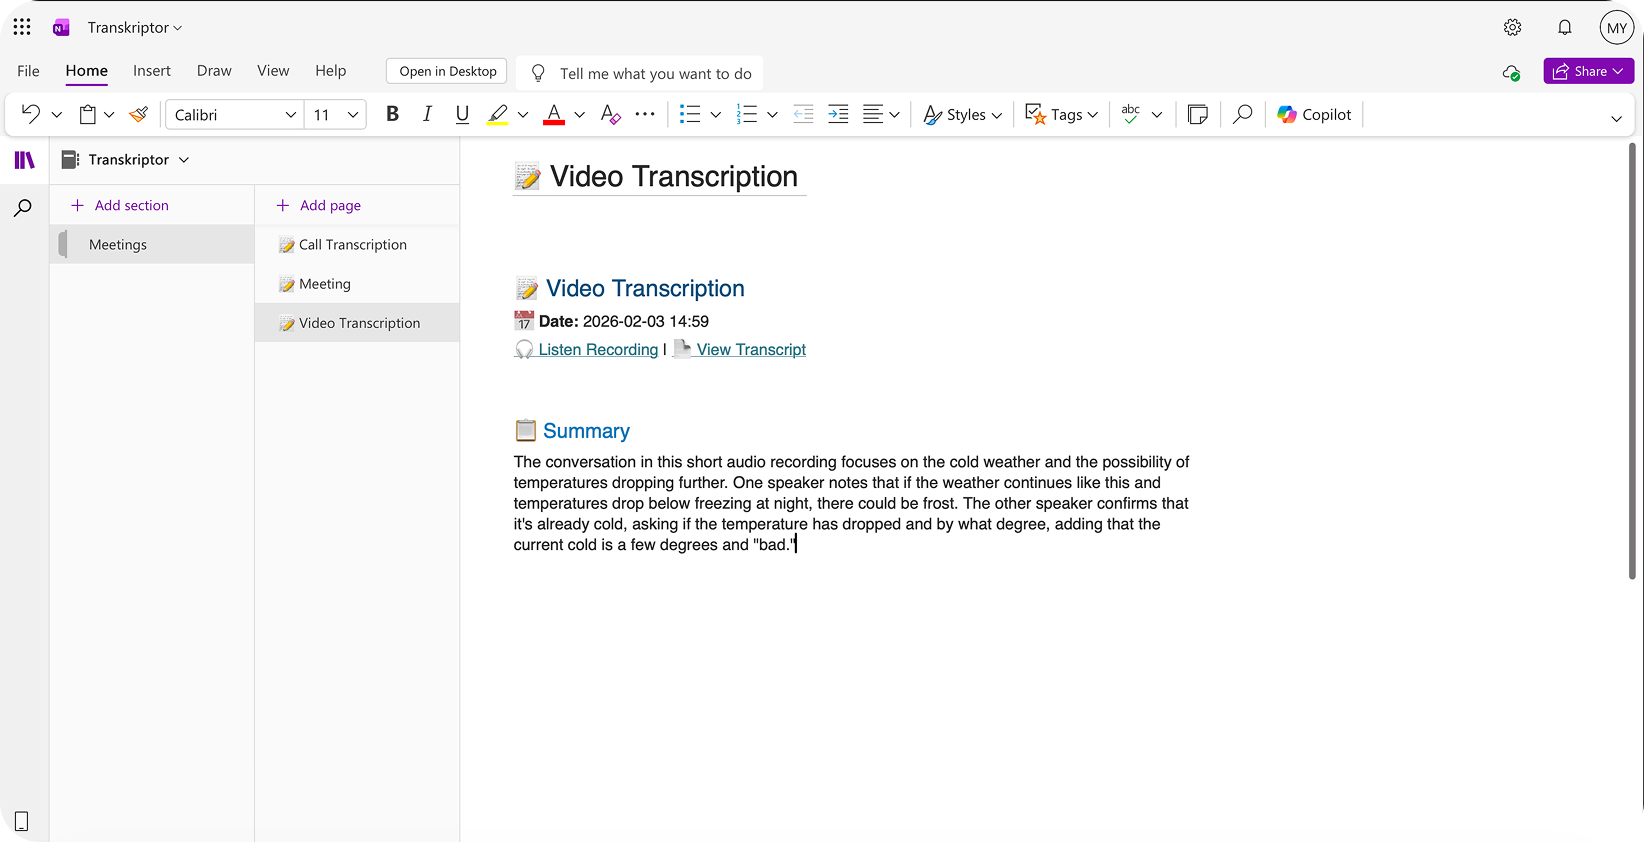
Once connected, transcripts will appear as pages in your chosen OneNote section including summaries and action items.
Configure the OneNote Integration
OneNote integration allows you to control how and where Transkriptor saves content in your notebooks. Customize notebook selection, page format, and automation preferences to fit your team's needs.
Main Settings
Select Account: If you have multiple Microsoft accounts, choose the one where you want to save Transkriptor notes.
Auto-Create Pages: Toggle this on to automatically create OneNote pages immediately after meetings end. When turned off, you can review and manually save transcripts from the Transkriptor editor.
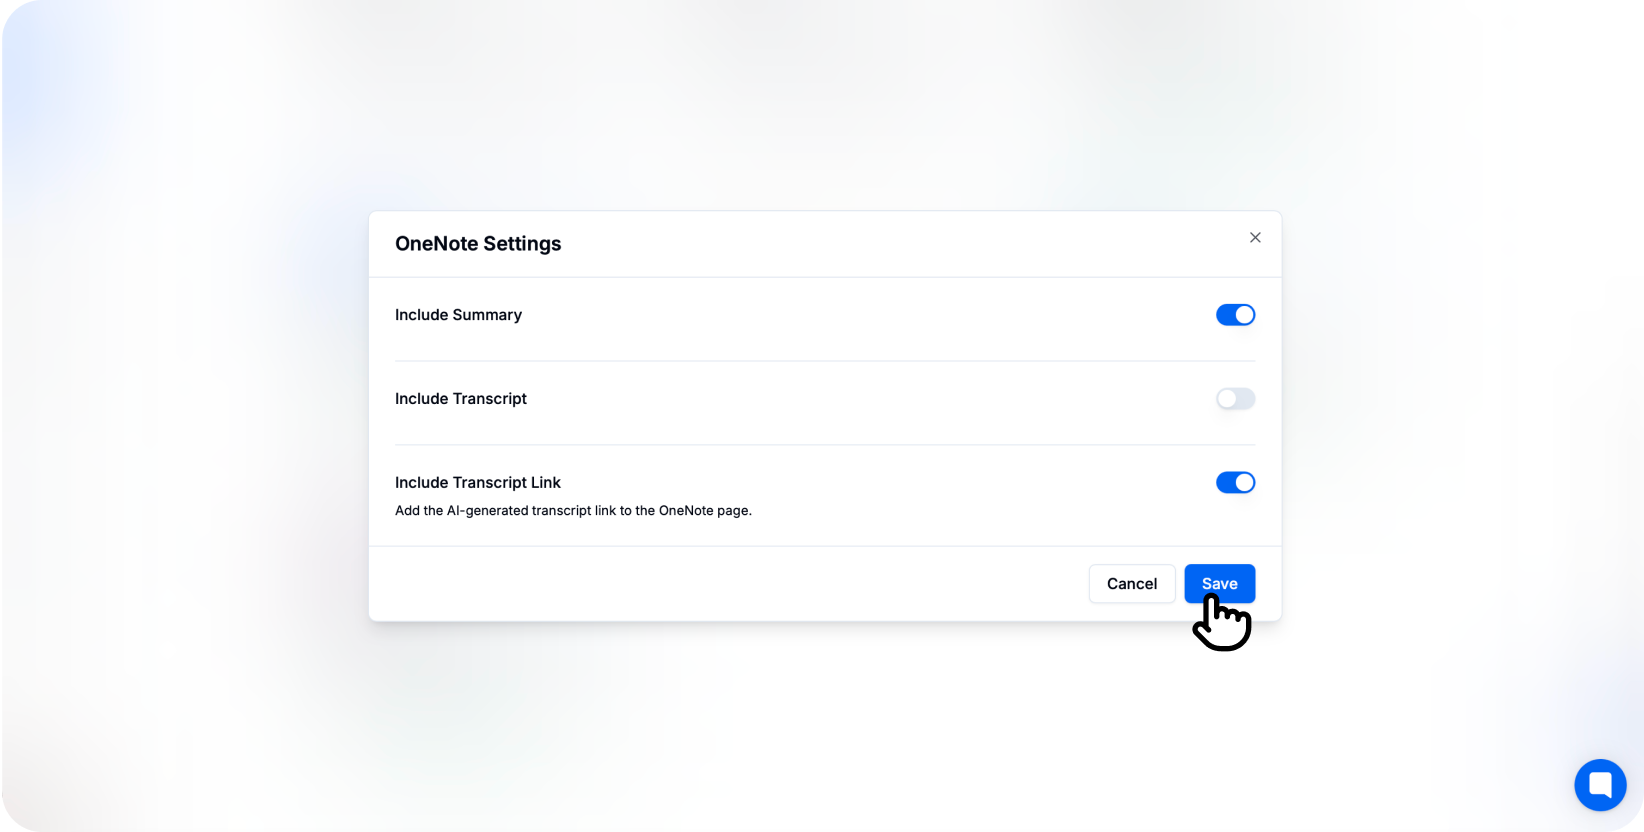
Include AI Summary: Enable this option to include an AI-generated summary at the top of each OneNote page, giving quick context before reading the full transcript.
Page Template: Choose between different page layouts optimized for meeting notes, action items, or detailed transcription review.
Choose Your OneNote Notebook and Section
Select the specific notebook and section where Transkriptor should create meeting pages.
Notebooks: Select from your available OneNote notebooks (e.g., Work Notes, Team Meetings, Project Documentation)
Sections: Choose the target section within the notebook (e.g., Weekly Meetings, Client Calls, Stand-ups)
Section Groups: Organize within section groups for deeper hierarchy
You can also configure different notebooks and sections for different meeting types or projects directly from the integration settings.
Content Preferences
Include Full Transcript: Add the complete word-for-word transcription to the OneNote page with proper formatting.
Include Summary Only: Create pages with just the AI-generated summary highlighting key points and action items.
Include Meeting Details: Add meeting metadata such as date, duration, participants, and organizer information at the page header.
Include Speaker Labels: Show who said what in the transcript with color-coded or formatted speaker identification.
Include Timestamps: Add clickable timestamp markers throughout the transcript for easy navigation.
Additional Options
Page Title Format: Customize how page titles are formatted using meeting name, date, and participant variables.
Tag Application: Automatically apply OneNote tags to pages (e.g., Important, To Do, Question) for better organization and filtering.
Inline Audio Embedding: Embed the original audio recording directly in the OneNote page for playback without leaving the app.
Highlight Key Decisions: Automatically highlight or format important decisions and conclusions identified in the transcript.
Table of Contents: Create a linked table of contents at the top of longer transcripts for easy navigation.
Sub-page Creation: Split long transcripts into main page and sub-pages by topic or time segment.
How to Disconnect
After connecting OneNote to Transkriptor, you can click the three-dot icon to either change settings or disconnect the integration.
When you disconnect, Transkriptor will stop creating pages in OneNote. Previously created pages and content will remain in your OneNote notebooks.
Page Formatting in OneNote
Once OneNote integration is enabled, Transkriptor automatically formats pages for optimal readability and usability.
Page Header: Displays meeting title, date, duration, and participants at the top of each page for quick reference.
Summary Section: If enabled, shows AI-generated key points, decisions, and action items in a highlighted or formatted section.
Transcript Body: Presents the full conversation with speaker labels, timestamps, and proper paragraph formatting for easy reading.
Audio Embedding: When enabled, includes an embedded audio player for listening to the original recording while reviewing notes.
This structure ensures your team can quickly scan important information while having access to complete details in a familiar note-taking environment.