
How to Record Phone Calls on Android and iPhone?
Transcribe, Translate & Summarize in Seconds
Android: Enable call recording in your Phone app settings (Settings > Call Recording), then tap "Record" during calls. If unavailable, use apps like Cube ACR for voice recording and call capture.
iPhone: With iOS 18+, tap the audio waveform icon during calls to start conversation recording. Both parties get notified automatically. Recordings save to your Notes app with AI transcription.
You can record calls on both Android and iPhone! The recording method depends on your device and local laws. Whether you're capturing business calls, personal conversations, or conducting interviews, this guide shows you exactly how to do it.
Important: Always inform the other party before recording to avoid legal issues, as some regions require consent from all participants.
The four steps to record phone calls on Android are listed below.
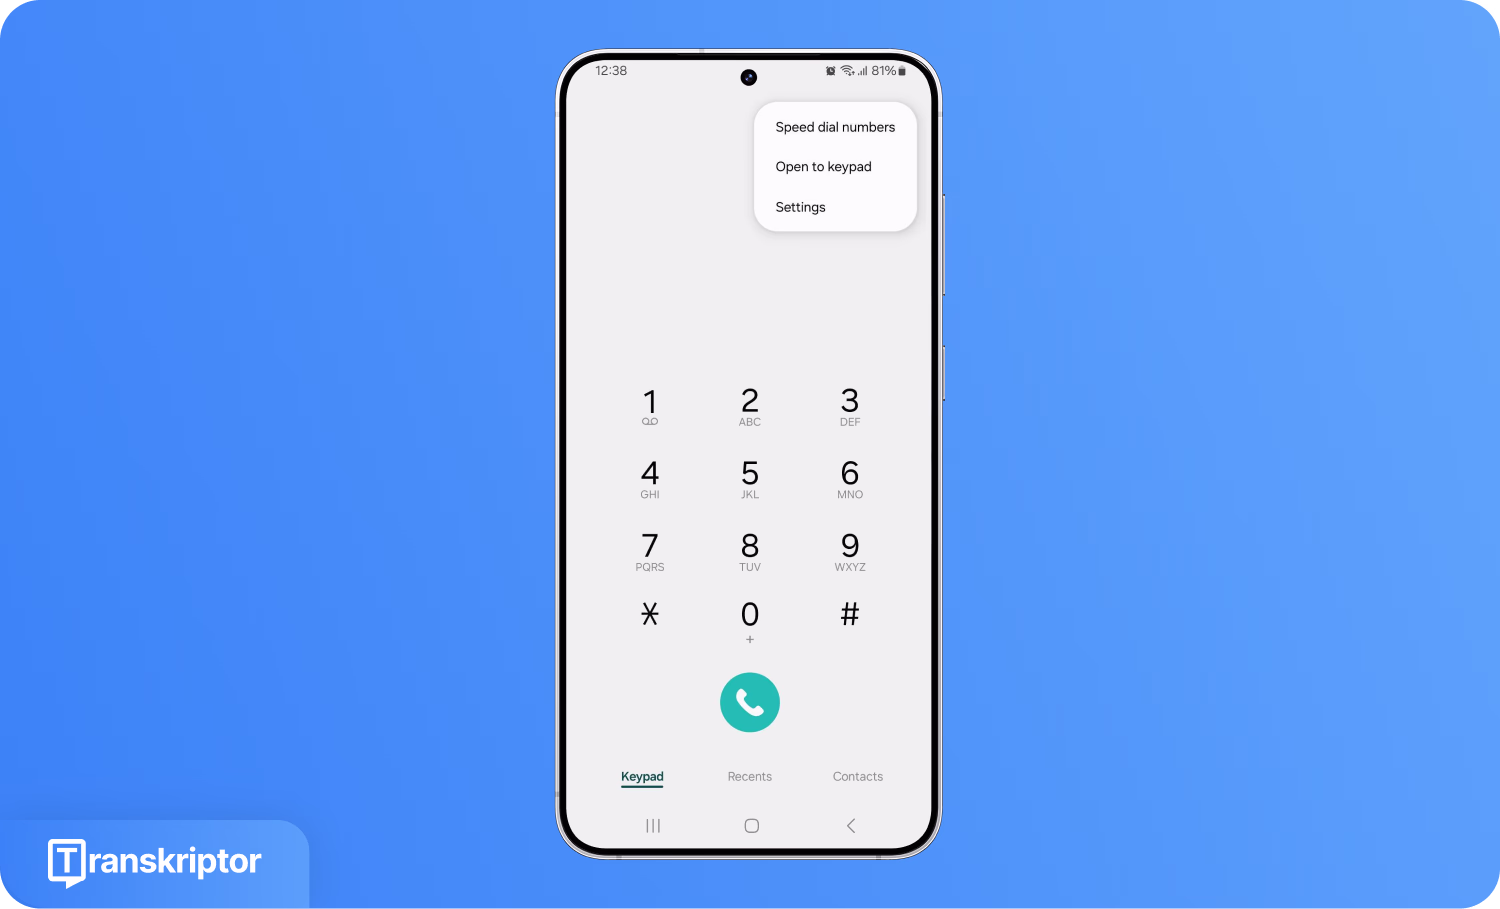
- Open the Phone App and Go to Settings: Launch the Phone app, tap the three-dot menu, and select Settings.
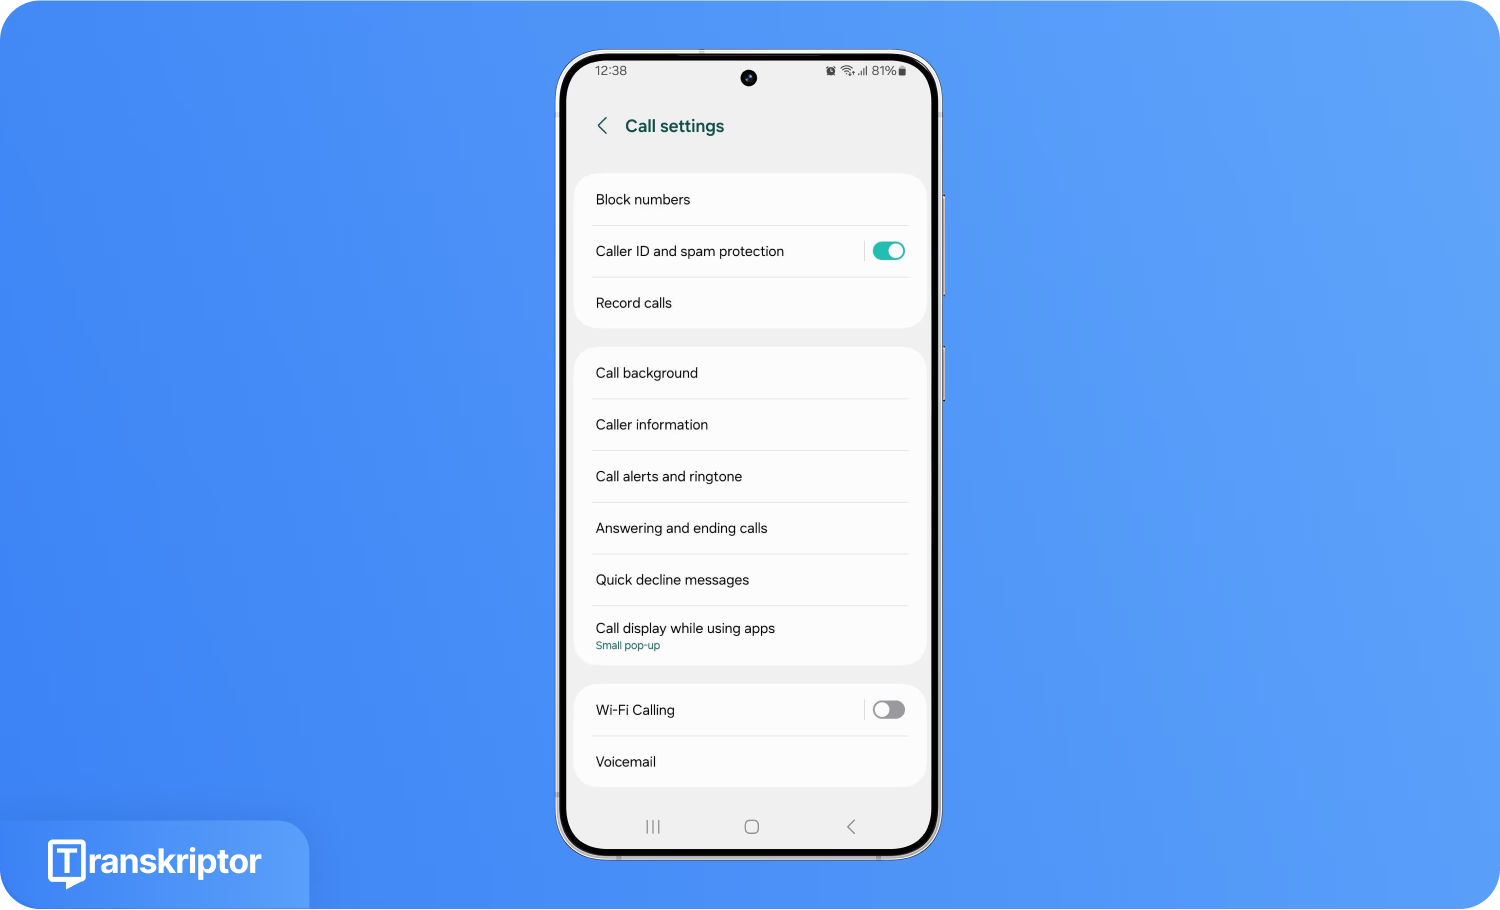
- Find ‘Call Recording’: Scroll through the settings to locate the Call Recording option.
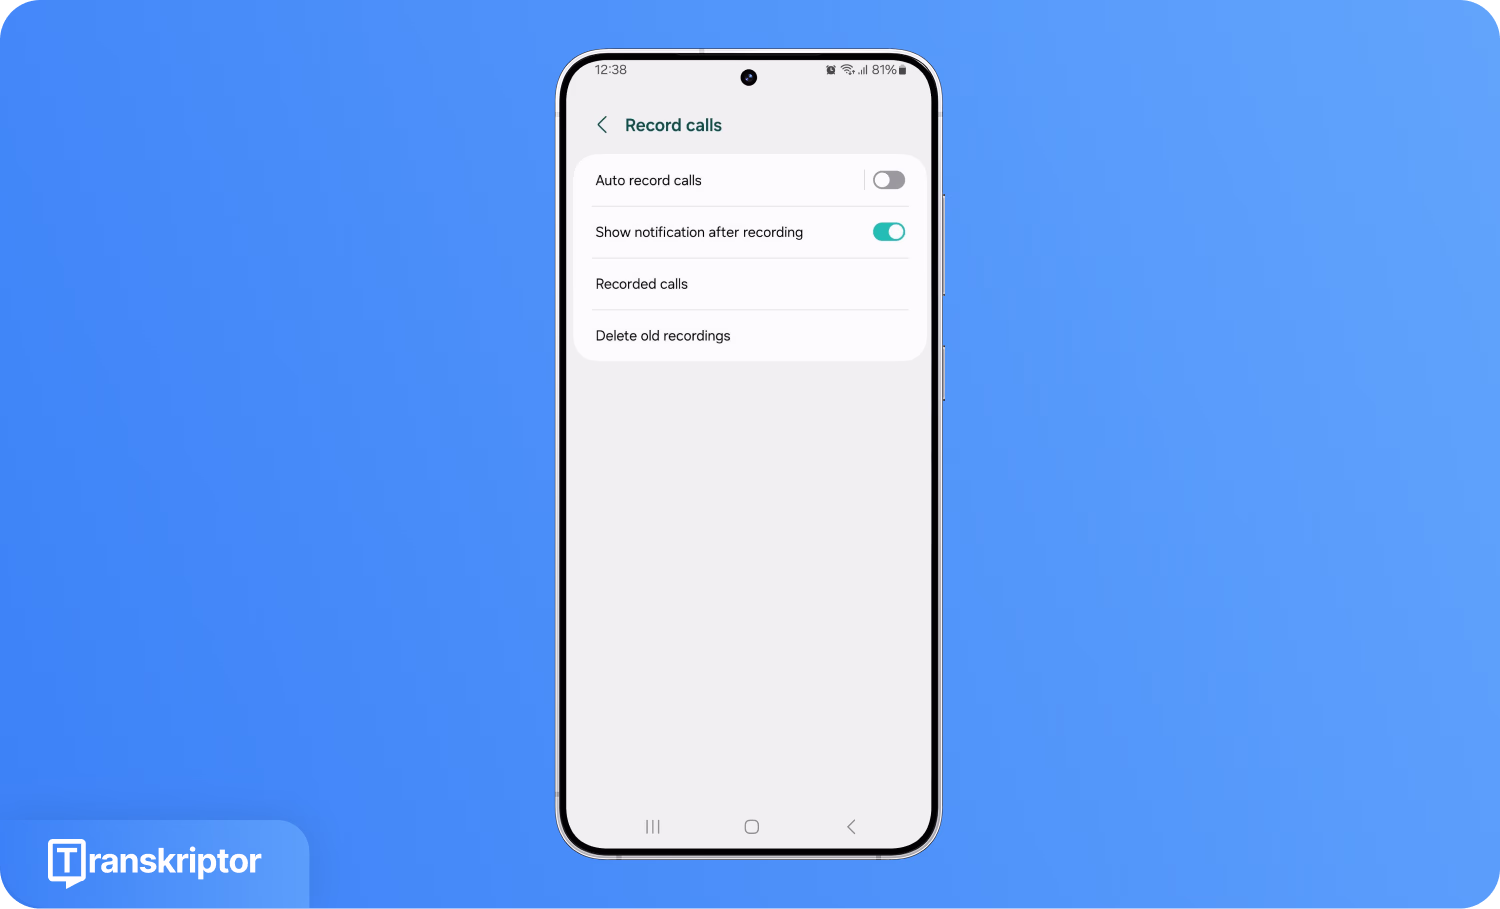
- Enable Recording Feature: Turn on recording for all calls or selected numbers.
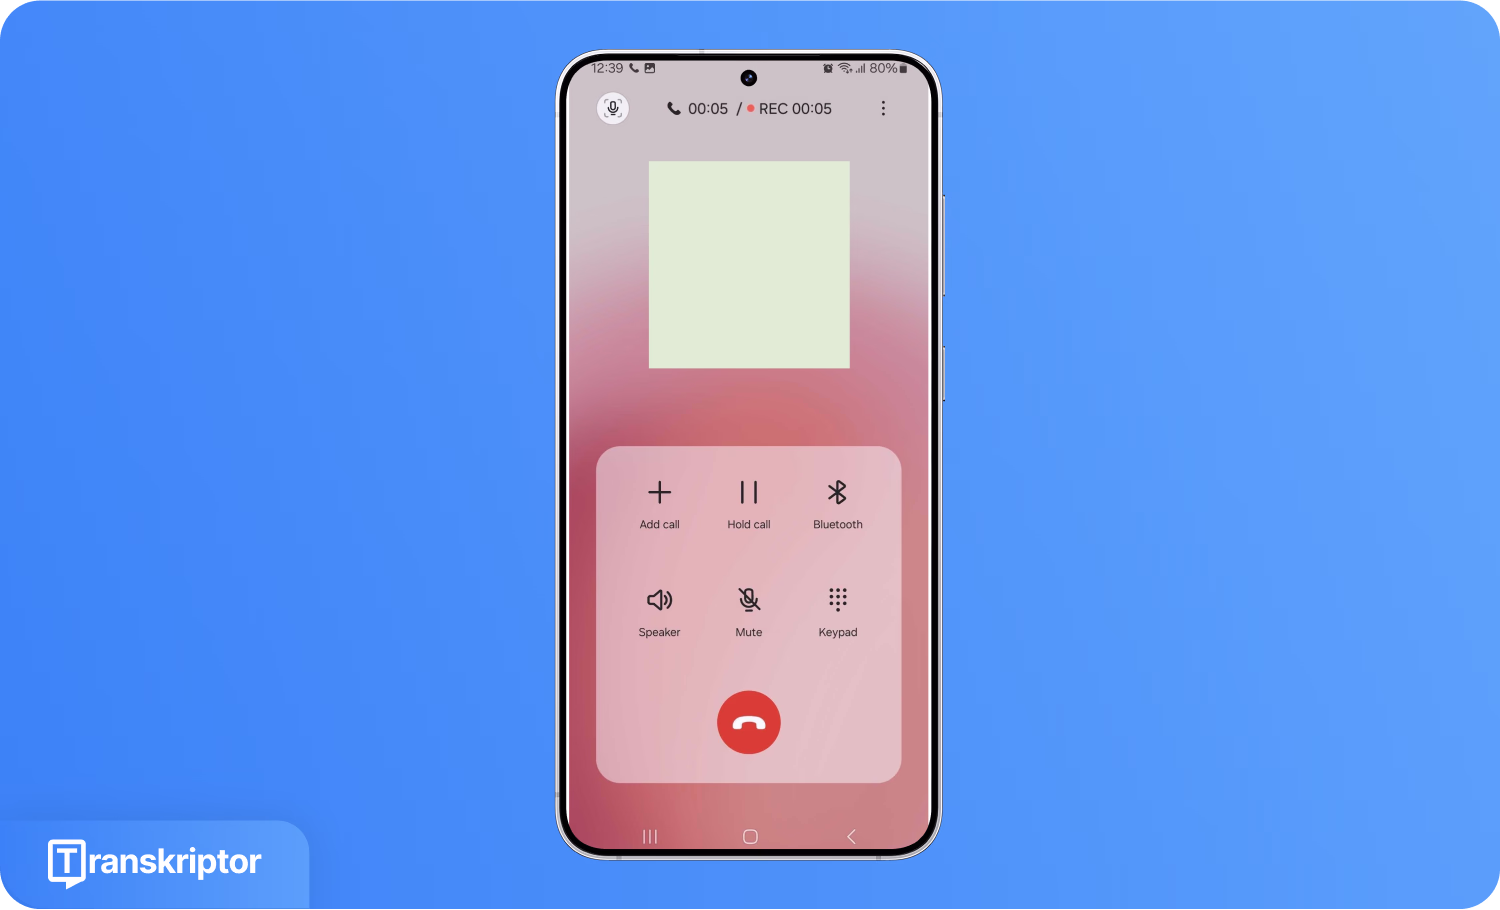
- Start Recording: During a call, tap Record on the screen to begin saving the conversation.
The four steps to record phone calls on an iPhone are listed below.
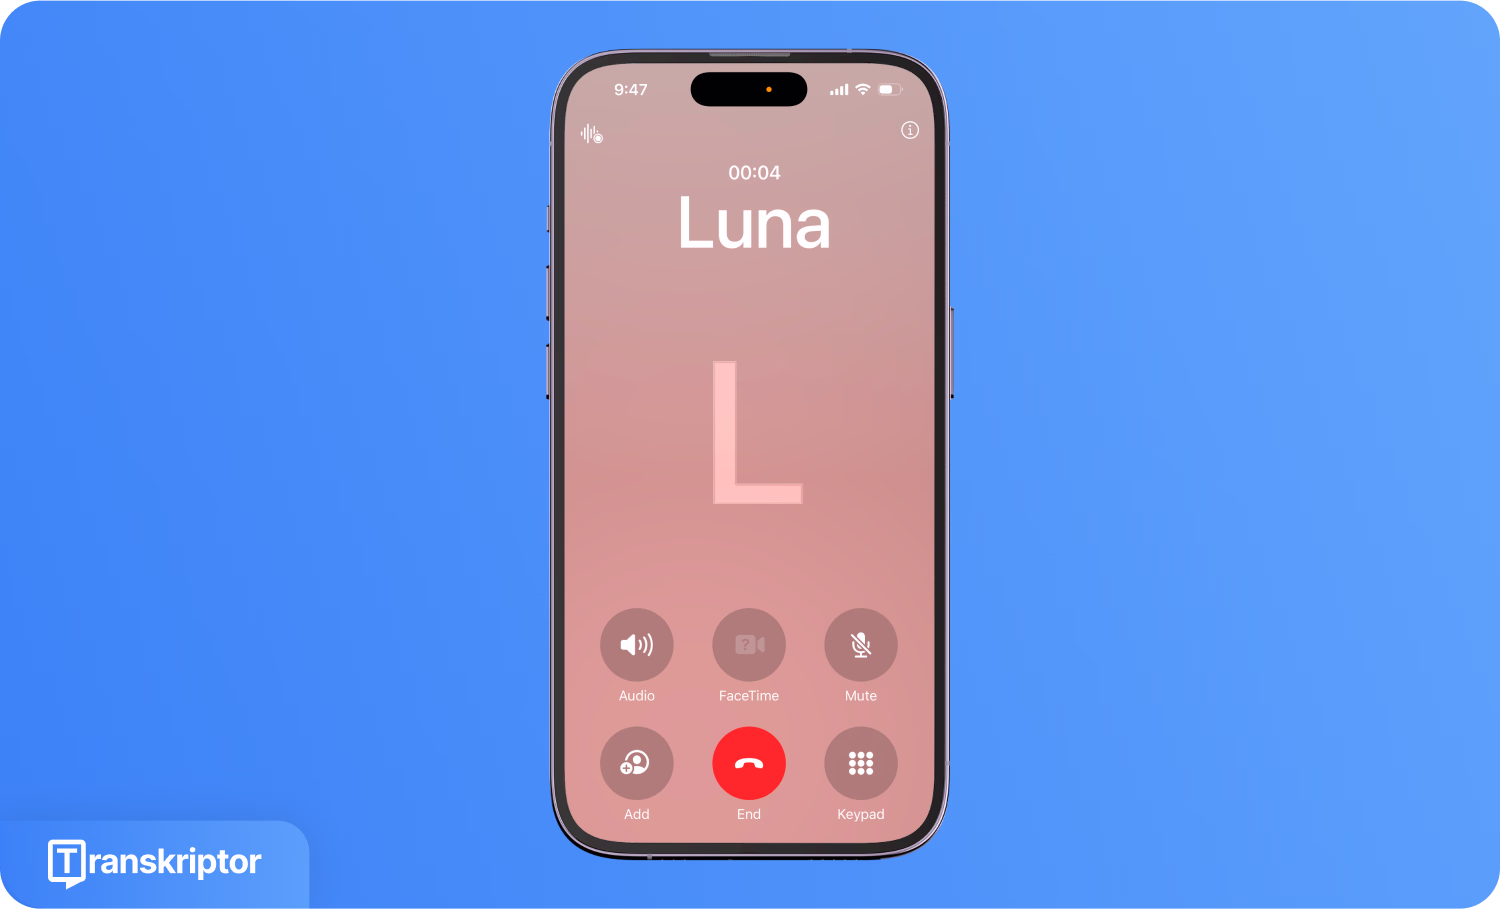
- Make a Phone Call: Start a call using the Phone or FaceTime app on iOS 18 or later.
- Tap Waveform Icon: Tap the audio waveform icon in the top-left corner to begin recording.
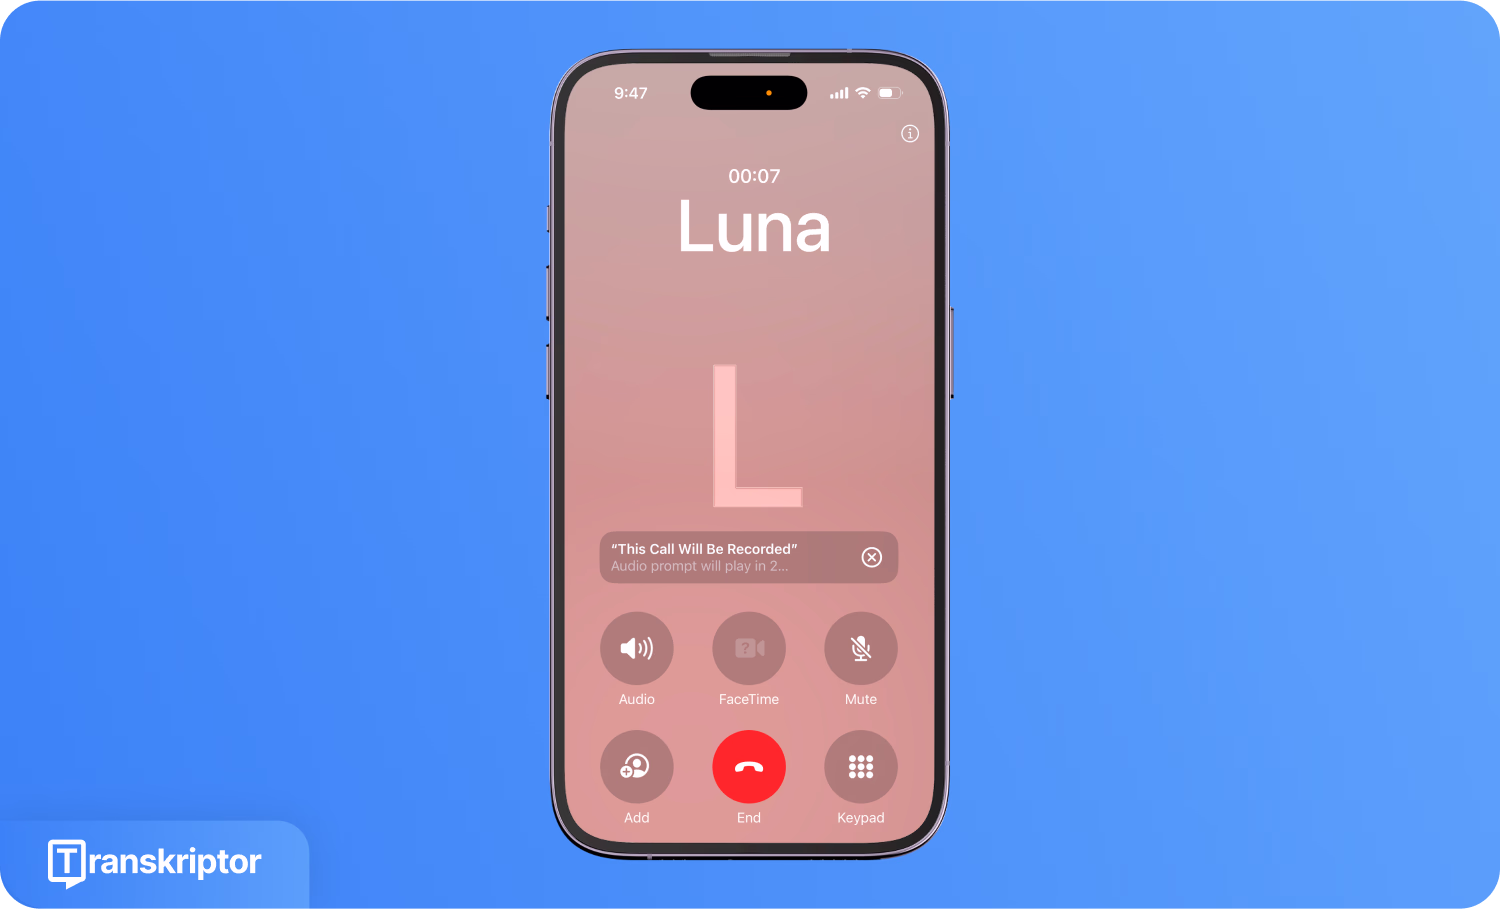
- Listen Alert: Both parties will hear a short notification indicating the call is being recorded.
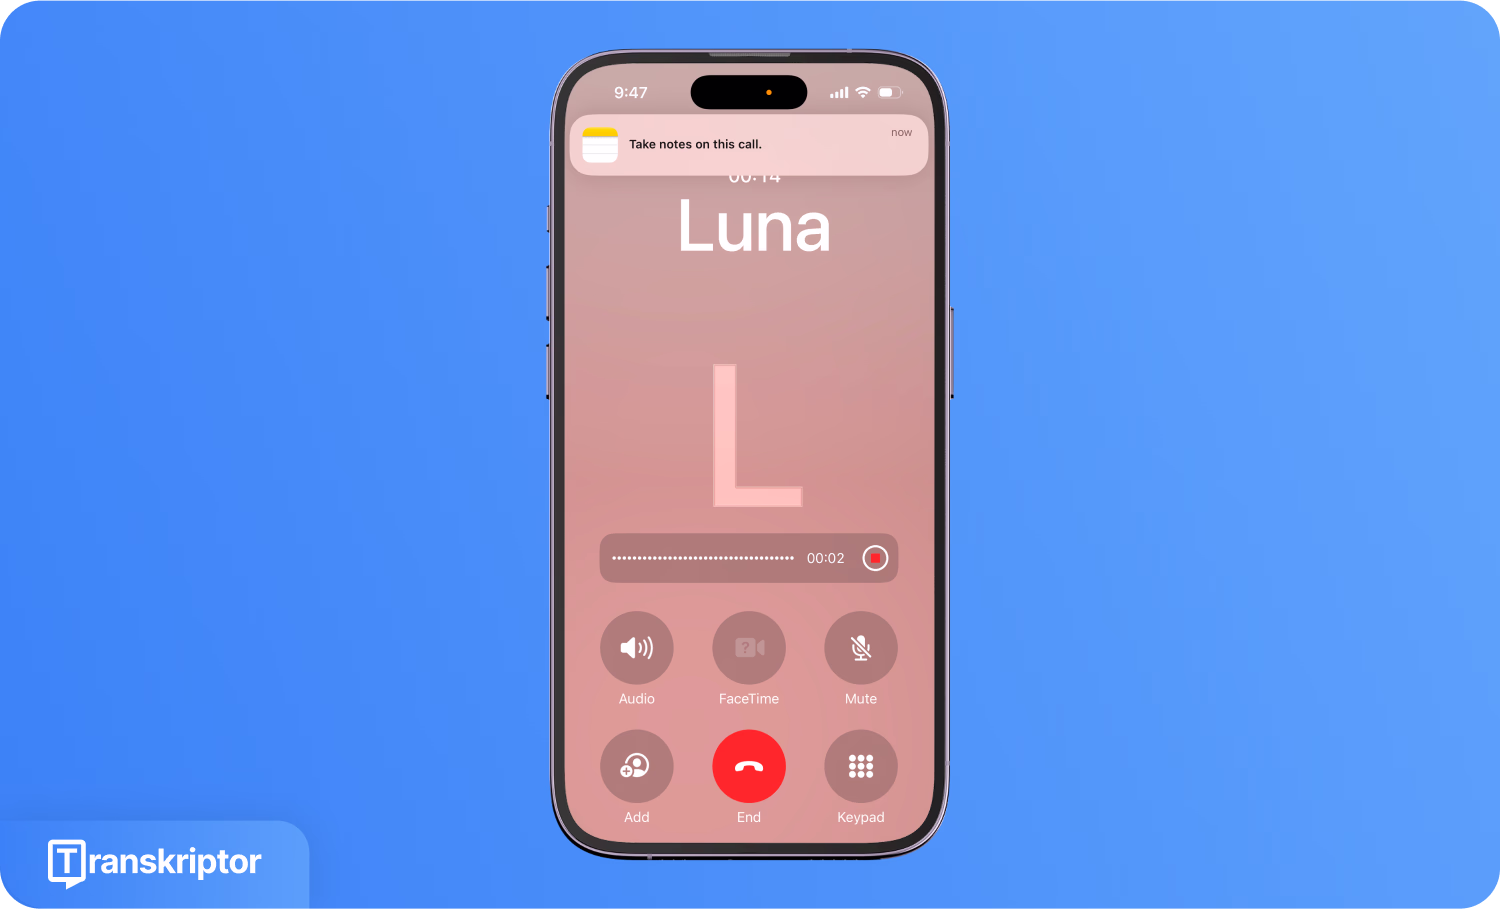
- Stop Recording: Tap Stop or end the call to finish. The recording is saved to the Notes app.
How to Record Phone Calls on Android?
To record a call on any Android phone, you can either use the built-in call recording feature (available on many devices) or opt for a third-party app if your phone doesn’t support native recording. For most Android users, the default method involves enabling the setting within the Phone app and tapping the recording button during the call.
- Open the Phone App and Go to Settings: Launch the default Phone app on any Android device. Tap the three-dot icon (More options) in the top-right or top-left corner of the screen and select “Settings” from the dropdown.
- Find ‘Call Recording’: Scroll down to find the “Call Recording” option (or a similar option, as the option will vary by manufacturer, such as Samsung, Xiaomi, or OnePlus). Tap on it.
- Enable Recording Feature: Turn on the call recording. Depending on the device, one can choose to either record all calls automatically or record only specific contacts.
- Start Recording: During an ongoing call, tap the “Record” button, appearing on the screen, to begin recording.
How to Record Calls on Android Using a Third-Party App?
If the Android phone doesn’t support native call recording, you can use third-party apps, like Cube ACR, to record all the calls. Cube ACR supports both regular phone calls and VoIP (Voice over Internet Protocol) services like WhatsApp, Telegram, Signal, and more.
Here’s how to set the recording.
- Install Cube ACR: Search for Cube ACR and install the latest version. There’s a free version with basic features, and Cube ACR Premium unlocks cloud backup, transcription, PIN lock, and more.

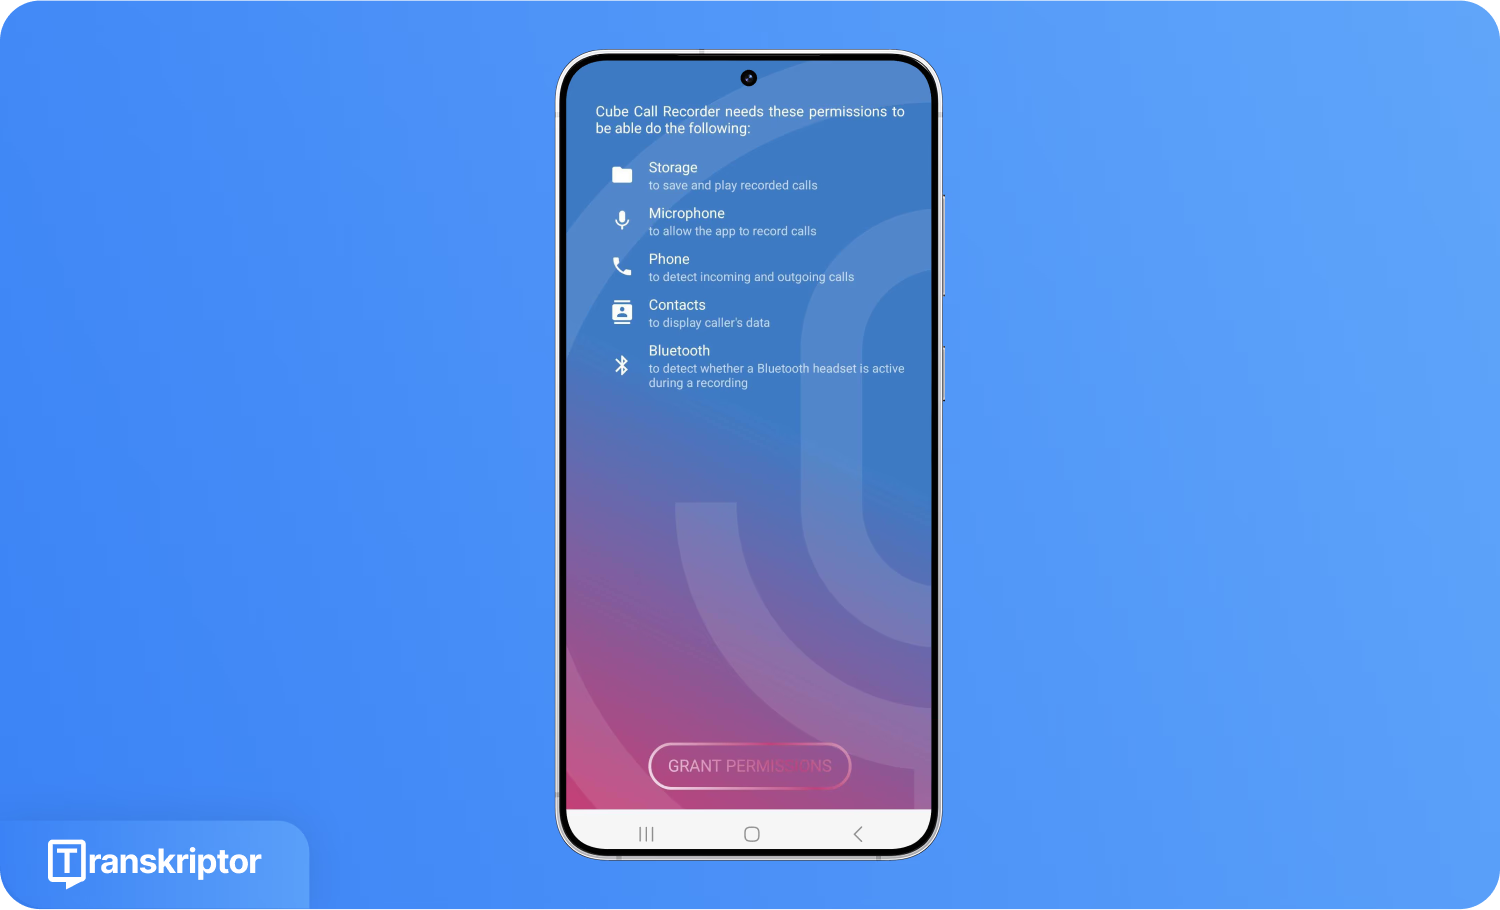
- Grant All Required Permissions: Once installed, open the app and follow the on-screen prompts. The user will be asked to grant permissions for phone access, microphone, storage, and Bluetooth.
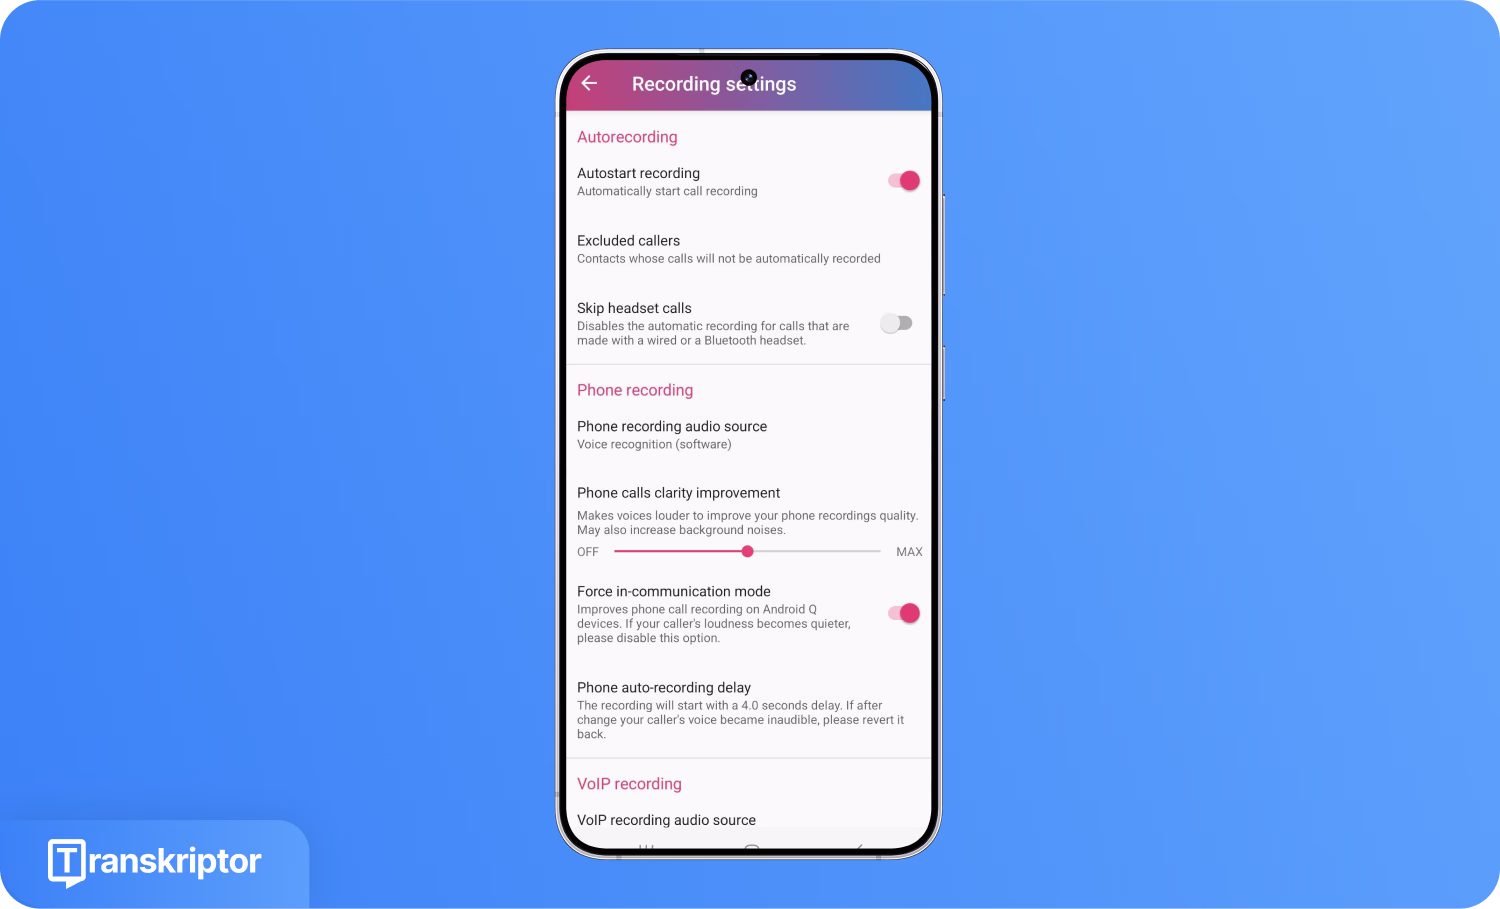
- Enable Call Recording: In the app settings, enable Automatic Call Recording.
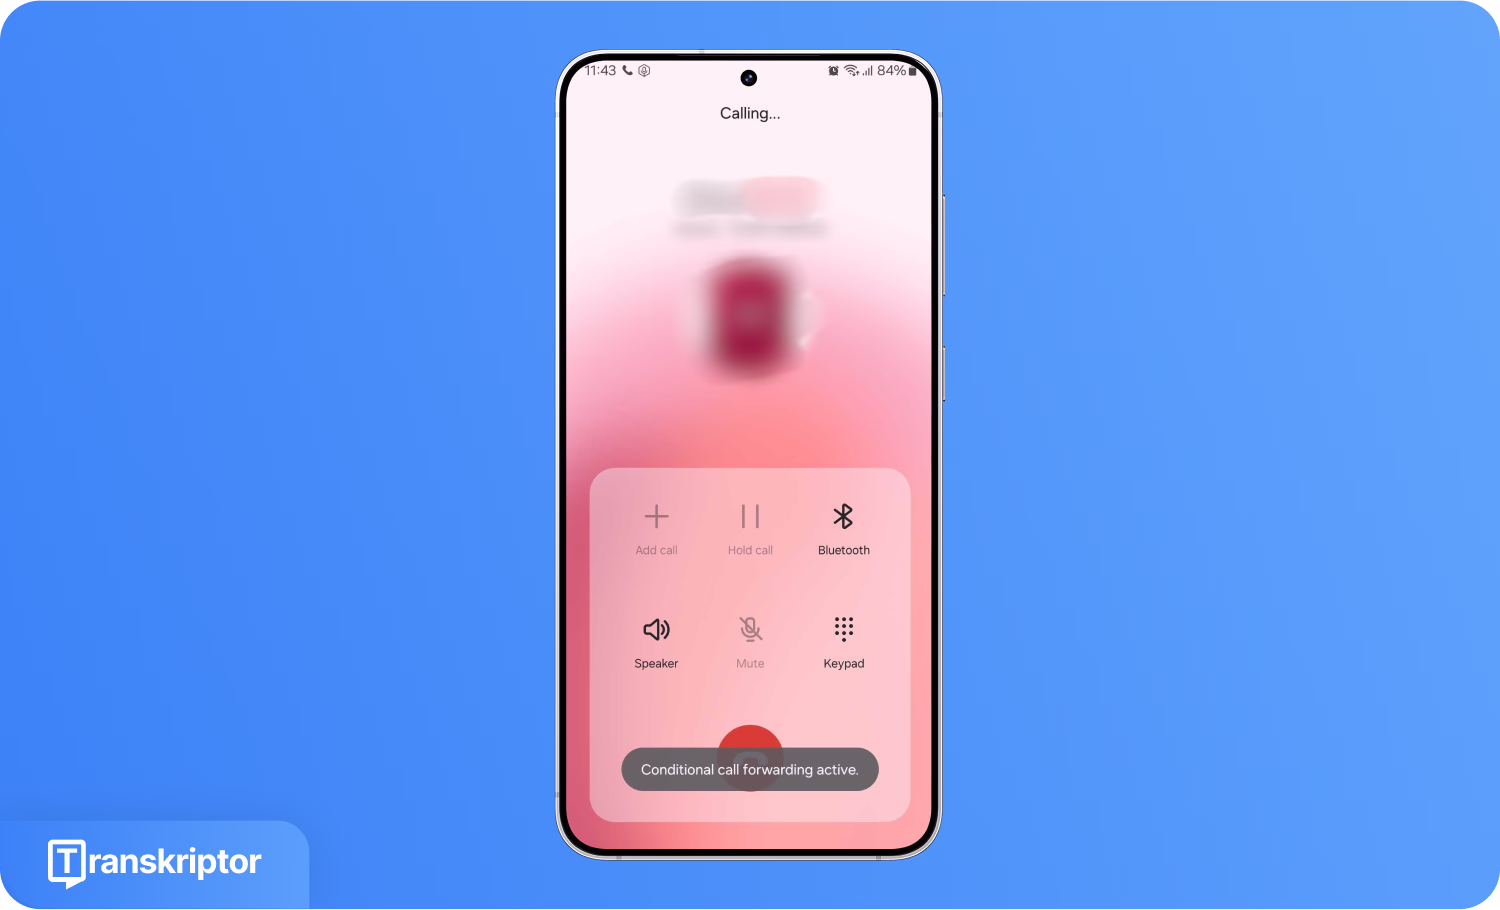
- Start Call: Make a call as one usually would. If Cube ACR is active, the tool will automatically start recording or show a floating “Record” button for manual use.
How to Record a Call on an iPhone?
The iOS 18 users can record a call on their iPhone using the native call recording feature. The recording feature from Apple lets users record both phone calls and FaceTime audio calls directly within the Phone app. When a call is being recorded, both participants will hear an audio notification indicating the recording has started. Once the call ends, the audio and its AI-generated transcript are saved automatically in the Notes app.
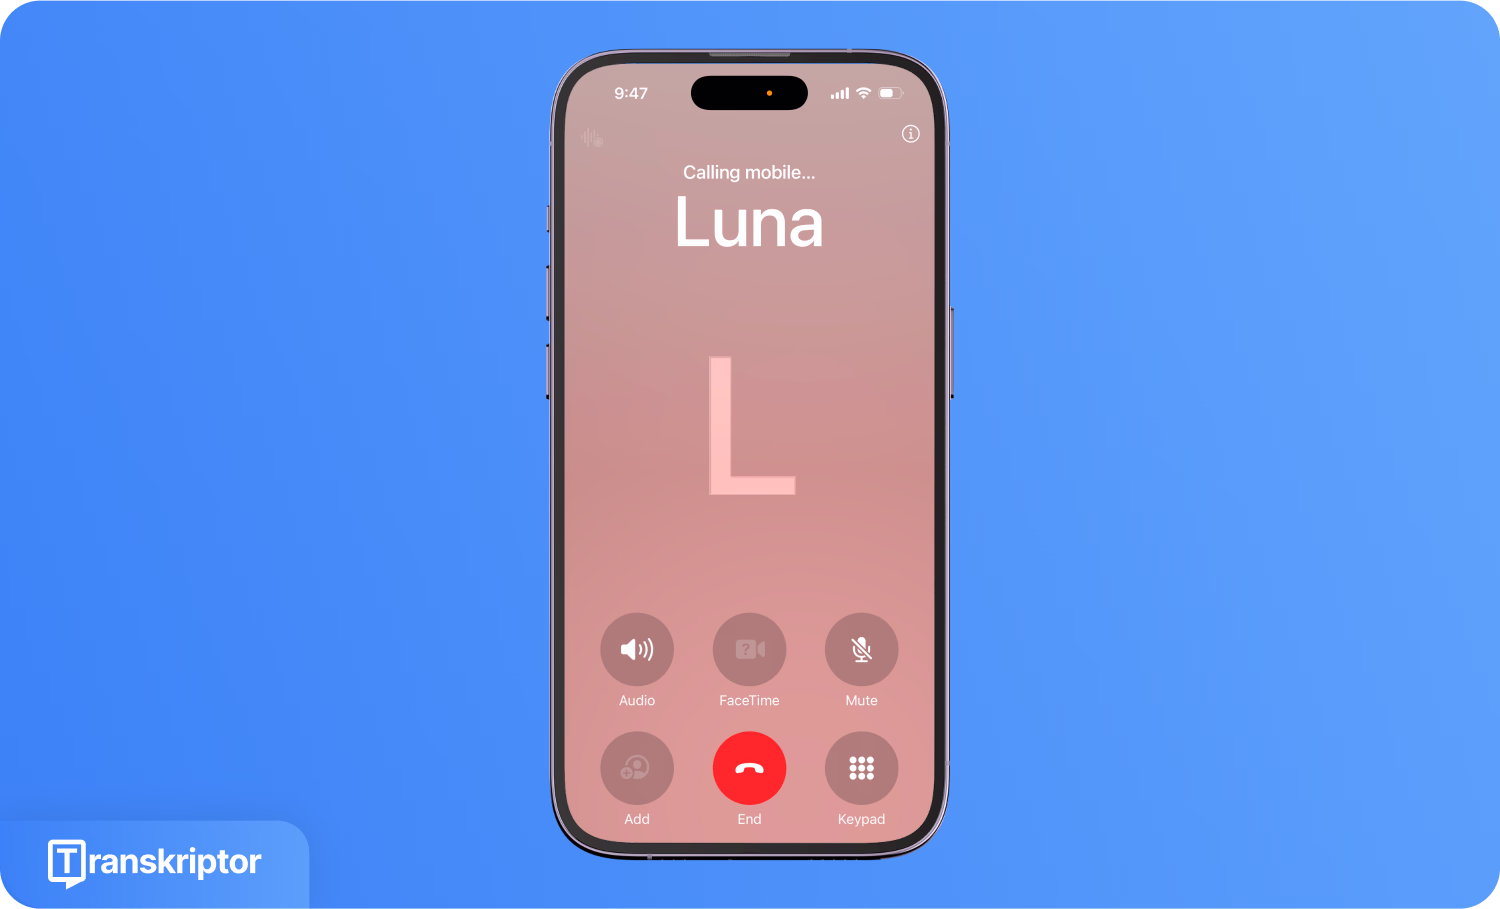
- Make a Phone Call: Start by calling the person you want to speak with using either the regular Phone app or FaceTime audio.

- Tap the Waveform Icon: Once the call is active, look at the top-left corner of the screen. The user will see an audio waveform icon appear. Tap on the icon to begin recording.
- Listen Alert: Apple plays a short audio alert for both the person currently on the call to make sure both parties know the call is being recorded, in line with privacy regulations.
- Stop the Recording: The user can stop the recording at any point by tapping the Stop button on the screen. Alternatively, ending the call will stop the recording automatically.
How to Record Calls on iPhone Using a Third-Party App?
If the user is not on iOS 18 yet or wants more flexibility in recording calls, then the user can use a third-party app, like Truecaller. Recording the call via third-party apps works using the customer’s carrier’s conference call (merge call) function and records conversations between the two parties.
Note: Truecaller Premium in the USA costs $9.99/month or $74.99/year as per the App Store.
Here’s how to use Truecaller to record calls on an iPhone.
Method 1: While Making a Call
Here’s how to record a call using Truecaller while making a call.
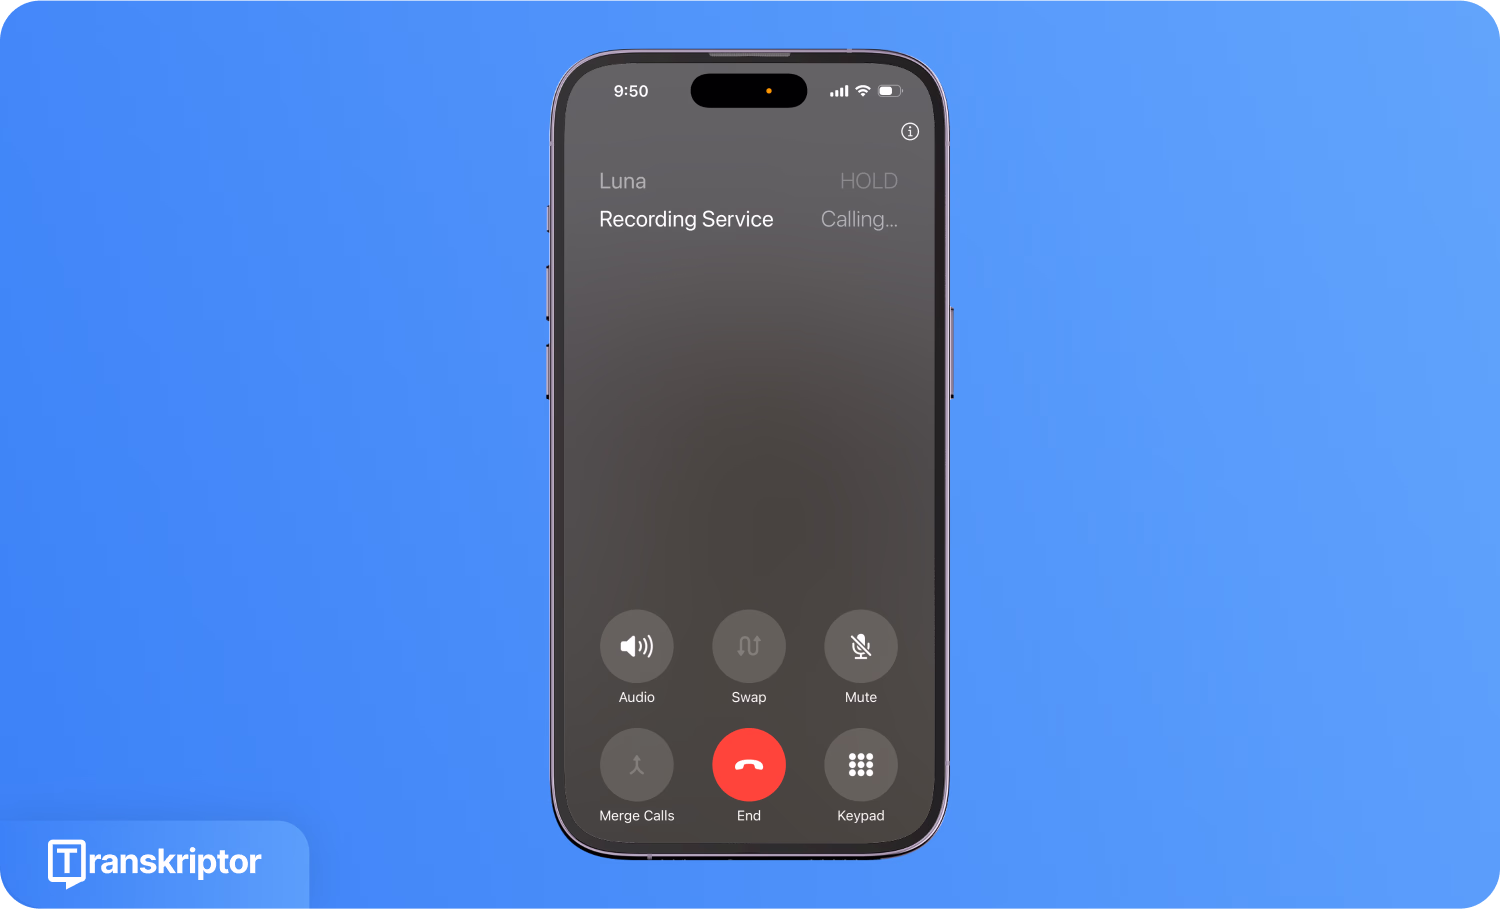
- Call the Recording Service: Open the Truecaller app and start by calling the dedicated recording line shown by the app.
- Tap on 'Add Call': Once connected to the recording line, tap the 'Add Call' option to add the person you want to speak with.
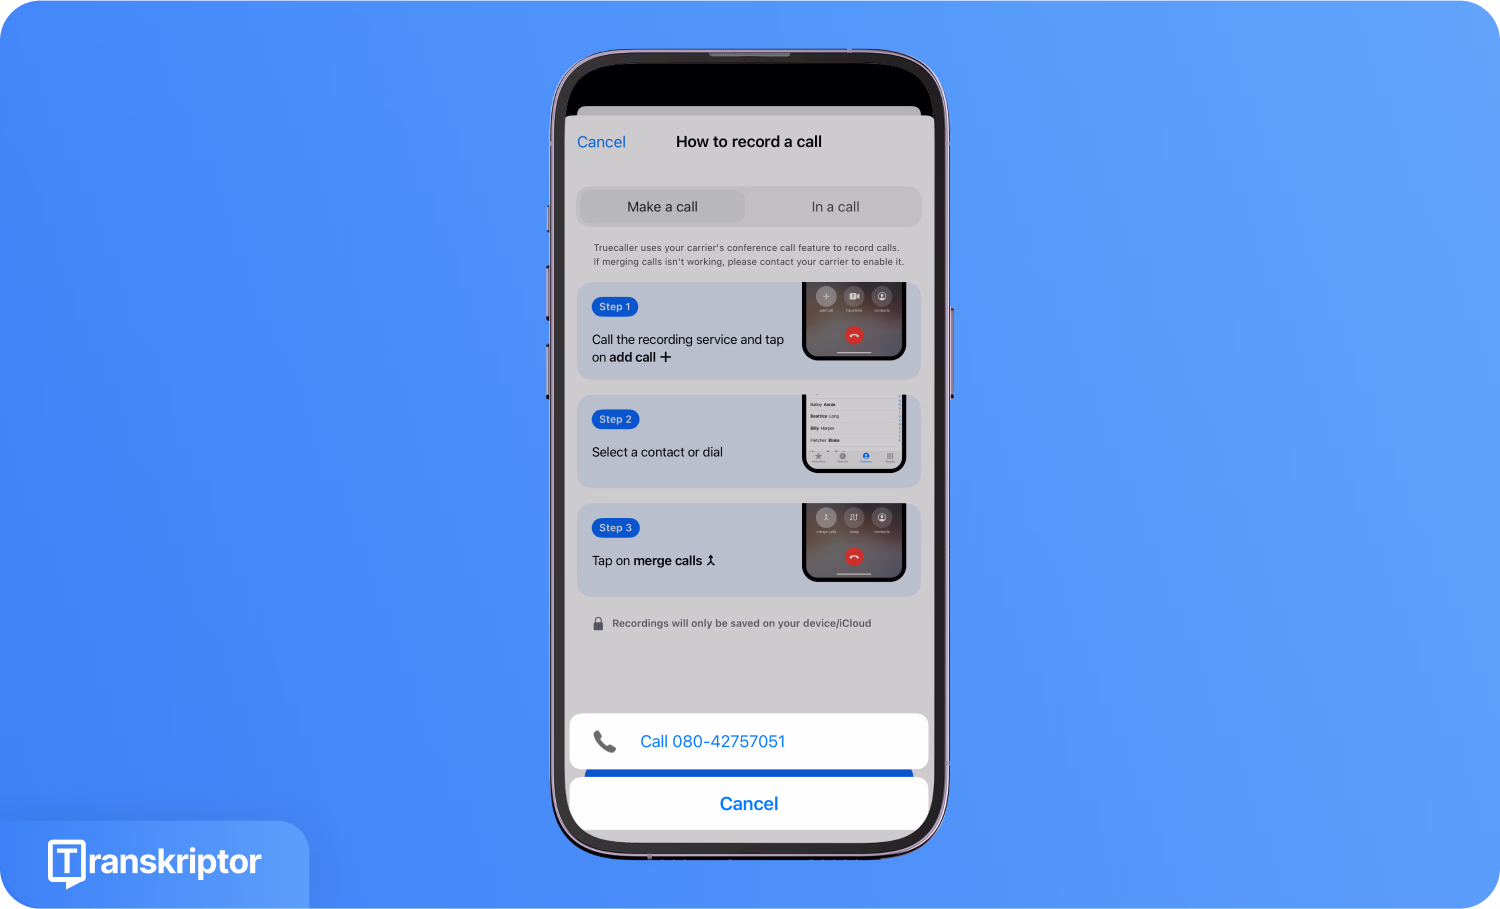
- Dial the Contact: From the contacts list or keypad, select the person the user wishes to call.
- Tap on Merge Calls: Once both calls are active, tap Merge Calls to initiate the three-way call. The recording will now begin.
Method 2: While Already in a Call
Here’s how to record a call using Truecaller while you are already on a call.
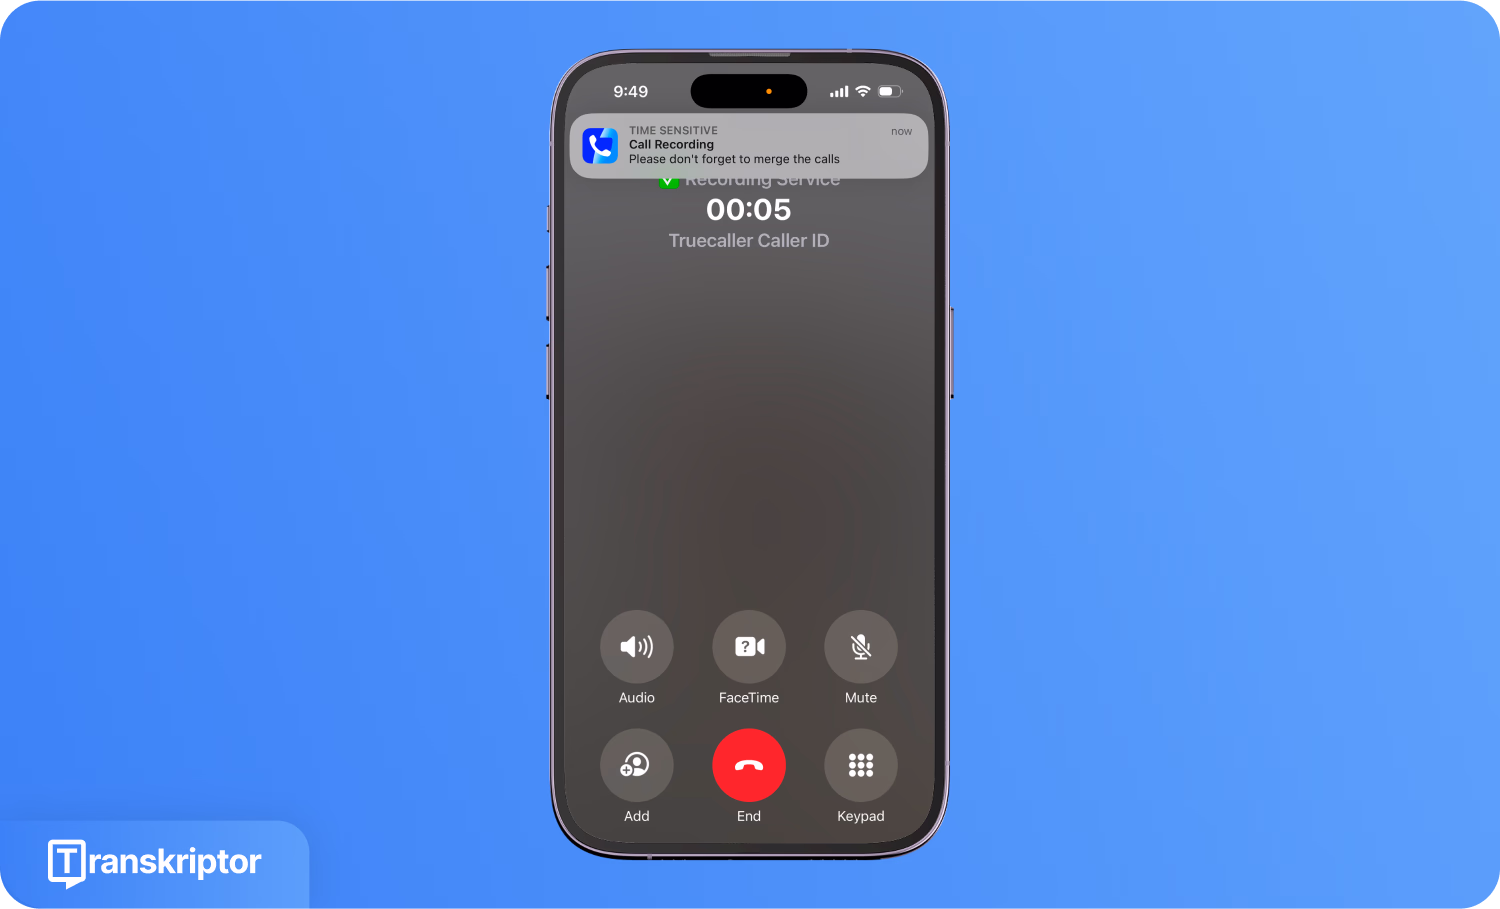
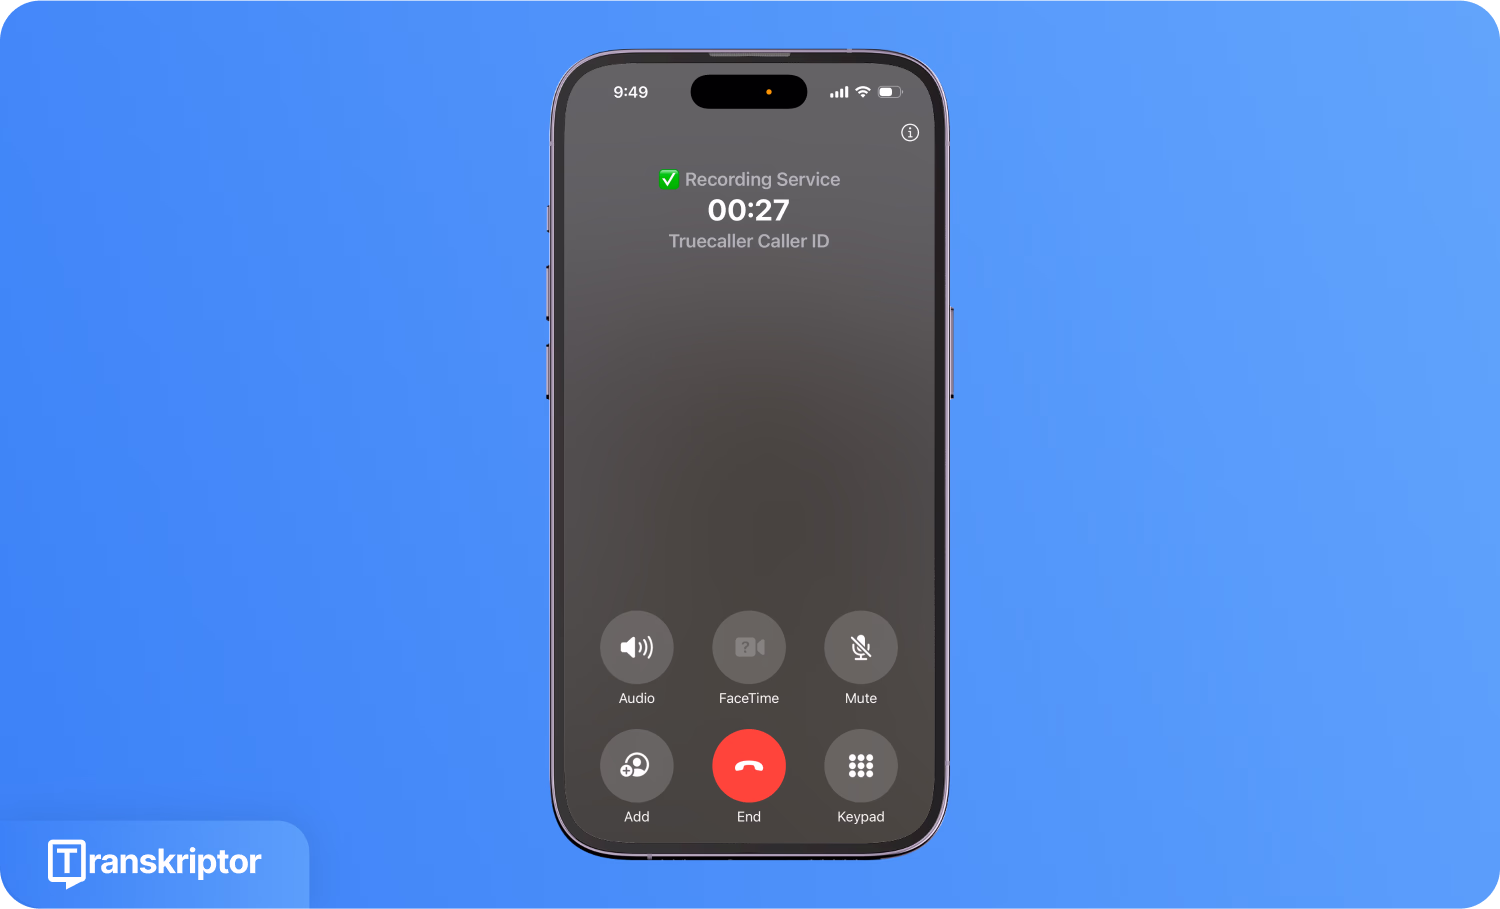
- Tap on Start Recording: While already on a call, the user can open Truecaller and select "In a Call" on the recording pop-up.
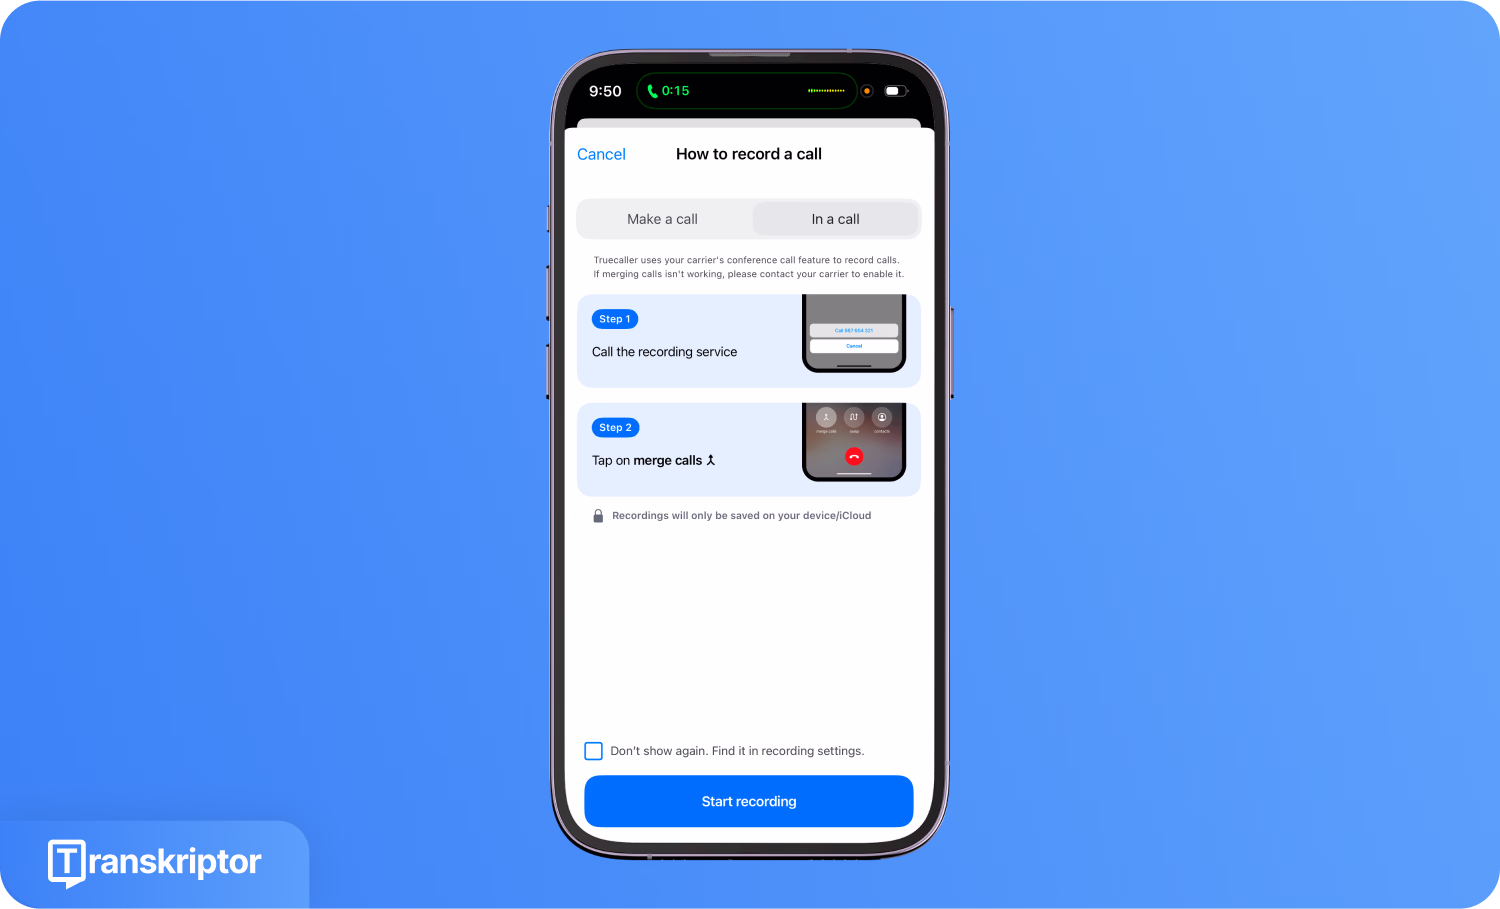
- Call the Recording Line: Truecaller will dial the recording line in the background.
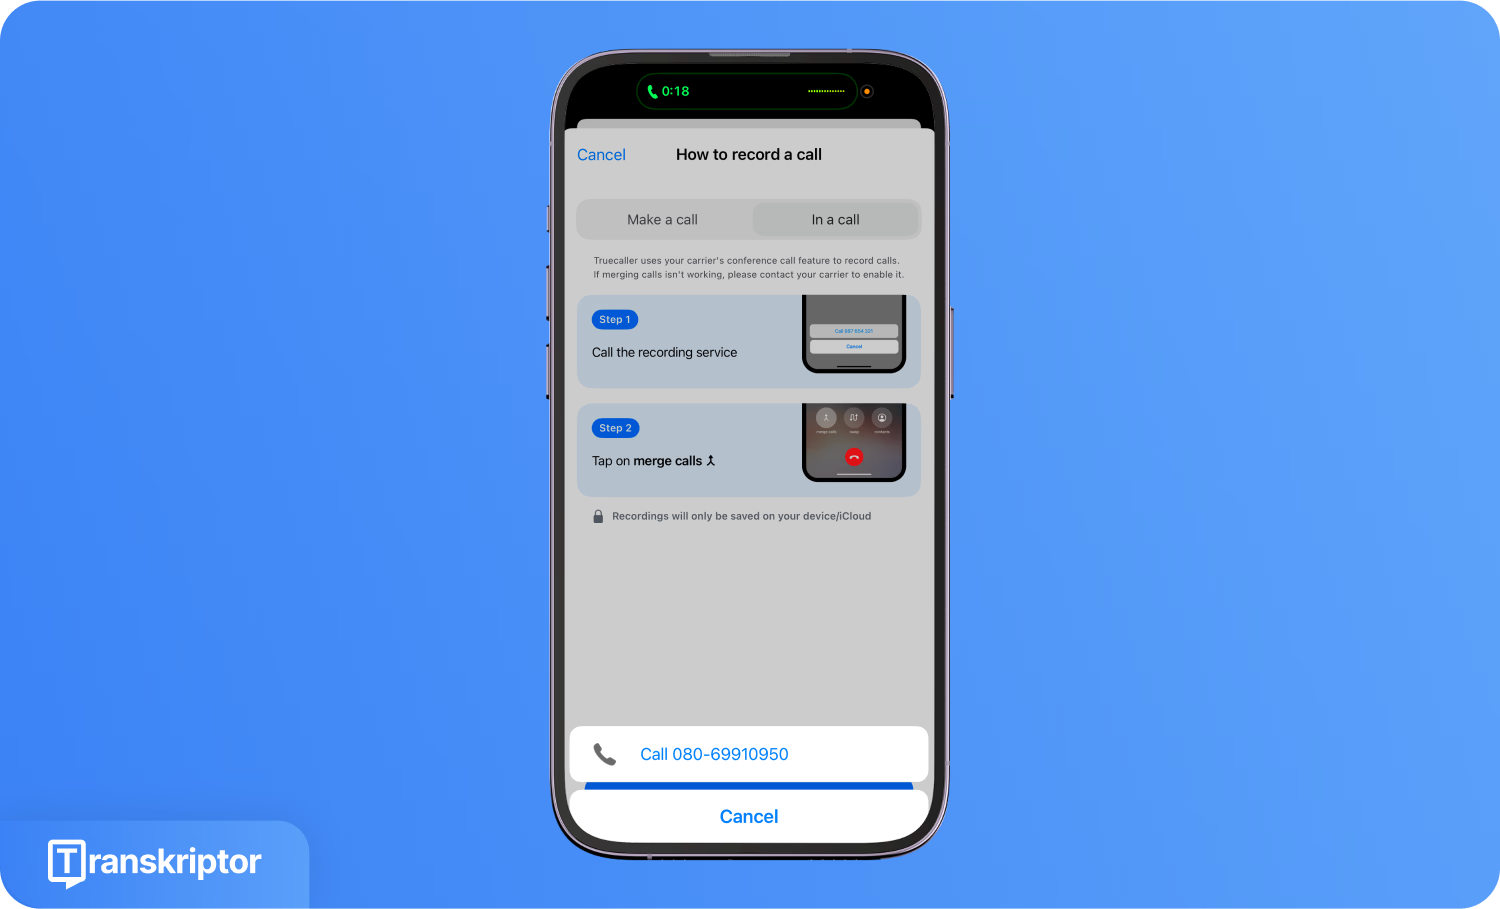
- Tap Merge Calls: Tap “Merge Calls” when available. The app will begin recording the call. All call recordings via Truecaller are stored locally on their iPhone or synced with iCloud.
What Are the Limitations of Recorded Calls?
While recording a phone call might seem like the final step in preserving a conversation, the reality is a bit more complex. Even if the device records the call without issues, playback often becomes time-consuming.
There are a few limitations to only having a recorded call.
- Difficult to Search or Reference: Raw audio recordings are linear. If the user needs to find a specific point in a 30-minute call, they will likely waste time skipping around.
- Audio Quality Issues: Poor network, background noise, or low speaker volume can distort words or entire segments, which makes them hard to understand.
- Speaker Confusion: In group calls or interviews, it’s hard to distinguish who said what.
- Lack of Actionable Format: Audio recordings are not inherently actionable, and the user cannot quickly highlight takeaways, extract quotes, or summarize talking points.
- Compliance Risks: Some organizations require call records to be indexed, timestamped, and archived in text format for audits or legal review.
An AI transcription tool converts audio into structured, searchable text, which makes the recorded calls usable, shareable, and insightful. When choosing the right solution for your needs, consider exploring call transcription services that can seamlessly convert your recorded conversations into actionable text formats.
How to Transcribe a Recorded Phone Call for Free?
To transcribe a recorded phone call for free, simply upload the audio file to Transkriptor, and the AI transcription platform will automatically convert the recording into searchable, editable text using AI. For businesses and professionals looking to evaluate different options, comparing various call transcription software solutions can help identify the most suitable platform for specific needs. Here's a step-by-step walkthrough of how to transcribe a recorded phone call for free.
Here’s a four-step walkthrough of how to transcribe a recorded phone call for free.
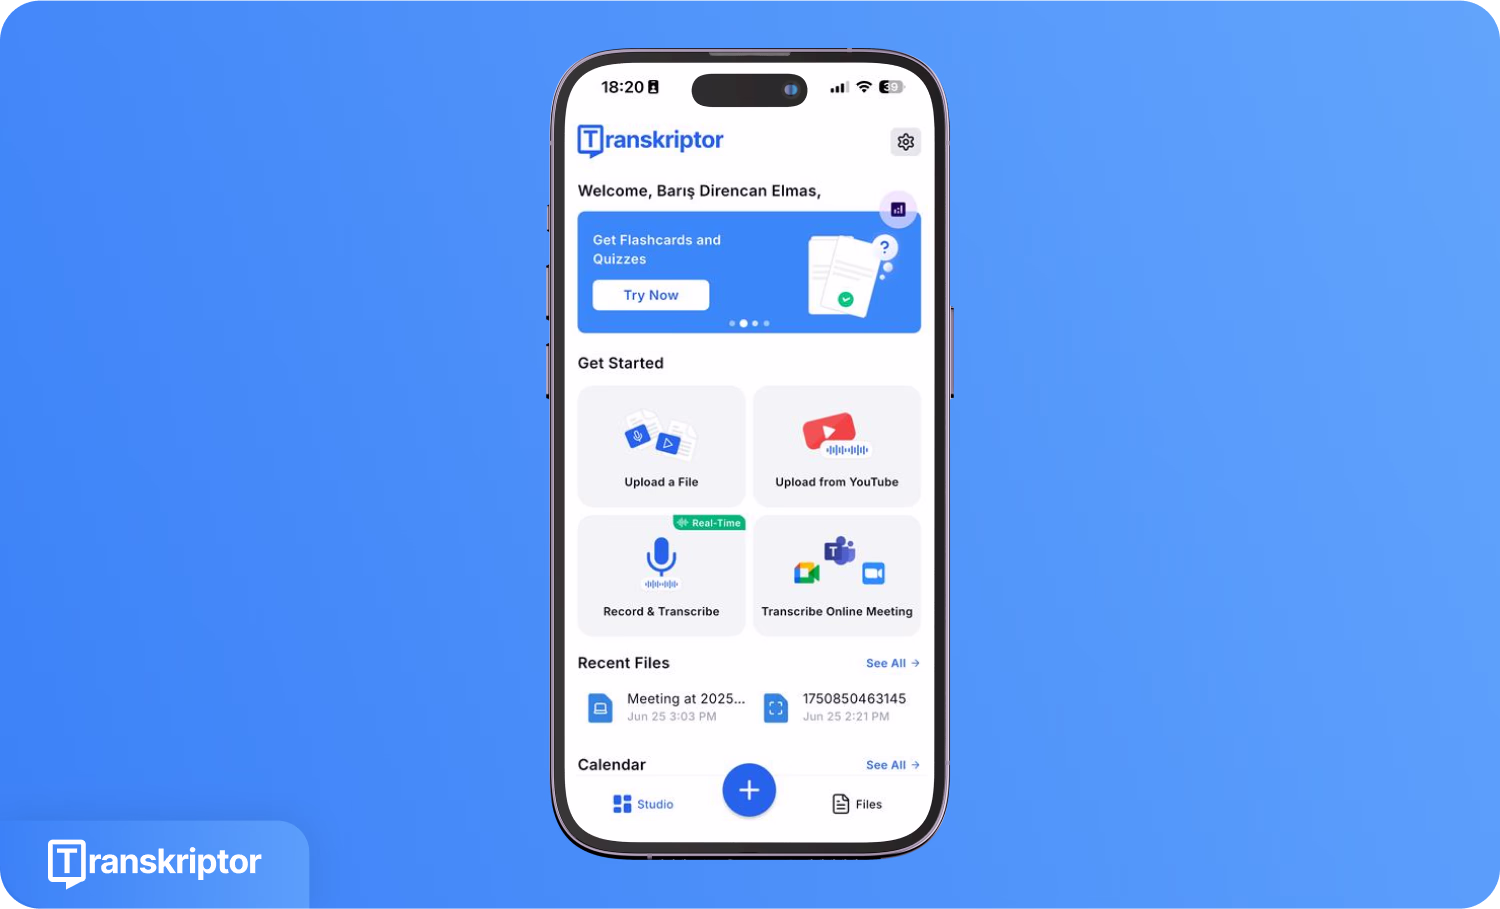
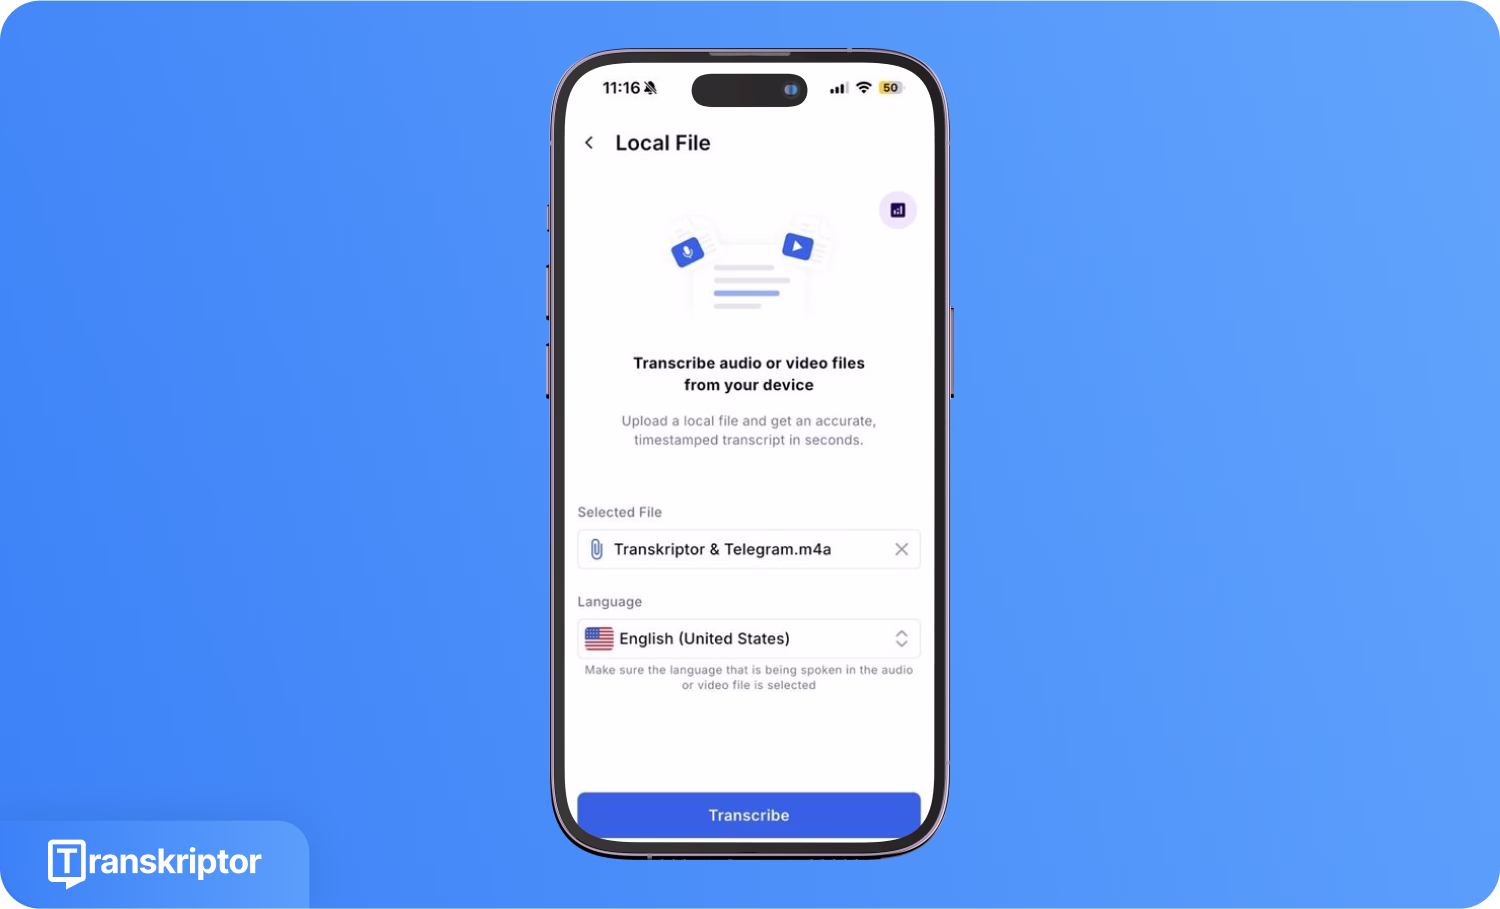
- Upload Call Recording: Go to Transkriptor’s upload page and drag & drop the audio or video file into the box. The user can click “Browse files” to select files from their device.
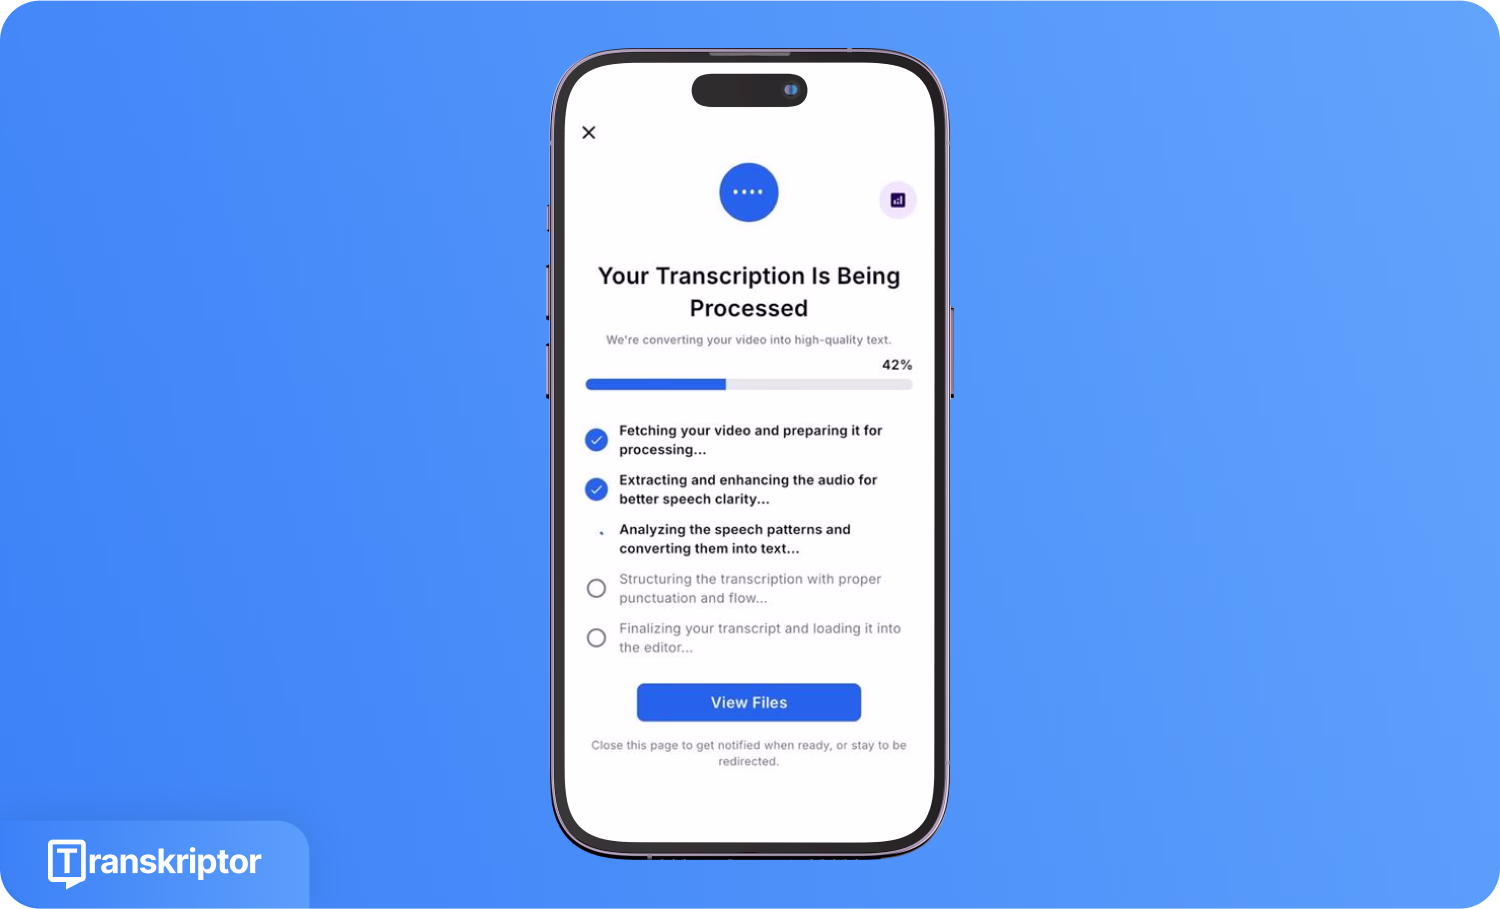
- Transkriptor Analyze & Process: Once uploaded, Transkriptor automatically analyzes the recording. If the file contains a phone call or meeting, Transkriptor will identify the speakers and start converting the speech to text.
- AI Converts Speech to Text: The transcription engine turns the conversation into editable text. Transkriptor supports over 100 languages and offers speaker identification, allowing you to easily follow who said what, even in a group call.
- Access, Edit & Share the Transcript: Once the transcription is complete, one can manually edit the transcript, add speaker names, or export the transcript in TXT, DOCX, SRT, or PDF formats.
Is It Legal to Record a Phone Call?
The answer depends on the country’s consent laws. Some regions require just your party’s consent to record a phone call, while others require all parties involved to be informed and agree before any recording begins. According to Grand View Research, the global call recording contact center as a service market size was valued at US$369.5 million in 2024 and is estimated to grow at a compound annual growth rate (CAGR) of 19% from 2024 to 2030.
The data shows the call recording market is growing and will continue to, well, into the 2030s. But understanding laws and country-specific laws is important as well, because recording a call without proper consent can lead to legal consequences, including fines or lawsuits.
Legal Case Examples by Country for Phone Call Recording
Here are a few countries and their laws regarding call recordings.
United States: Laws vary by state
- One-party states: Only one person needs to know the call is being recorded (e.g., New York, Texas).
- Two-party states: All participants must consent (e.g., California, Florida, Pennsylvania).
Canada: Single-party consent law
As per the Office of the Privacy Commissioner of Canada, one must inform the other party at the start of the call if the conversation is being recorded manually or via an automated message.
Australia
- Recording phone calls without informing the other party is generally not allowed.
- An organization must disclose call monitoring or recording at the start of the conversation and give the other party a chance to:
- End the call, or
- Request a transfer to a line where recording does not occur.
Key Takeaways
Recording phone calls is easier than ever with built-in features on modern devices. Android offers native call recording through the Phone app settings, while iPhone users can use iOS 18's integrated recording feature or third-party solutions.
Remember to:
- Always check local laws and get consent
- Choose the right method for your device
- Consider transcription for better usability
- Use quality recording conditions for best results
Whether you're recording for business, personal, or interview purposes, these methods will help you capture and preserve important conversations effectively.
Frequently Asked Questions
The legality of call recording depends on where you live. Some countries or U.S. states allow one-party consent, meaning you can record if you are part of the call. Others require all participants to be informed and give consent before recording.
If you are on iOS 18 or above, you can use Apple's built-in recording feature to record the call. For older versions, Truecaller Premium is a popular option and uses the merge call method. Apps like TapeACall and Rev Call Recorder are widely used by users.
Yes, you can transcribe the call in 100+ languages using Transkriptor. Whether your recording is in English, Spanish, Thai, or Japanese, Transkriptor can convert the recording into searchable, editable text with 99% accuracy.
Transkriptor typically transcribes audio in just a few minutes. The exact time to transcribe a call depends on the file length, audio clarity, and selected language, but most 30-minute recordings are ready within 1-2 minutes.
Yes, you can use Transkriptor's AI to summarize your calls. Once your call is transcribed, you will get a concise summary highlighting key points, speaker insights, and action items.