Notion Integration with Transkriptor

Notion Integration with Transkriptor

Learn how to connect your Notion account to Transkriptor, configure integration settings, sync past meetings, and manage your connection preferences.

How to Integrate with Notion?

Follow these simple steps to integrate Transkriptor with Notion and streamline your transcription workflow.

Transkriptor dashboard showing Notion integration option highlighted.
Transkriptor integration options highlighting Notion workspace connection.
Notion integration with Transkriptor for speech to text conversion.
Notion integration setup with Transkriptor, showing access permission screen.
Notion integration settings for Transkriptor showing options to store and sync meetings.
Transkriptor integration with Notion showing connected status and settings option.
Notion settings interface for storing meetings with Transkriptor integration.
Notion Integration displaying Transkriptor meetings database view.
Notion integration with Transkriptor showing meeting transcription details.
Notion integration with Transkriptor showing a meetings page view.
Transkriptor interface showing a meeting transcript with details like date, organizer, and participants.
Notion settings for integrating Transkriptor meetings and organizing notes.
Notion integration settings for syncing meetings with Transkriptor.
Transkriptor integration interface showing Notion integration settings.

Connecting Your Notion Account

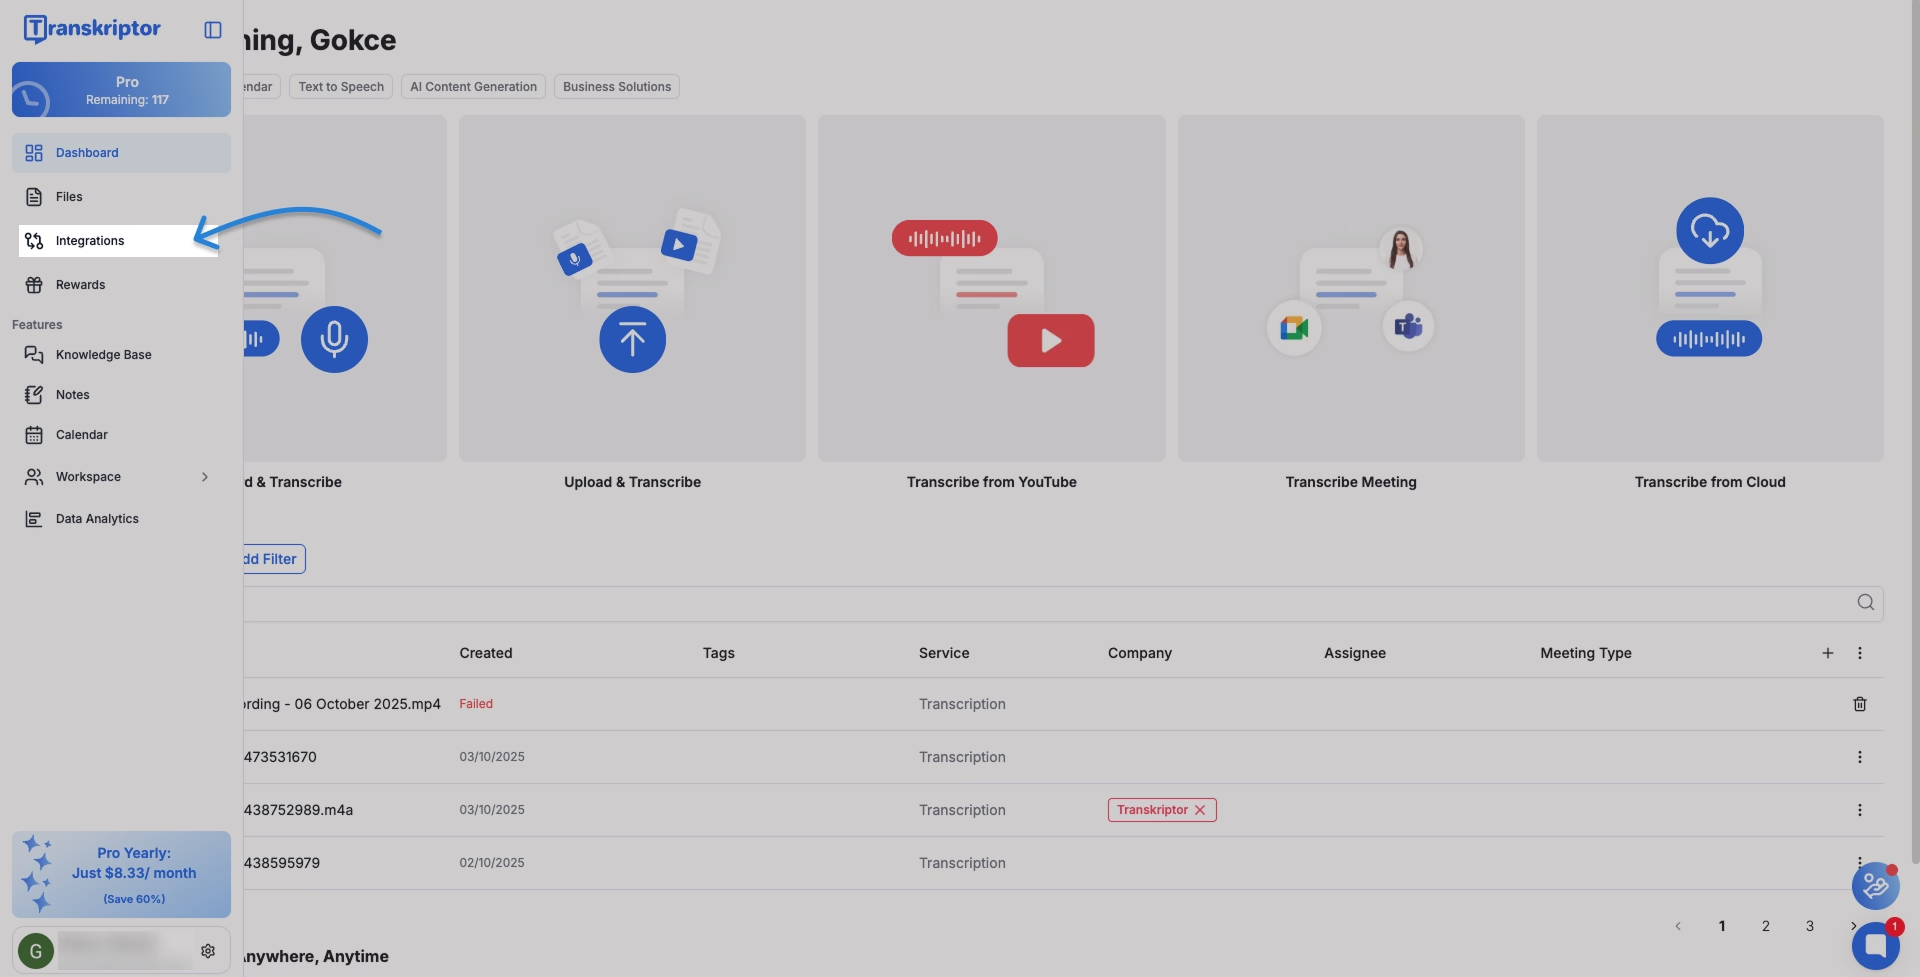
Go to the Integrations tab in your Transkriptor dashboard

Transkriptor dashboard showing Notion integration option highlighted.
Explore Notion integration with Transkriptor for efficient transcriptions.

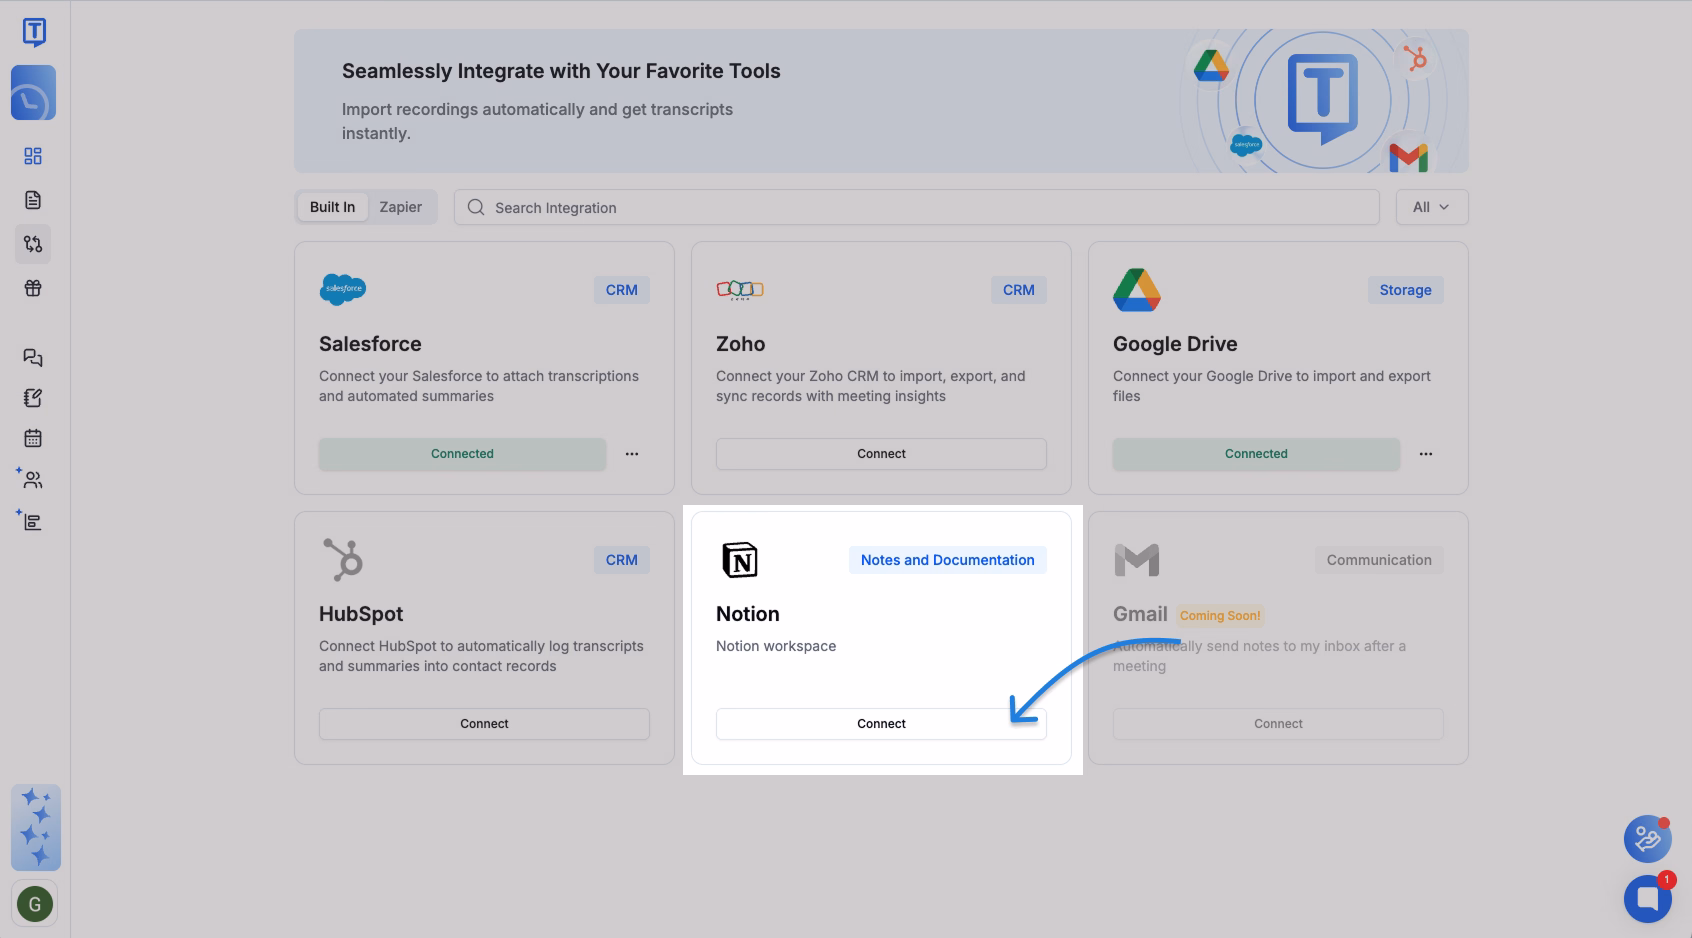
Find Notion and click on Connect button

Transkriptor integration options highlighting Notion workspace connection.
Connect Transkriptor with Notion to streamline your note-taking process.

Granting Access to Notion

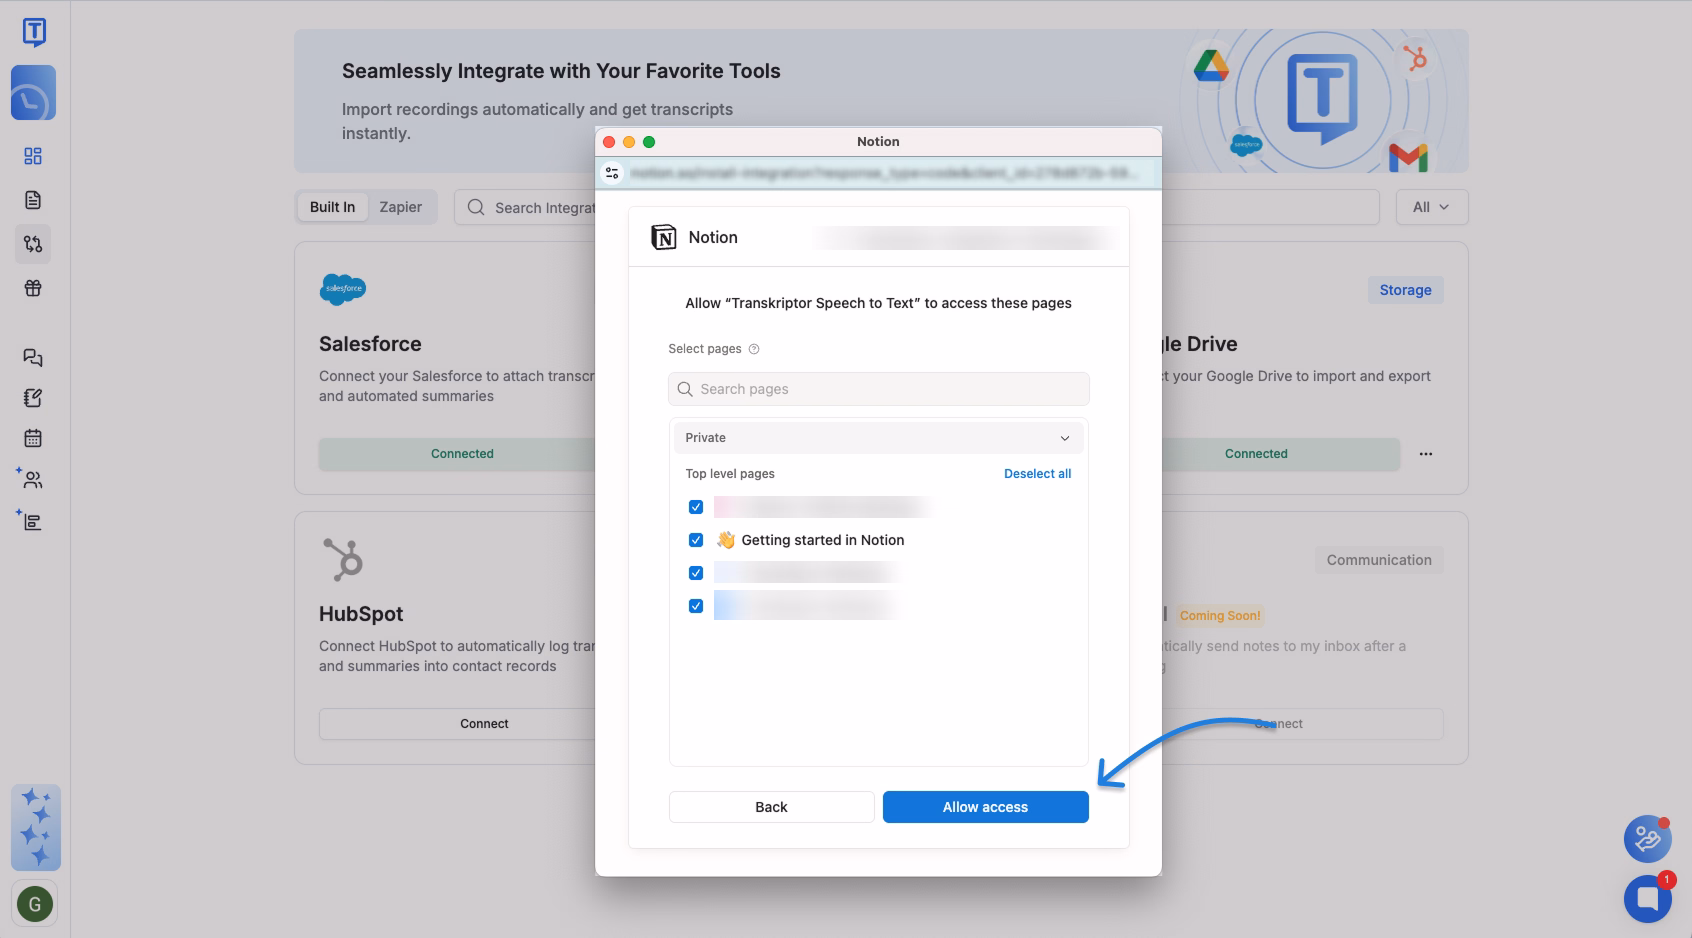
Click on "Select Pages" button to grant access to integration

Notion integration with Transkriptor for speech to text conversion.
Connect with Transkriptor to enhance your Notion experience by selecting pages for transcription.

Selecting Notion Pages to Share

Select which pages Transkriptor can access and click on "Allow Access" button.

Notion integration setup with Transkriptor, showing access permission screen.
Enable Notion integration with Transkriptor to access your selected pages effortlessly.

Understanding Integration Settings

Storage Options for Meeting Data

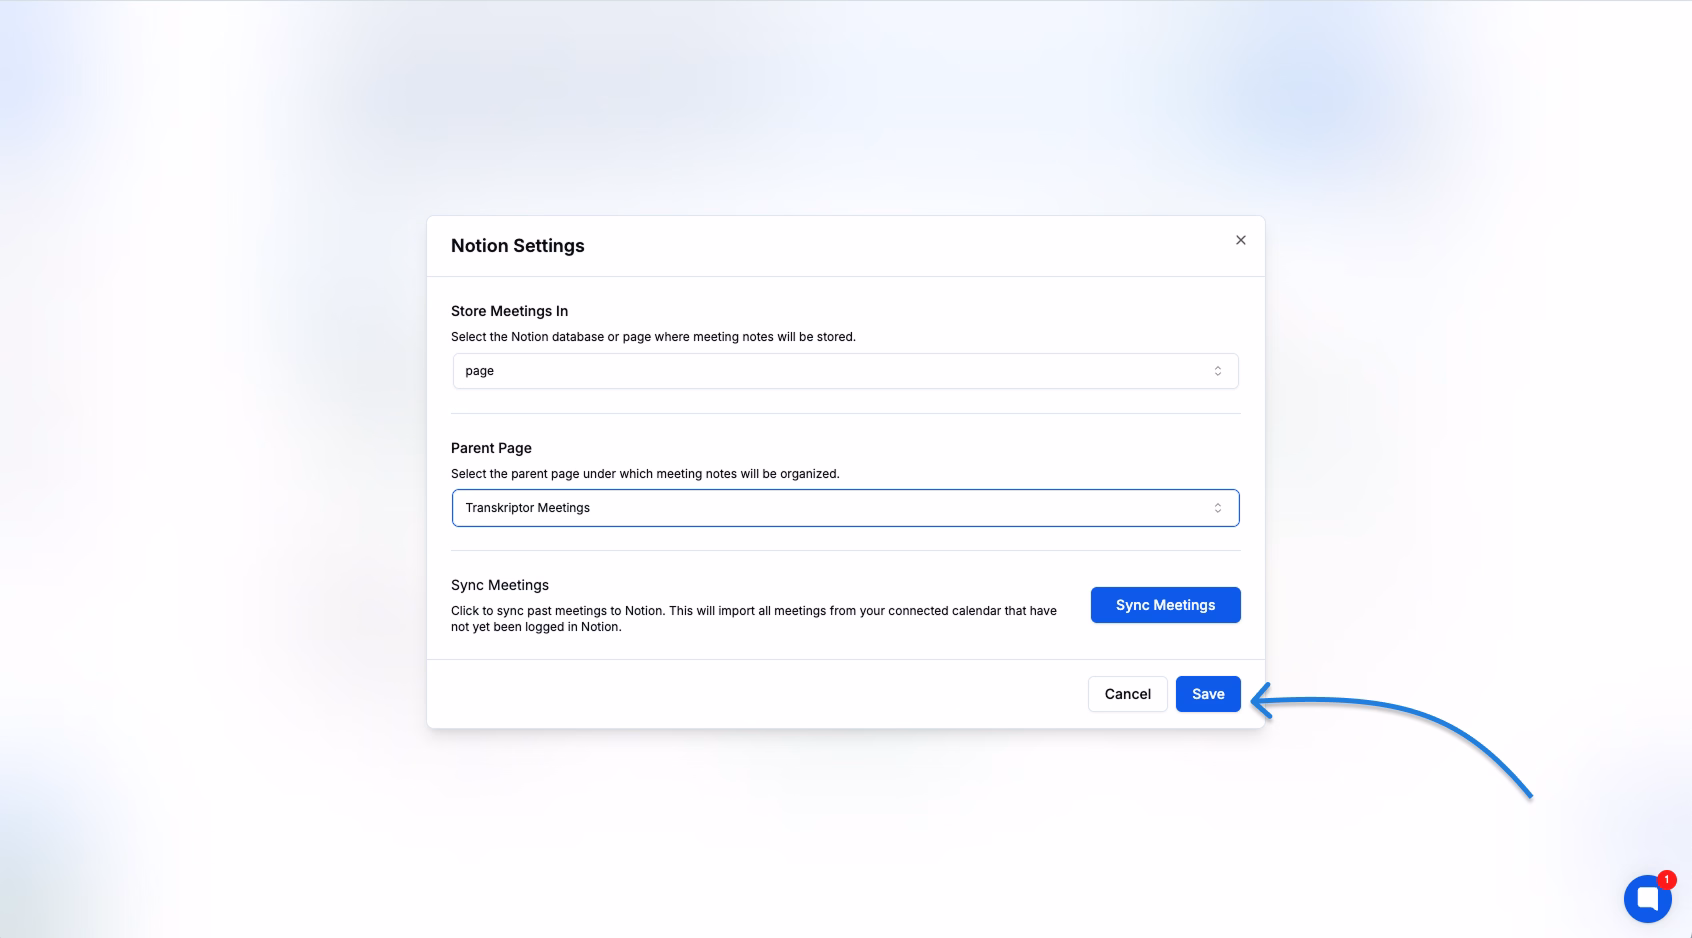
Transkriptor allows creating meeting logs as separate pages or database rows in Notion. You can also select a workspace page where the meeting logs will be saved (applies only when "Page" is selected in "Store Meetings In").

Notion integration settings for Transkriptor showing options to store and sync meetings.
Explore how to configure Notion integration with Transkriptor to organize meeting notes effectively.

Accessing Integration Settings

After connecting Notion, click the three dots next to the green "Connect" indicator.

Transkriptor integration with Notion showing connected status and settings option.
Explore Notion integration settings in Transkriptor to enhance your workflow.

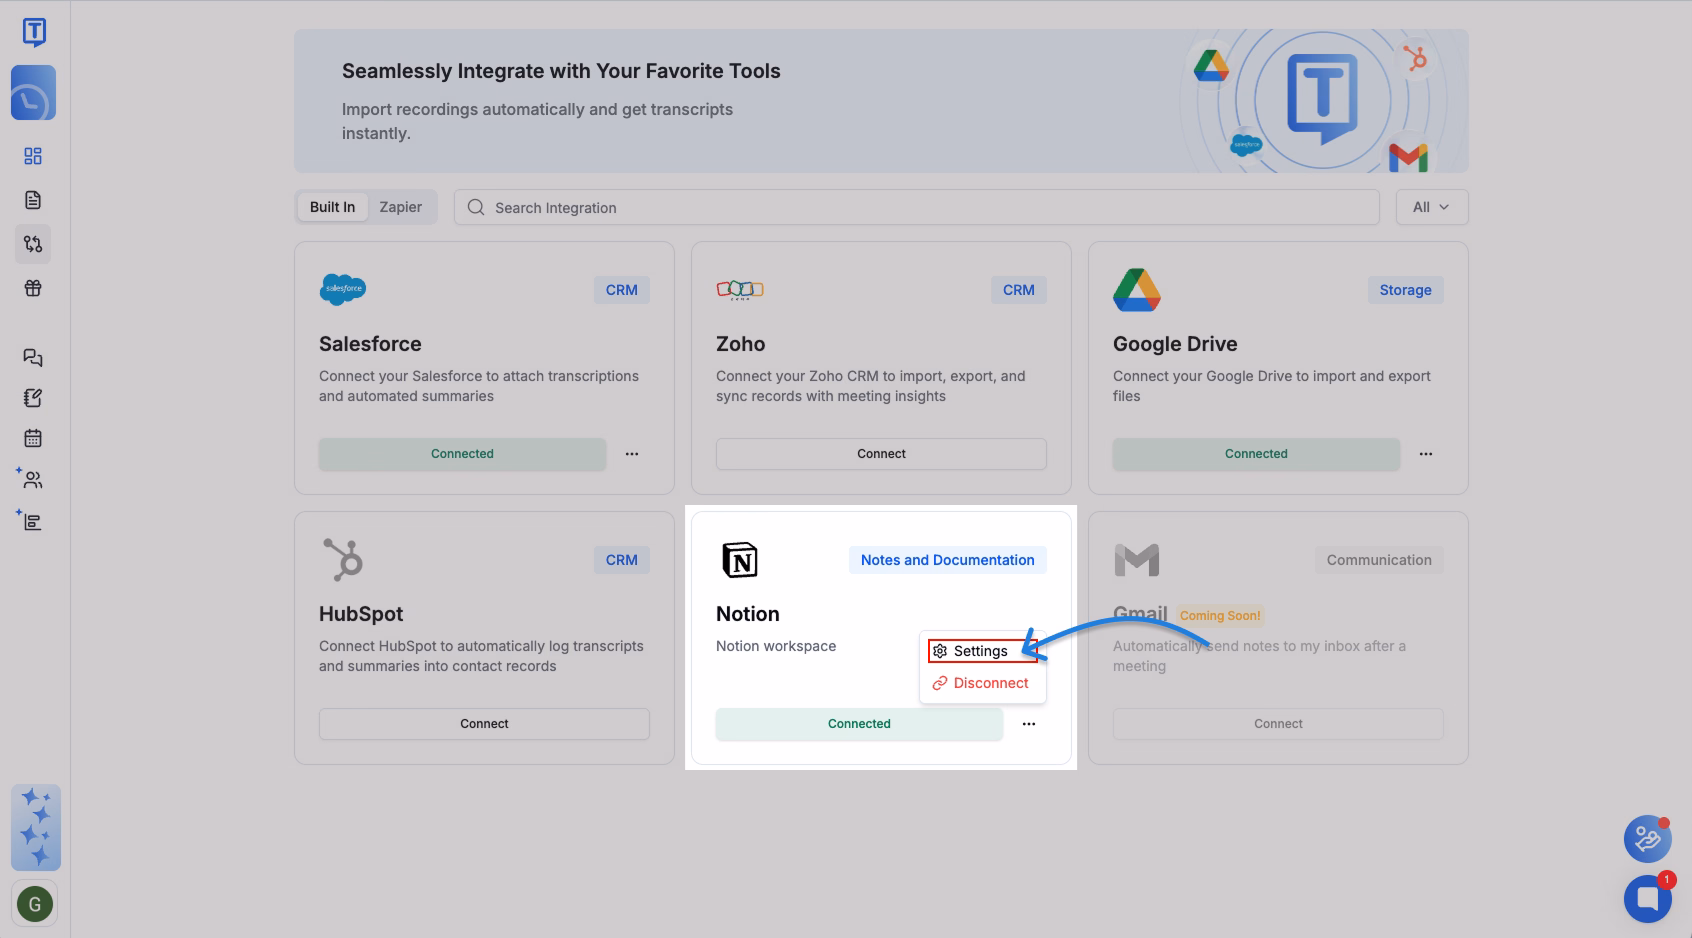
A menu will appear. Click on "Settings".

Store as Database Rows

In the integration settings tab, click the dropdown under "Store Meetings In" and choose "Database". Click "Save".

Notion settings interface for storing meetings with Transkriptor integration.
Choose where to store meeting notes in Notion using the Transkriptor integration.

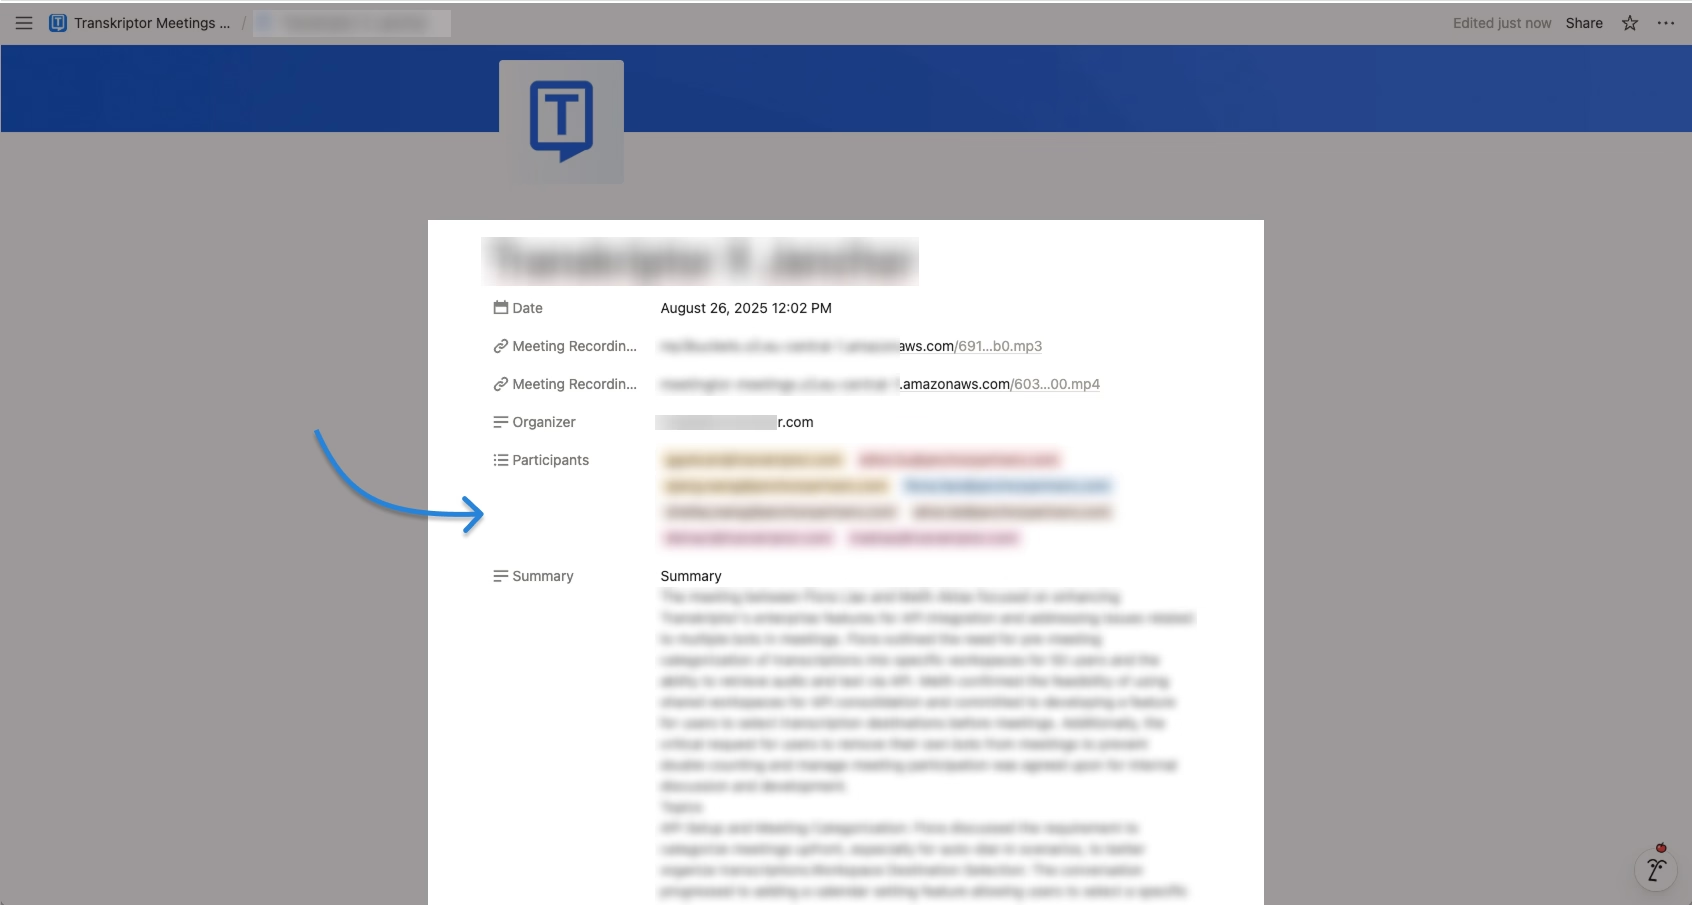
To view your meetings in Notion, go to "Transkriptor Meetings (Database View)".

Notion Integration displaying Transkriptor meetings database view.
Explore how Transkriptor integrates with Notion to manage meeting data efficiently.

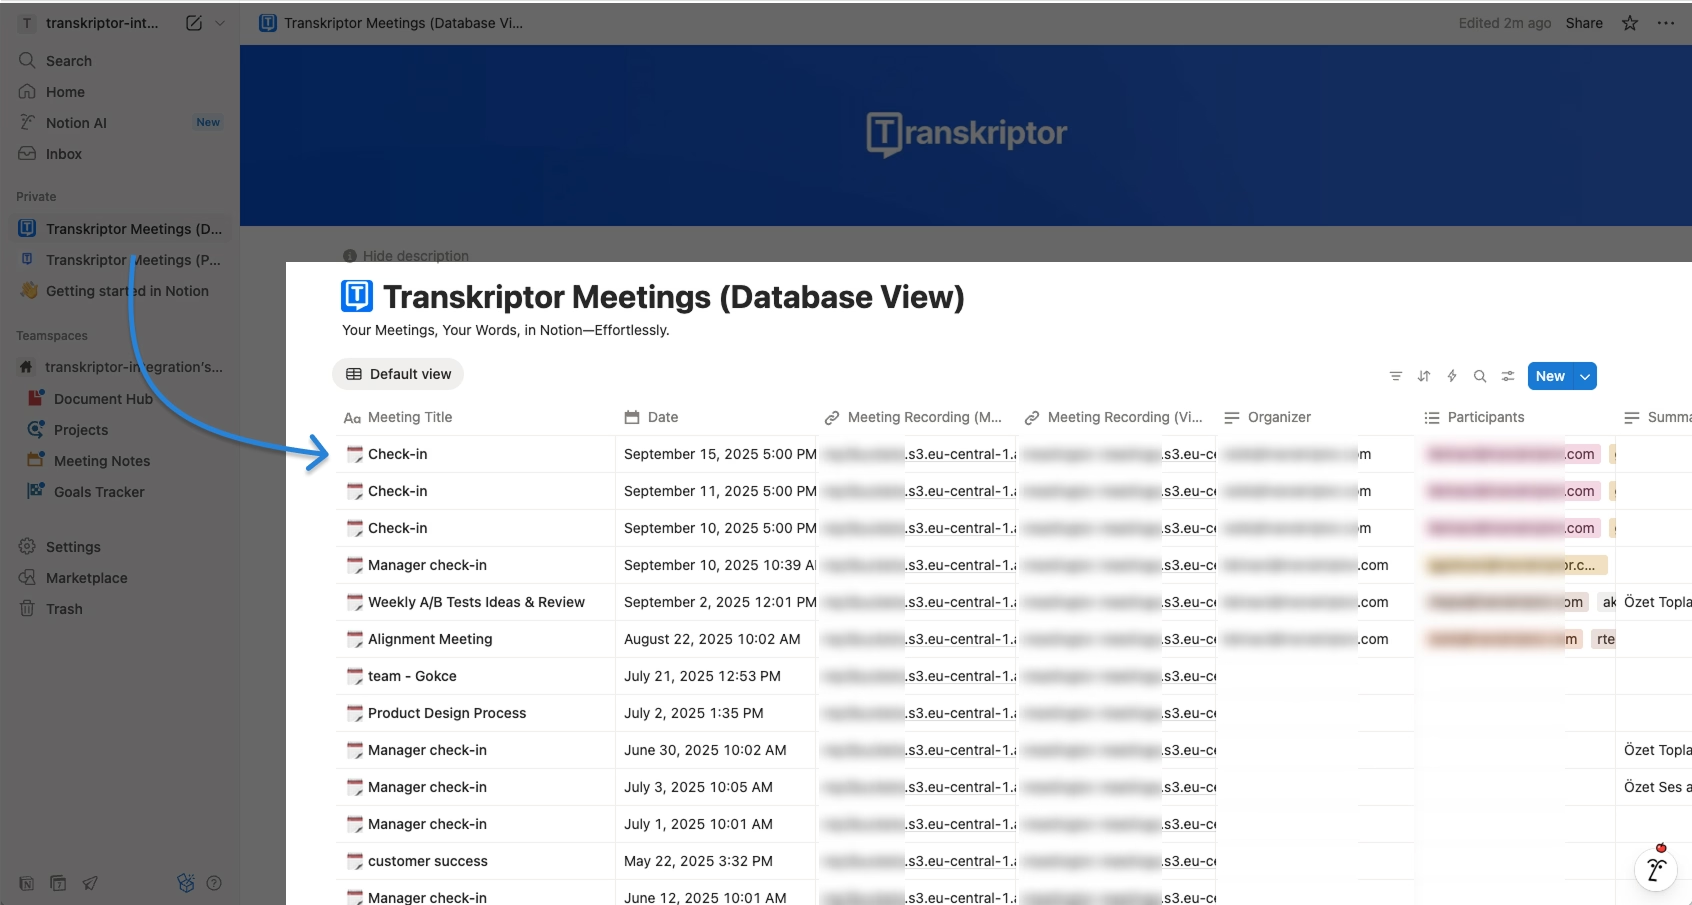
Click on a meeting title to see its details

Notion integration with Transkriptor showing meeting transcription details.
Explore how Transkriptor integrates with Notion to streamline meeting transcriptions.

Store as Separate Pages

In the integration settings tab, click the dropdown under "Store Meetings In" and choose "Page". Click "Save".

Notion settings interface for storing meetings with Transkriptor integration.
Choose where to store meeting notes in Notion using the Transkriptor integration.

Go to "Transkriptor Meetings (Page View)" in Notion to view your meetings.

Notion integration with Transkriptor showing a meetings page view.
Explore how Transkriptor seamlessly integrates with Notion to manage meetings efficiently.

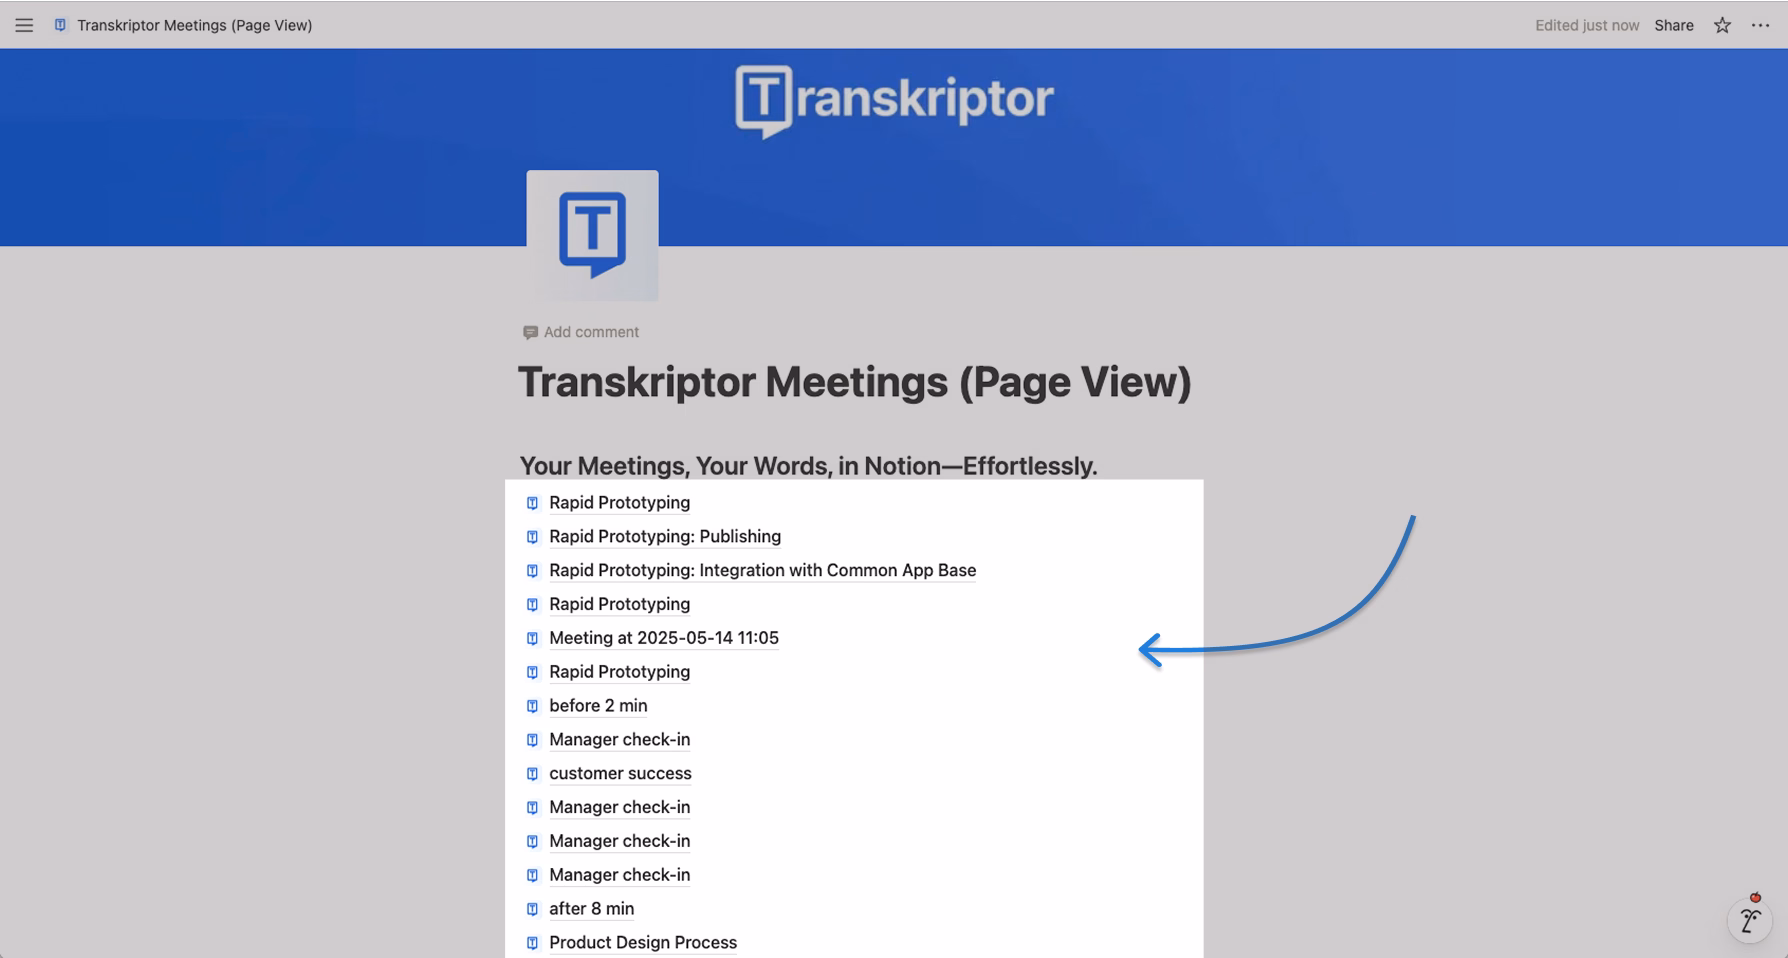
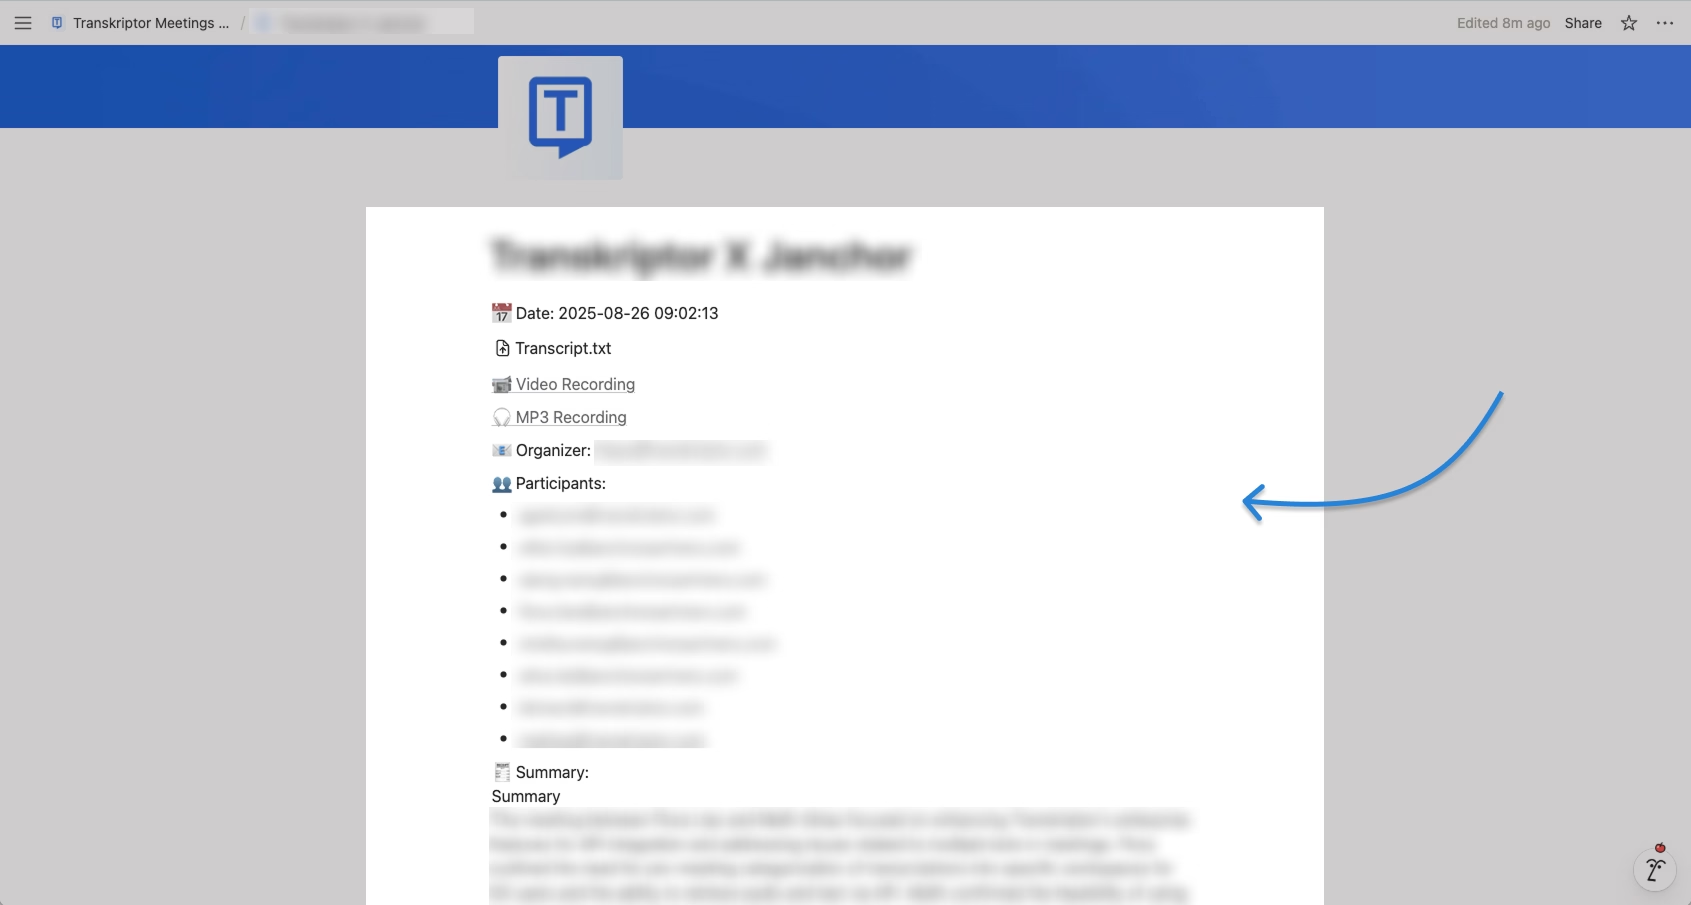
Click on a meeting title to view its full content.

Transkriptor interface showing a meeting transcript with details like date, organizer, and participants.
Explore how Transkriptor simplifies meeting documentation with efficient transcript integration.

Setting the Parent Workspace Page

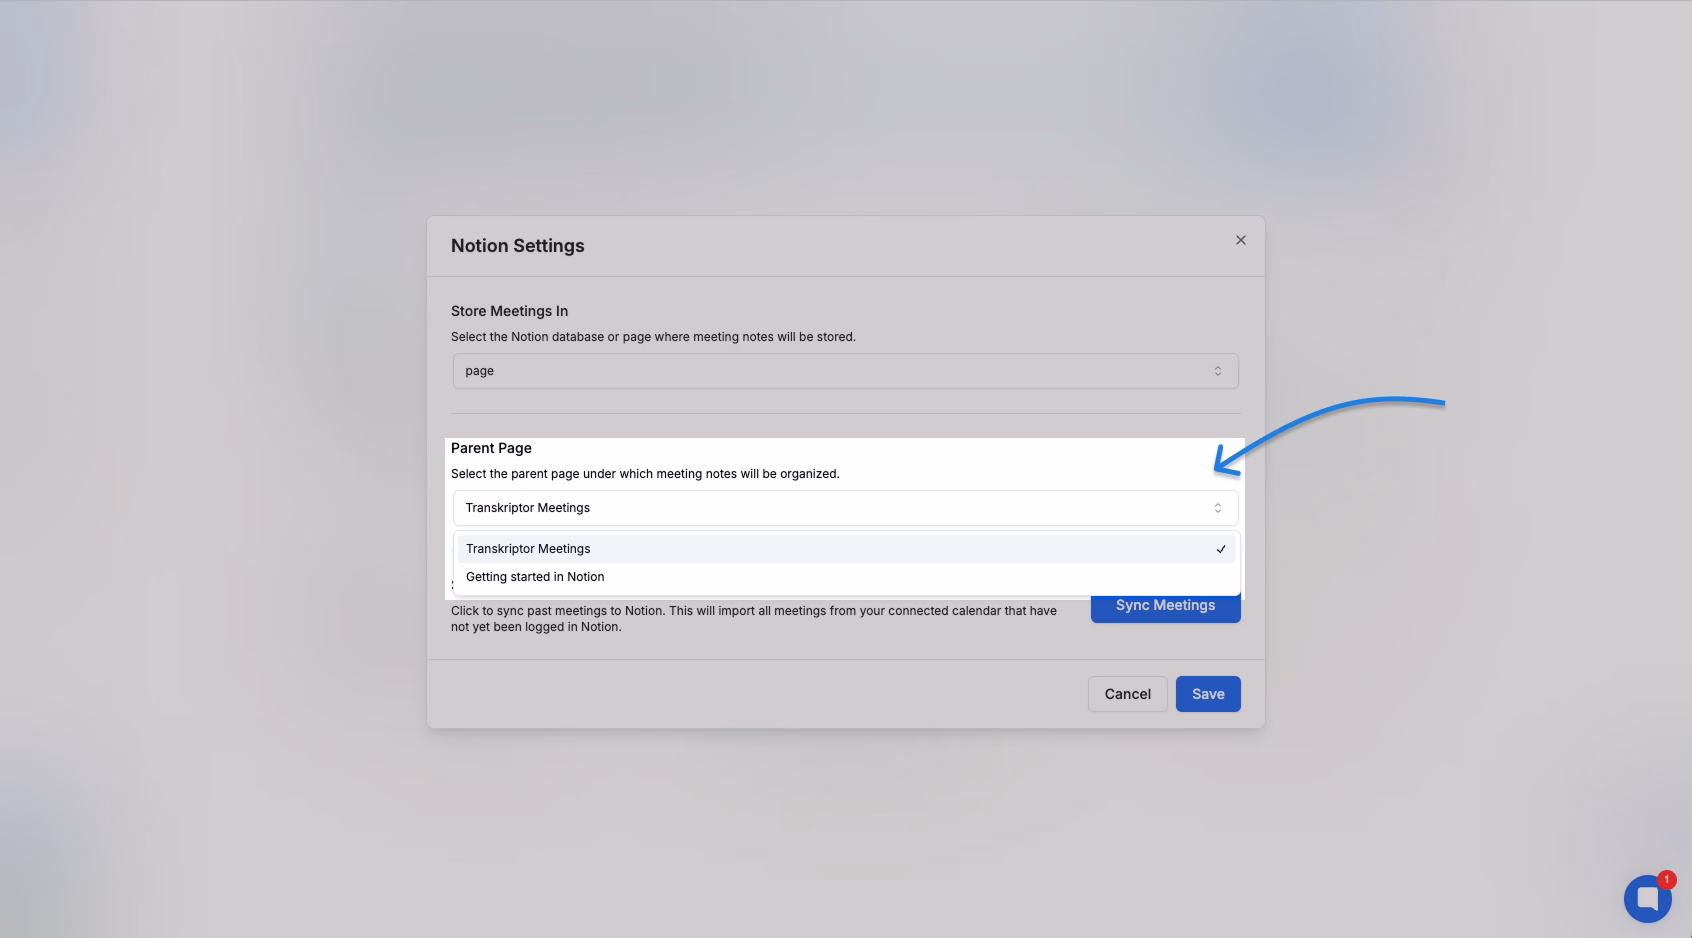
If you chose "Page" as your storage option, you can choose the workspace-level parent page. In the settings tab, under "Parent Page", choose an option from the dropdown and click "Save".

Notion settings for integrating Transkriptor meetings and organizing notes.
Select a parent page to organize your Transkriptor meetings in Notion for streamlined integration.

Changing Your Integration Settings Later

You can change your integration settings at any time after connecting to Notion.

Migration Between Database and Subpages

If you change the "Store Meetings In" or "Parent Page" setting, your existing logs in Notion will be migrated. E.g., switching from "Page" to "Database" deletes previous subpages and recreates them as database rows. If you made manual edits to meeting logs in Notion, they will be lost. Migration is also supported from "Database" to "Page" and between parent pages.

Syncing Past Meetings

How to Trigger Past Meeting Sync

Go to the integration settings tab, click on the "Sync Meetings" button, and wait for the process to complete. Check your Notion workspace to see the synced meetings.

Notion integration settings for syncing meetings with Transkriptor.
Sync meetings easily with Transkriptor's Notion integration to organize your notes.

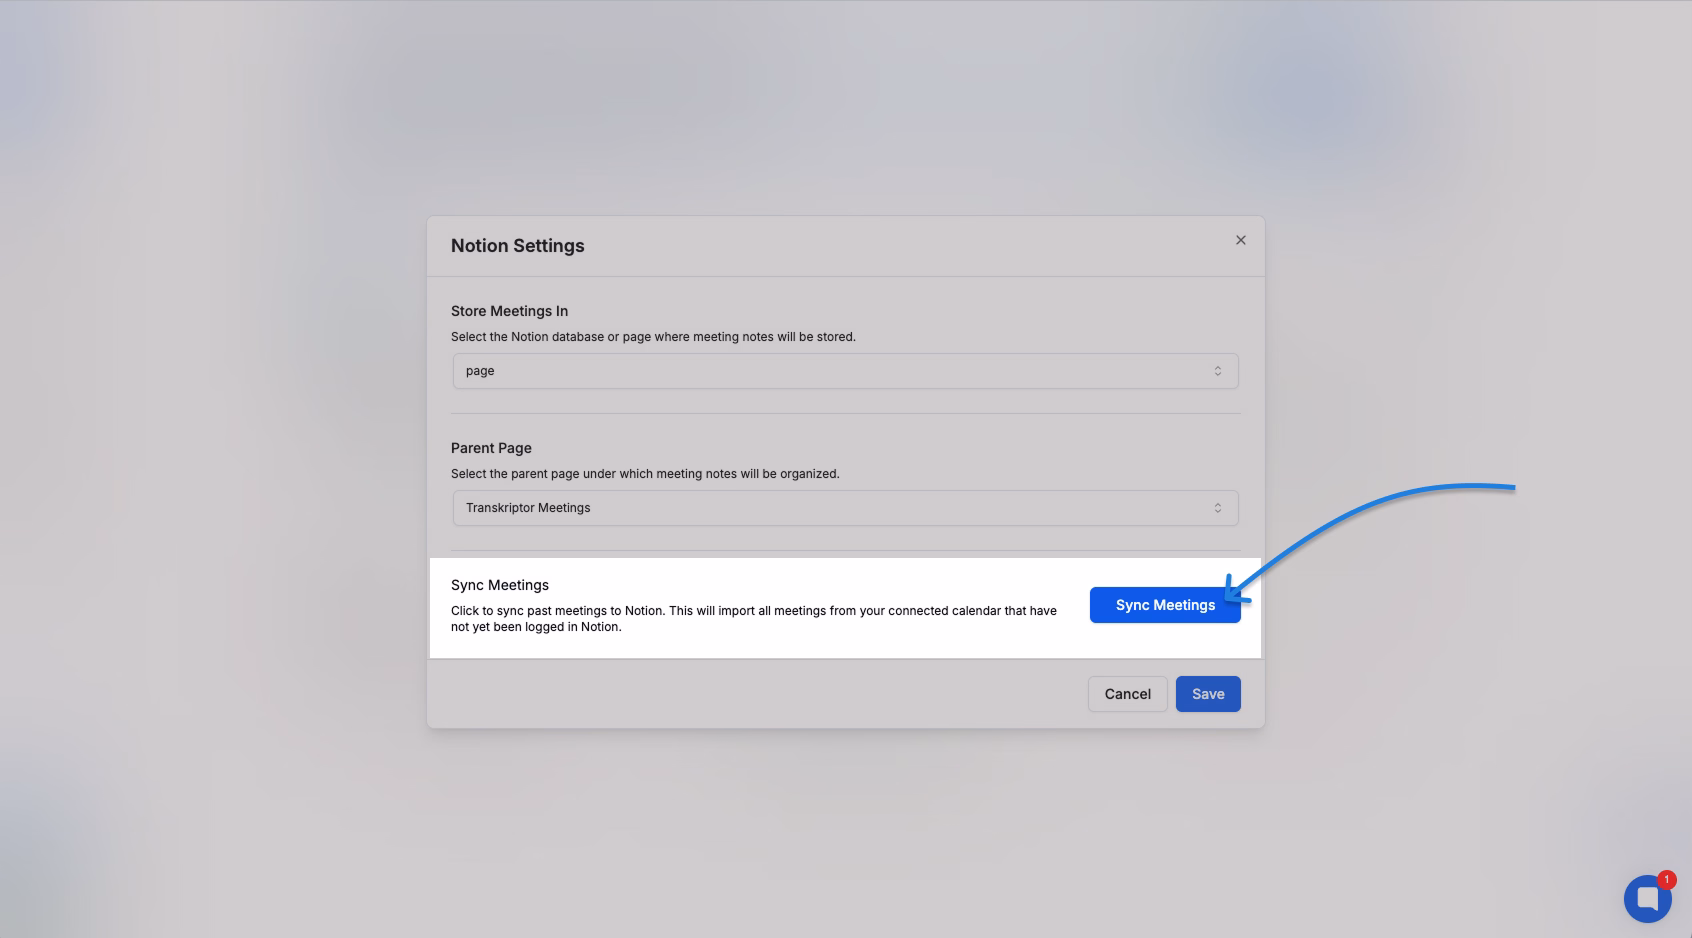
Sync Behavior Based on Current Configuration

Transkriptor only syncs meetings that aren’t already logged to Notion. The sync behavior follows your current integration configuration.

Disconnecting the Notion Integration

How to Disconnect

Click the three dots and then click on "Disconnect".

Transkriptor integration interface showing Notion integration settings.
Explore Notion integration settings in Transkriptor for seamless transcription management.

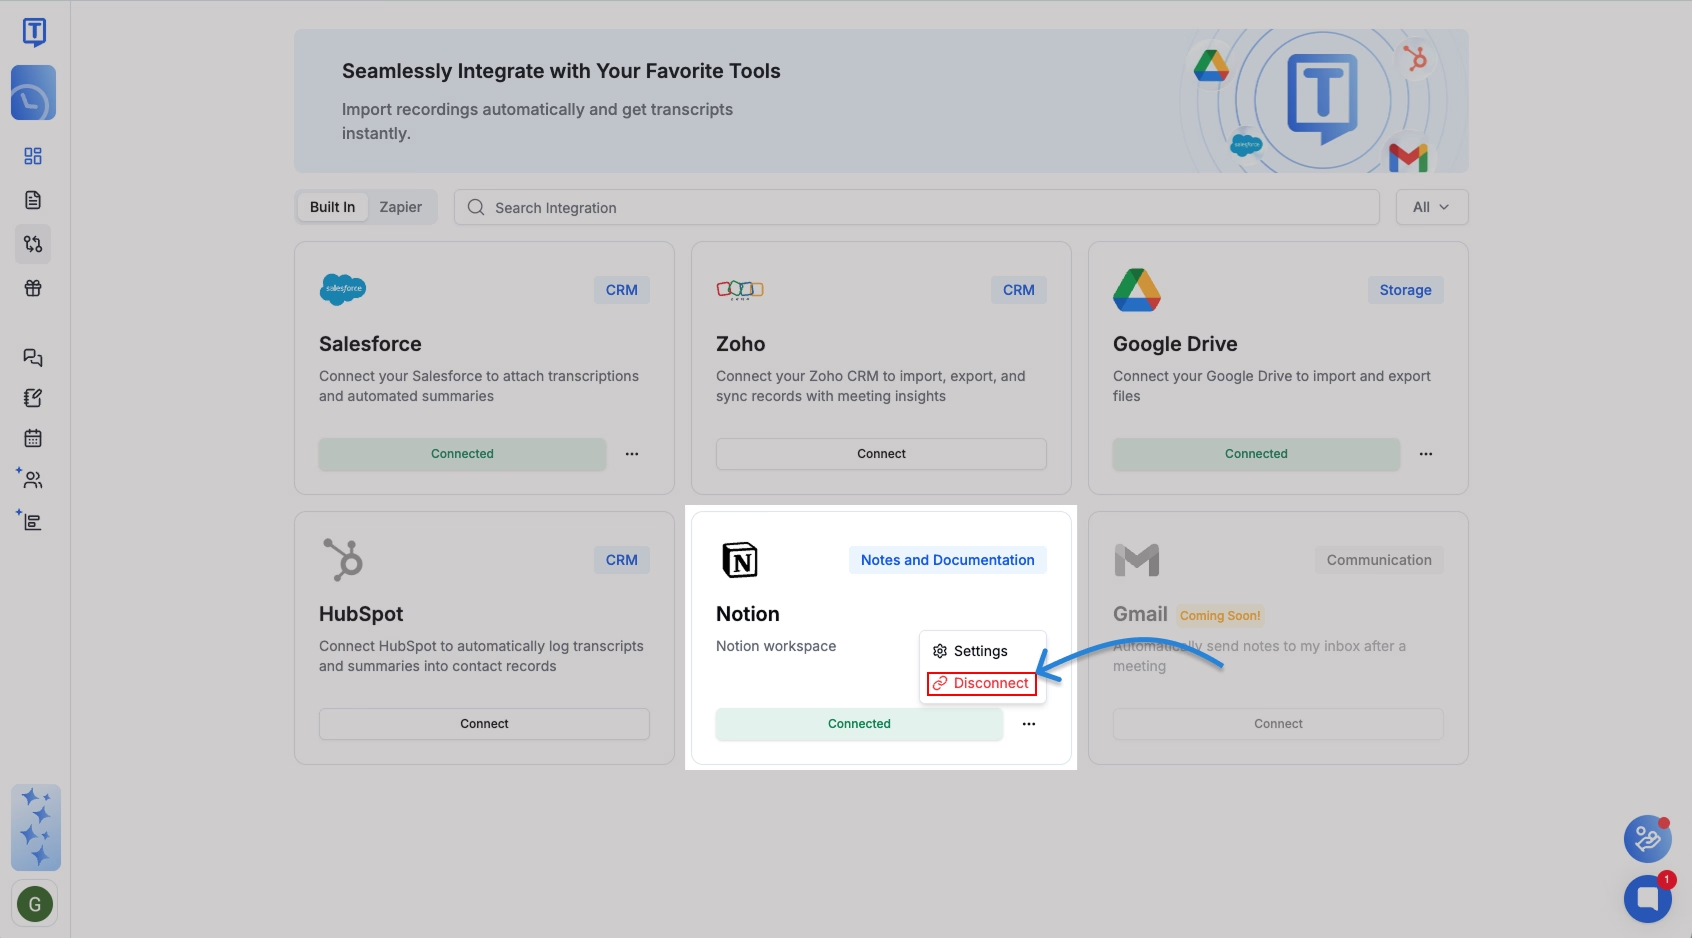
After a short delay, the connection will be removed.

What Happens After Disconnection

All meeting logs created by Transkriptor, whether as subpages or database rows, will be deleted.

Frequently Asked Questions

Yes. During the authorization step, you can manually select the specific Notion pages or workspace areas you want to share. Transkriptor will only access what you grant permission for.

Nothing is changed in your existing content. Transkriptor only creates new meeting logs in the specified workspace or database—based on your configuration.

Yes. When switching from “Page” to “Database” (or vice versa), or changing the parent page, existing logs will be deleted and recreated in the new structure. Manual edits to those logs will be lost.

Yes. You can trigger past meeting sync anytime via the integration settings tab by clicking “Sync Meetings”.

At this time, customization is limited to choosing between storage as database rows or pages, and selecting the parent workspace page. Fine-tuned formatting inside the meeting content is not configurable.

Yes. Disconnecting will automatically remove all meeting logs that were created by Transkriptor in your Notion workspace.

No. Only meetings recorded after the reconnection will sync automatically. If you want to add meetings recorded before reconnecting, use the “Sync Meetings” button after setting up again.

There’s no enforced sync limit, but syncing large volumes of meetings may take a few moments depending on the size and number of entries.

Sign up Now and Start Transcribing Audio With AI