If you’re wondering how to get audio to text APIs on your transcriptions, you’re in good hands because this guide will show you how to do this efficiently using the best tools. Adding timestamps will help you organize information better and easily access it whenever you need it, so you can also maximize your productivity and derive more value from your meetings and discussions.
Why Timestamps Matter in Audio-to-Text Conversion
Timestamps often seem like a forgettable detail in high-quality transcriptions, but they offer a host of different benefits at an educational or even an organizational level, including using the best podcast app for organizing structured audio recordings. They’re defined as a digital record of the time at which an event occurred. In a transcript, they refer to the time at which every utterance in a phrase or a sentence is spoken.
With companies of all scales investing more resources into maximizing the productivity of their meetings, the use of transcription tools for recording to text has seen a steady rise. They use these tools to automate the process of recording and transcribing meetings with specific features such as speaker recognition, high accuracy, translation into multiple languages, and so on. However, the context of the meeting, the key action items, and the key points discussed are just as important.
Timestamps can help teams organize information into segments by identifying what was discussed between two distinct timestamps when you transcribe audio to text . They also make it easy to navigate between longer transcripts so users can access specific information quicker, improving the usability of these transcription tools.
This feature can come in handy in various situations, including when you need to create and understand legal transcripts or meeting notes, create content for your social media channels or a blog, or even segment topics of discussion in an interview.
Essential Transcription Technology Tools for Timestamps
If you’re looking for a reliable transcription tool, you’ll be delighted to find several different options online. However, not all of them will be worth your money or offer you the accuracy and features you need. There are a few, such as Transkriptor , Rev.com, and Otter.ai, that make the cut, and this section will give you an overview of each of these tools.
Transkriptor
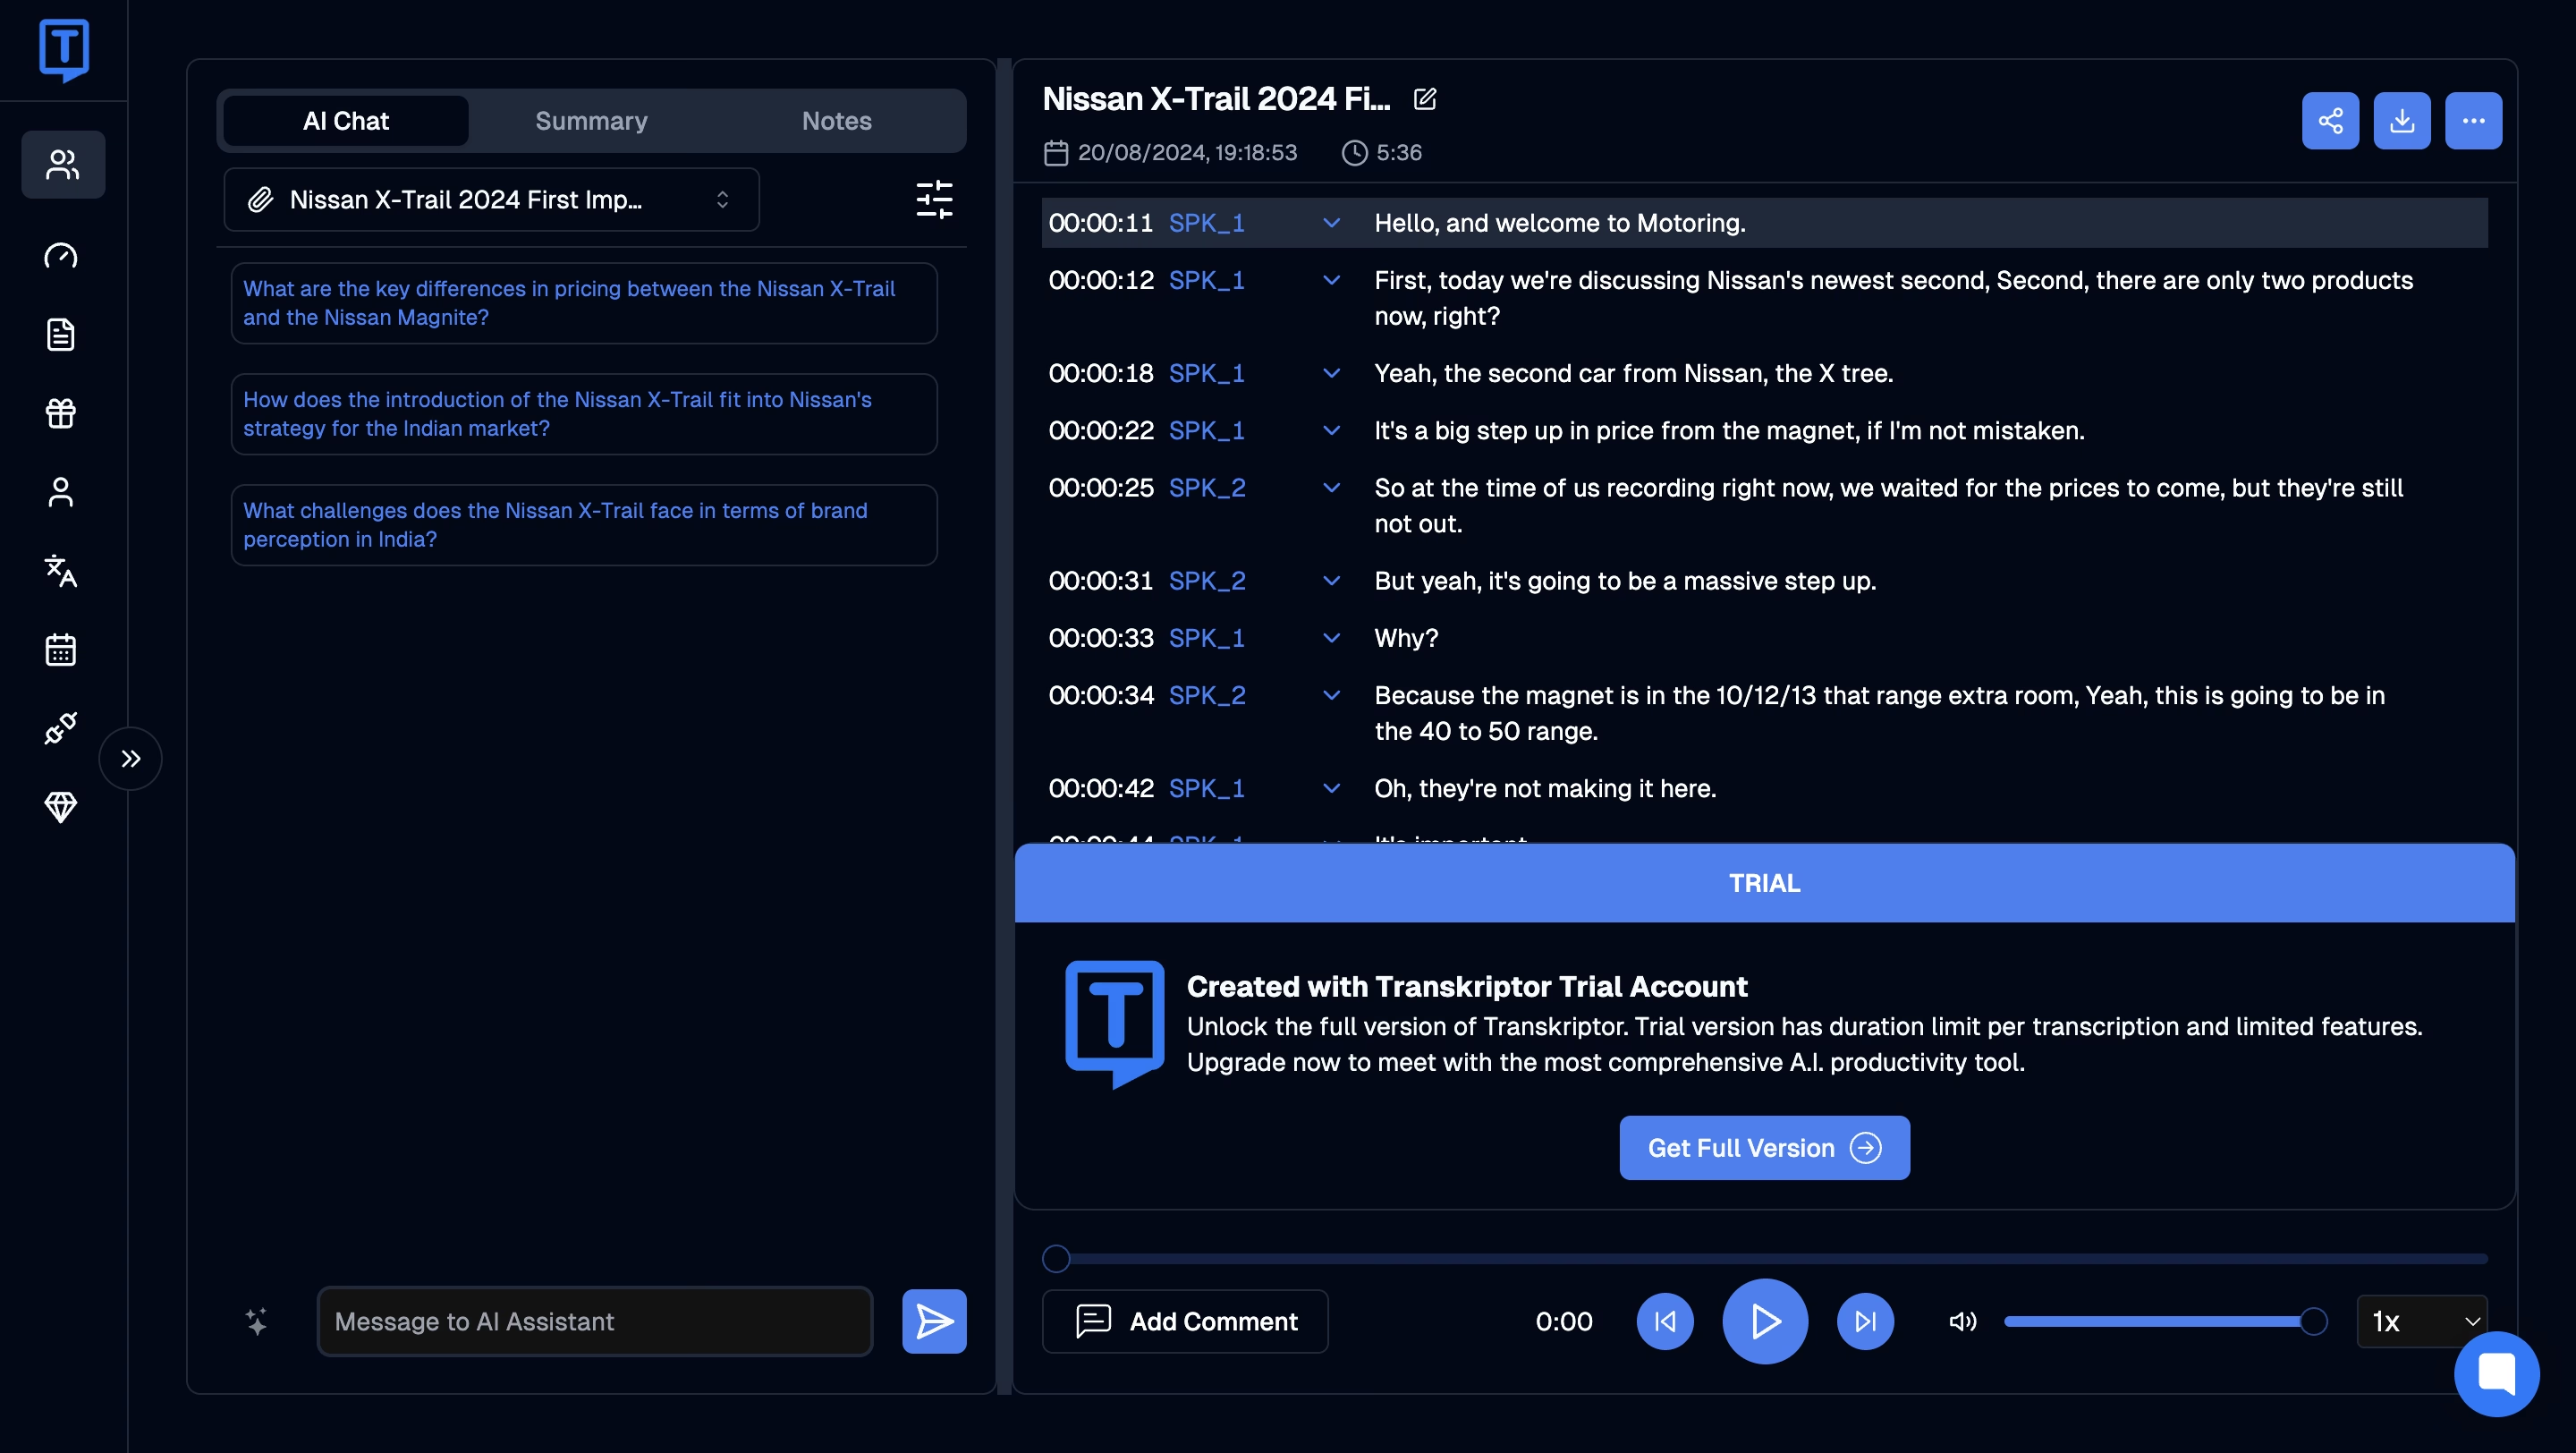
The first tool on this list is Transkriptor, an AI-powered audio-to-text converter that offers a range of different transcription features. It can automatically transcribe your meetings, lectures, and even interviews using AI and allows you to source audio or video files from multiple sources.
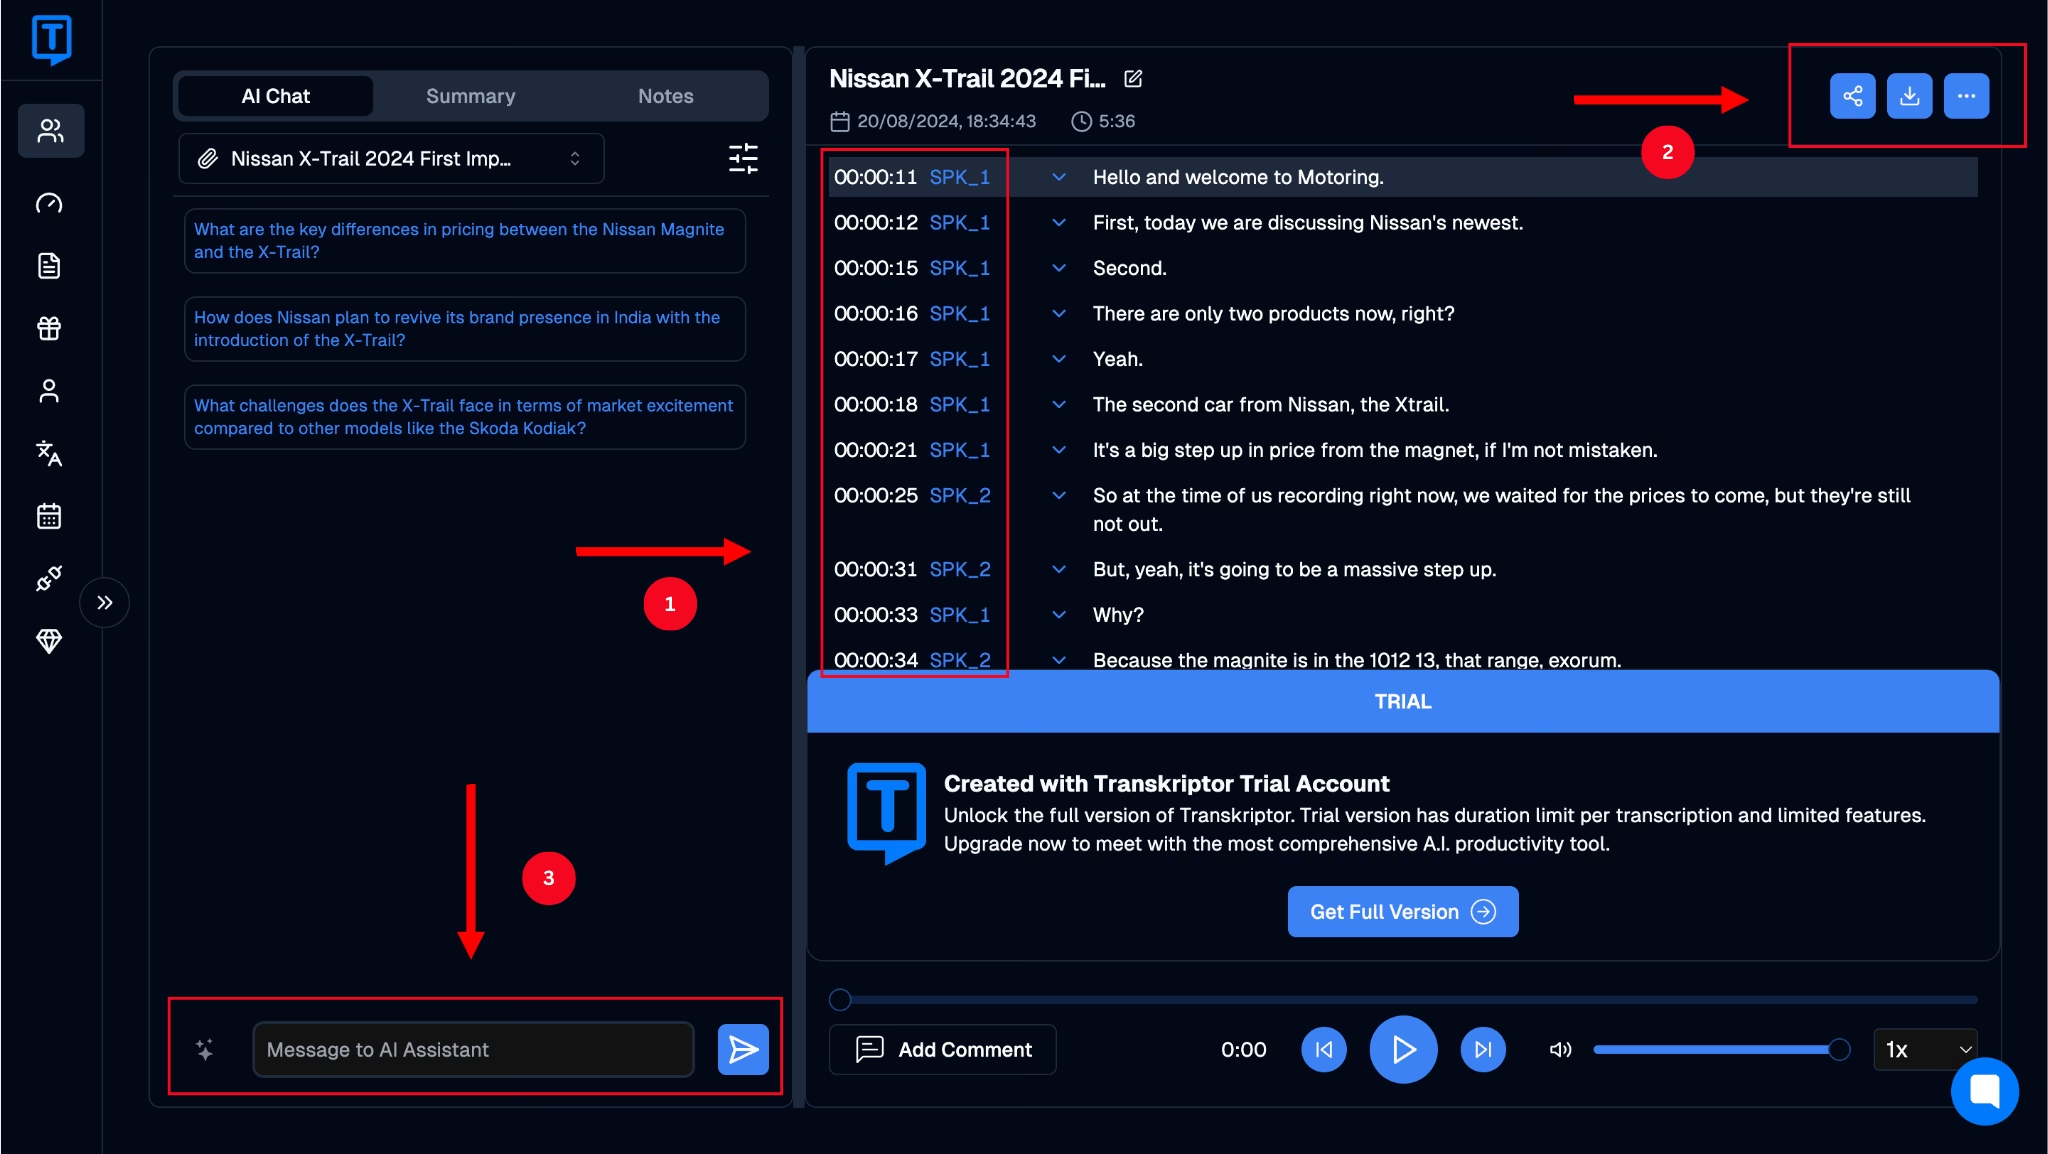
Regardless of how you input a file into Transkriptor (you can upload an audio or a video file, record one in real-time, or even source one from the cloud or YouTube), the tool will give you an accurate timestamp of each sentence while identifying which speaker spoke it.
All this information is neatly presented in the tool’s dashboard along with other details such as the date and time at which the audio was recorded, the total duration of the file, and even the option to share download, or ask the AI chatbot for information from the transcript itself.
These detailed transcripts make it easy for professionals to identify key points, action items, and other important details. This saves them a lot of time and enhances their productivity. It also makes collaborating on the same transcript easier for multiple stakeholders.
One disadvantage of Transkriptor is that fast, highly technical, or heavily accented speech might require a few manual adjustments after generating the transcript. However, our testing found that the same factors affect transcripts produced by various tools.
Rev.com
Another tool for generating transcripts with timestamps is Rev.com, which allows you to record meeting notes and interviews automatically. It offers many other features, such as the ability to organize and edit files, search for keywords, and highlight quotes, making collaborating with a large team easier. The timestamps the tool generates are also accurate, but it may produce incorrect transcriptions if the speaker speaks too fast or is heavily accented.
The downside of using Rev.com, and something you’ll notice, is that it doesn’t offer a free trial, so you have no way of knowing how intuitive its interface is before you actually purchase a subscription. Additionally, the basic plan only offers a total of 45 minutes of transcriptions for a month, which is vastly inadequate in a professional setting. Paying for subscriptions that offer more transcription bandwidth can end up being expensive.
Otter.ai
Otter.ai is an AI meeting assistant that can automatically record, transcribe, and summarize your meetings. This is another reliable tool you can consider if you want to generate transcriptions for important meetings, lectures, or discussions with accurate timestamps that can make organization easier.
The real-time transcription feature produces detailed transcripts at all times and provides timestamps for each one. The downside to using Otter.ai is that the accuracy of the transcripts can vary when the speaker speaks too fast, and the content is heavily packed with technical jargon.
Step-by-Step Guide to Converting Audio to Text With Timestamps
There are two primary stages of using convert voice to text software, such as Transkriptor, to convert audio to text with timestamps. These are described below.
Set Up Your Transcription Tool
The first step is setting up the transcription tool to ensure it produces timestamps for each transcription and configuring the settings to get the right placement for the timestamps. While some apps, like Transkriptor, will produce timestamps by default, others may require you to enable them in the tool’s settings.
You should check your tool’s tutorial or settings to check whether timestamps are enabled by default. You can also check if the tool offers different options for the placement of the timestamps themselves and whether you can change them.
Processing and Reviewing the Transcribed Audio
This section will walk you through the key steps to import and process a transcription and ensure accurate timestamp placement.
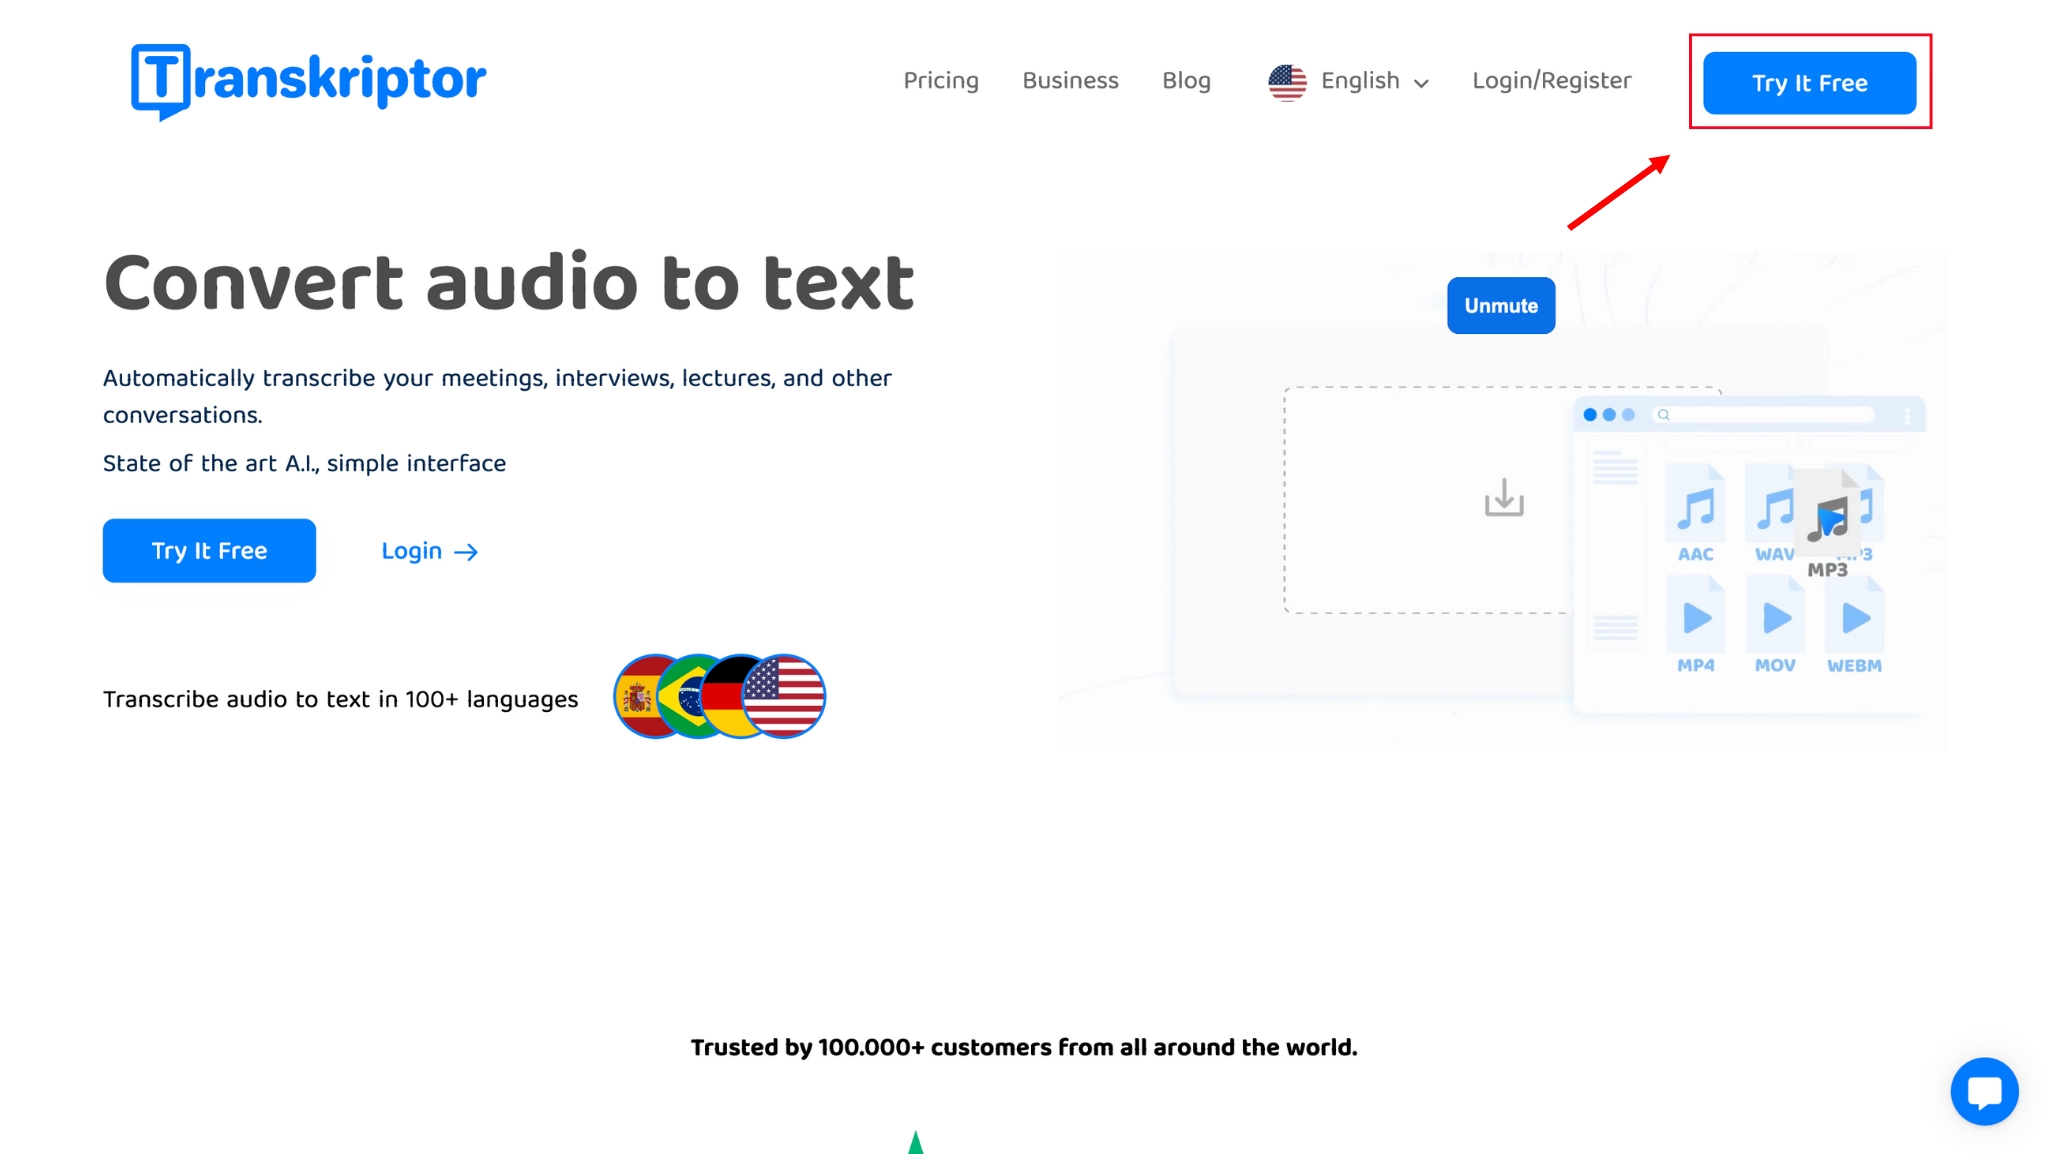
Step 1: Open the Transkriptor website and click on ‘Try It Free.’
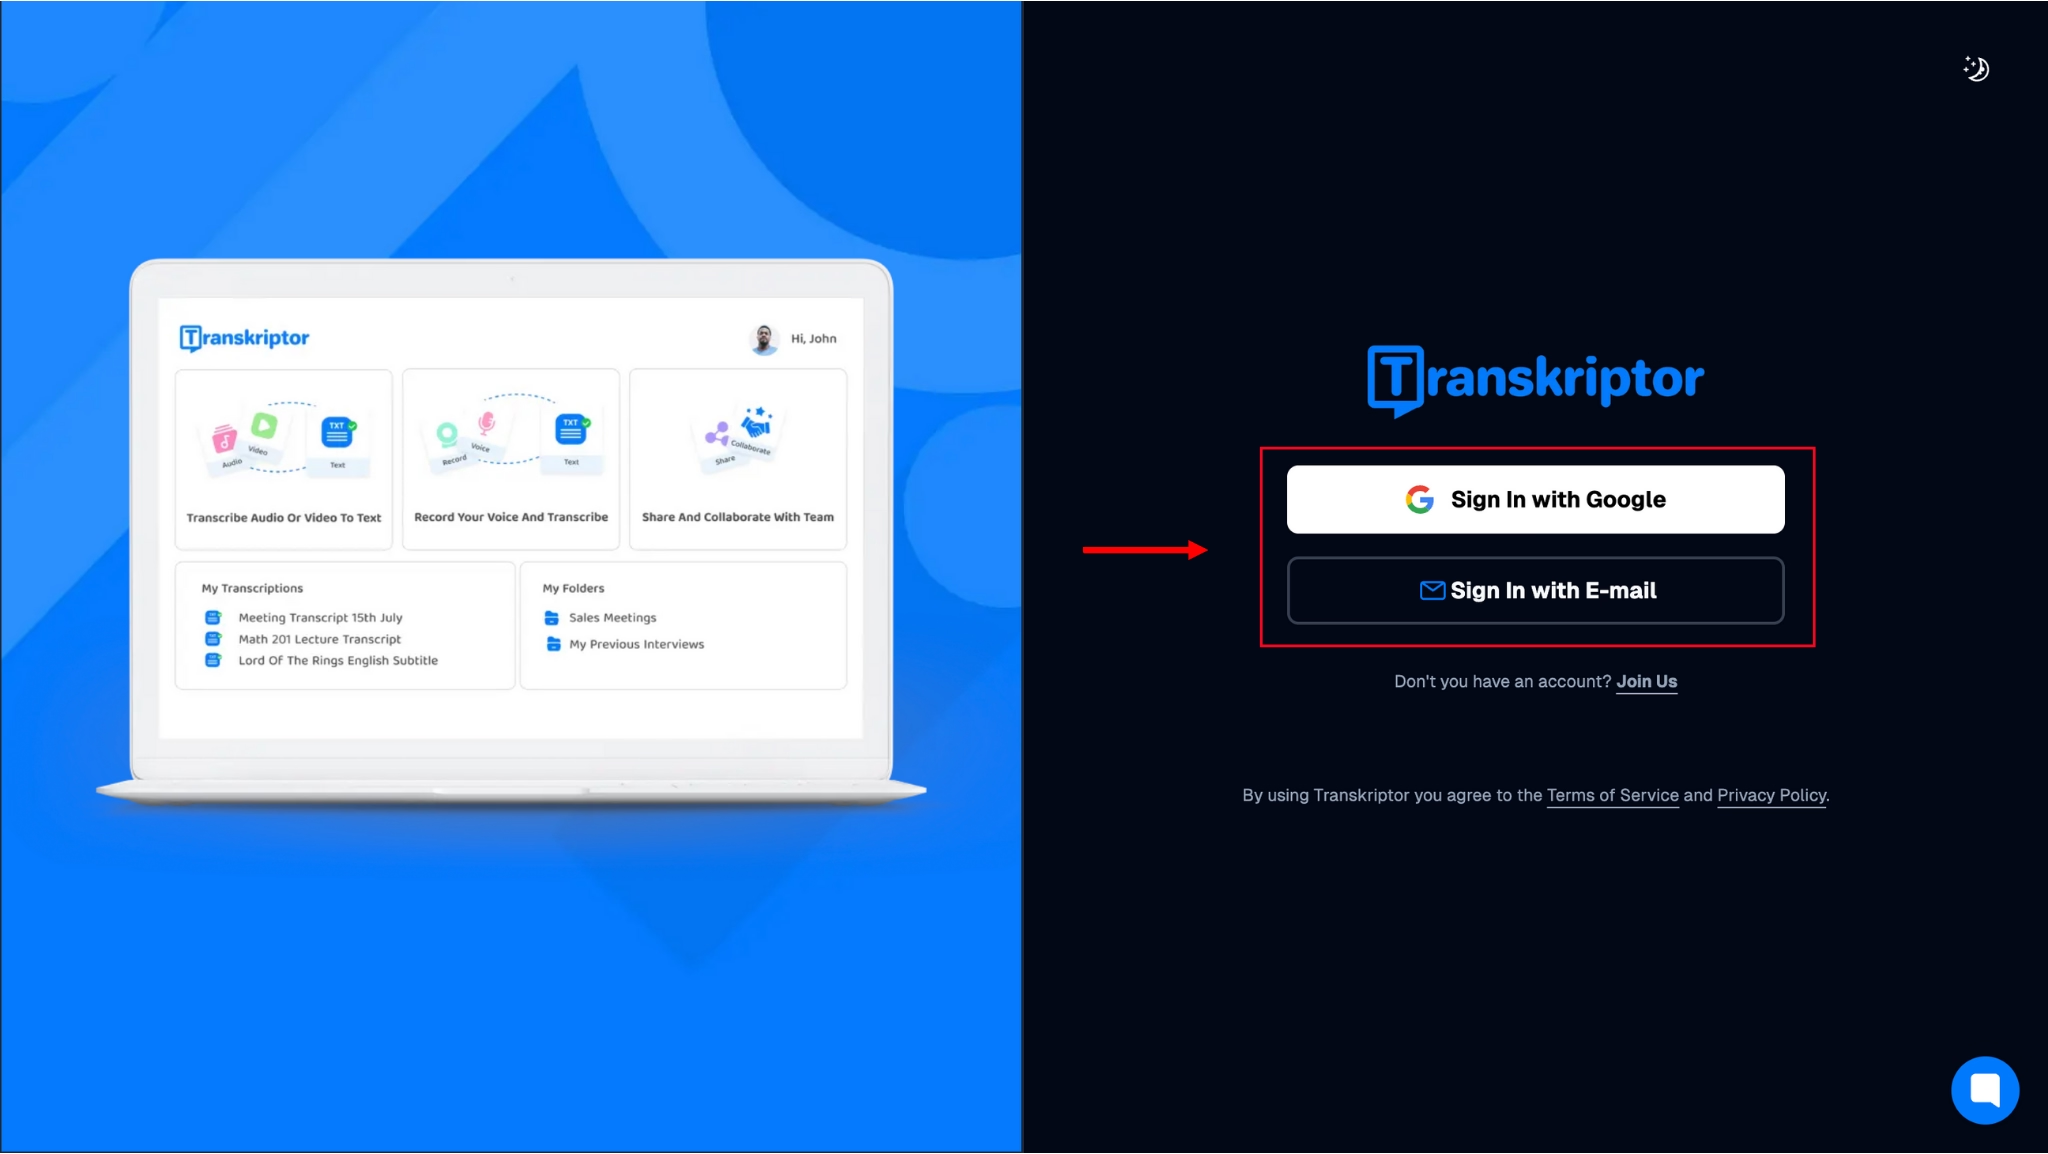
Step 2: Create an account using your email address and a password of your choice. You can also choose to create your account using your existing Google account to make the process more seamless.
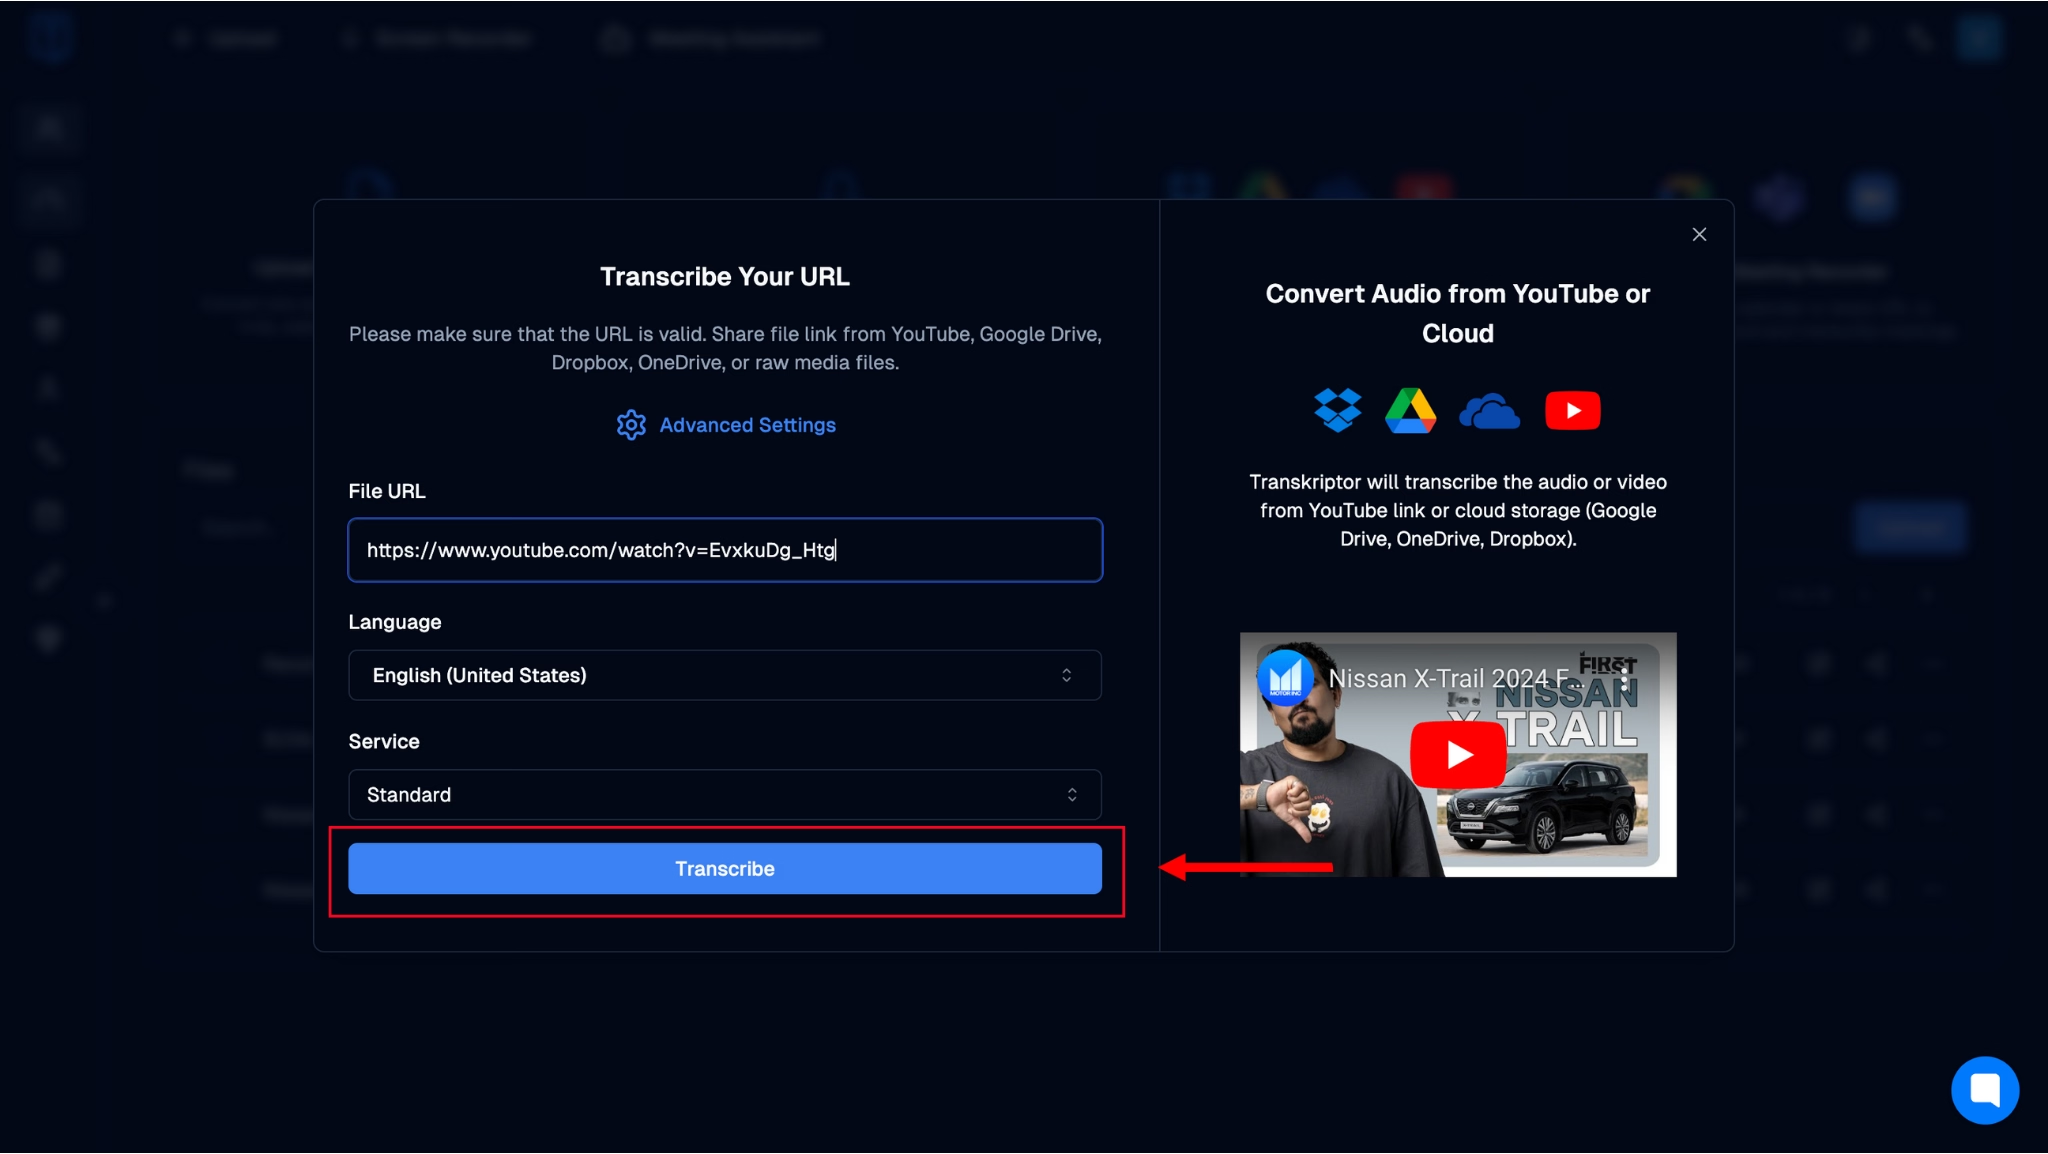
Step 3: Once you’ve logged in, you’ll be taken to the Transkriptor dashboard, where you’ll see multiple different ways in which you can import an audio or video file to transcribe. For the purposes of this guide, we’ll import a link to an existing YouTube video with two speakers to demonstrate how Transkriptor can recognize each speaker and accurately add timestamps for each segment. To do this, click on ‘Convert Audio from YouTube or Cloud.’
[image 6]
Step 4: In the dialog box that appears, you can add the link to the video and select the language and the kind of service you’d like (Standard, Subtitle, and Speaker Separated). Once you’ve chosen your preferred settings, click on 'Transcribe'. The transcript will then be uploaded to the cloud and processed.
Step 5: Once the transcript is ready, you’ll see that it has detailed timestamps and specifically demarcated speakers (SPK_1 and SPK_2). You can also share and download the transcript and ask the AI bot questions based on it.
Speech-to-Text Conversion Methods for Accurate Timestamps
If you think there’s only a standard method of adding timestamps to a transcript, you’d be wrong. There are several different approaches you can take, such as using audio to text google translate , and this section explores each of them in detail.
Start-End
This approach to adding timestamps involves adding one at the start and the end of an important part of a transcript, especially if it’s in the middle of the entire transcript.
Periodic
Periodic timestamping involves adding timestamps at a given interval, such as 30 seconds, 1 minute, 2 minutes, or every 5 minutes. In this format, the timestamp is typically added before the word spoken at the time interval you set, so it becomes easy to identify.
Speaker Change
The speaker change approach is among the most popular timestamping methods. It involves adding a timestamp whenever the speaker in a discussion changes, which helps separate the content spoken by one speaker from another for easier navigation.
Sentence
The sentencing approach involves adding a timestamp at the start of every sentence. This is one of the lesser-used approaches as it’s considered to be too intrusive, especially when using tools like mp3 to text converters.
Inaudible
The inaudible timestamp is added to any section that the tool hasn’t been able to transcribe because it’s inaudible or where a portion of the speech is missing.
While timestamping used to be done manually until a few years ago, the influx of AI tools has made it possible for users to set their preferences beforehand so the tool can automate the process for them. As a result, automatic transcriptions save users a lot of productive time that they can otherwise spend on high-priority tasks.
This is in contrast to manual timestamping, where you’d have to manually cross-check the recording of the discussion with a stopwatch to add timestamps to each section.
Automating Meeting Notes With Timestamps
Now that you’ve grasped the advantages of automatic timestamping over its manual counterpart, you should also know how to use the right settings to achieve the desired outcome. Some apps allow you to set your choice of timestamp in the app’s settings, whereas other, more basic apps will give you a single default option.
Changing these settings can ensure your timestamps are set in a manner that’s convenient for you and your team to navigate to maximize productivity.
There are also certain best practices that can help you timestamp your transcripts better to save time and maximize your productivity. These are discussed in detail below:
Document the Meeting’s Outline: Record an outline of the entire discussion with key points or topics so you can segregate the transcript into concise sections. This will make it easier for everyone on your team to identify and understand the transcript as a whole.
Understand the Purpose of the Meeting: The key purpose of the discussion or meeting is key to choosing the right settings when using your transcription tool. For example, if you want to distinguish between two or three key speakers to derive insights from their contributions, you can select the Speaker Change option when setting your timestamp preferences.
Choose the Right Tool: The tool you choose will also impact the accuracy and type of timestamping used. While some tools offer different options, others give you a default setting that you won’t be able to change.
Use Timestamps to Highlight Action Items: While using the Speaker Change or Period model of timestamping, you can manually set them to highlight important points or action items that make it easier for everyone in your team to find them.
Enhancing Transcription Accuracy With Speech Recognition Systems
The backbone of any effective meeting transcription is high-quality speech recognition systems. A good system will ensure that it identifies different speakers effectively and marks them in the final transcript while also identifying differences in languages and dialects. It will also transcribe technical jargon so you can get an accurate transcript each and every time you use it.
A tool that ticks all these boxes is the most effective option for dynamic workplaces looking to maximize their productivity and make their meetings more effective. They also ensure that the transcript is accurately timestamped based on the preferences you choose, thereby reducing any manual interventions you may have to make at the end.
Tools like Transcriptor, for example, leverage the power of advanced AI engines to deliver high-quality transcriptions. As you’ve seen in the images in the above sections, the tool accurately identifies individual speakers and what they say, and it presents them in an intuitive manner with accurate timestamps.
Conclusion
Although timestamps may seem like insignificant details when reading through a transcript, they often add crucial value in professional settings, especially when large teams collaborate on projects.
Audio-to-text timestamps help identify speakers and key points discussed, along with any action items decided. While you’ll find several tools that offer timestamping online, not all of them produce accurate results.
Transkriptor uses advanced AI and speech recognition systems to provide transcripts that are accurately timestamped each time. Try it for free today and discover how it can help you maximize your productivity at the workplace.
