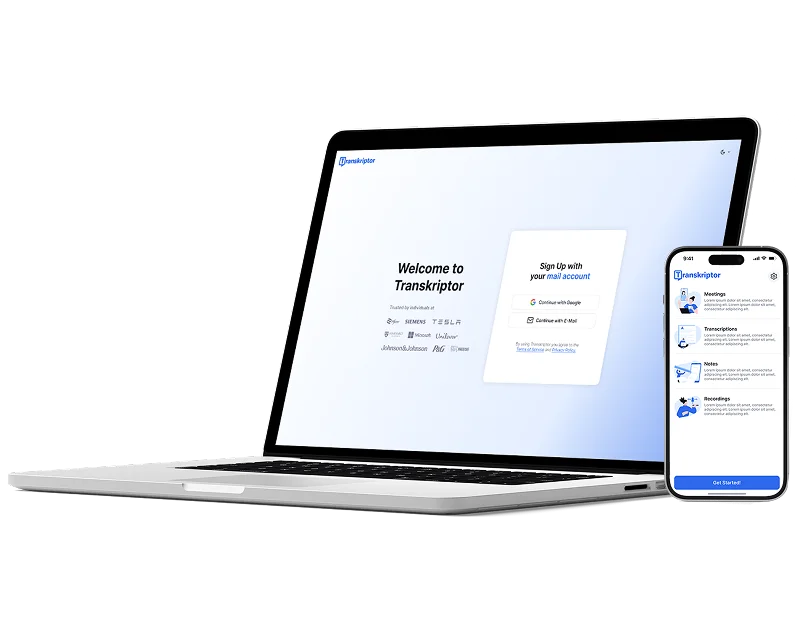
AI Meeting Recorder
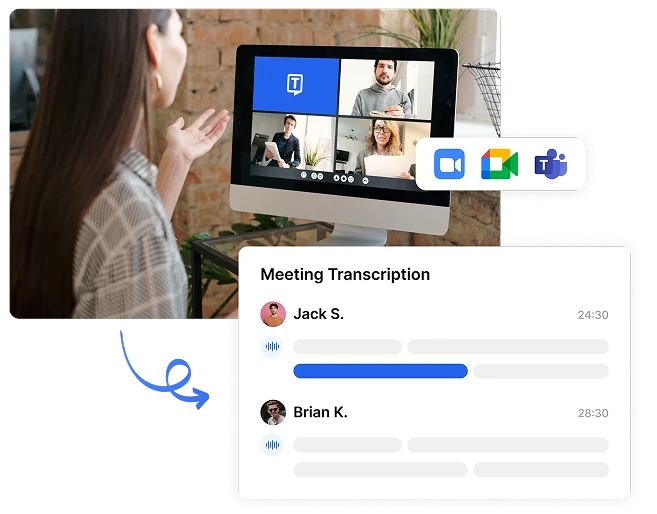
Transkriptor's AI meeting recorder captures your online meetings on Zoom, Microsoft Teams, and Google Meet either by joining through a meeting link or calendar integration, or by using the in-built recorder to capture the conversation without joining the call. Get accurate meeting transcriptions, smart AI summaries, and searchable meeting content from every conversation, helping teams save hours on meeting documentation.
Record and transcribe meetings in 100+ languages
Save 20+ Hours Monthly with Automated Meeting Recording
Transkriptor's AI meeting recorder automatically captures your online meetings by connecting to your calendar and meeting platforms. By eliminating manual recording, note-taking, and follow-up, the entire documentation workflow is automated, saving valuable time and reducing administrative overhead for your entire team.
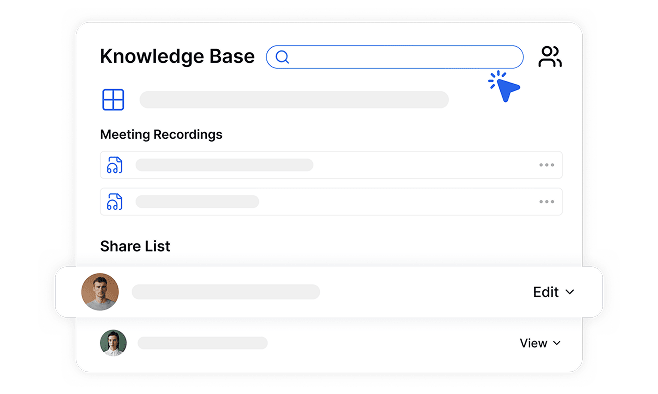
Build a Searchable Archive of All Your Recorded Meetings
Automatically compile every recorded meeting into an organized, searchable repository with Transkriptor. This comprehensive knowledge base of recorded conversations serves as your team's collective memory, eliminating information loss and providing valuable context for new team members, project continuity, and future reference.
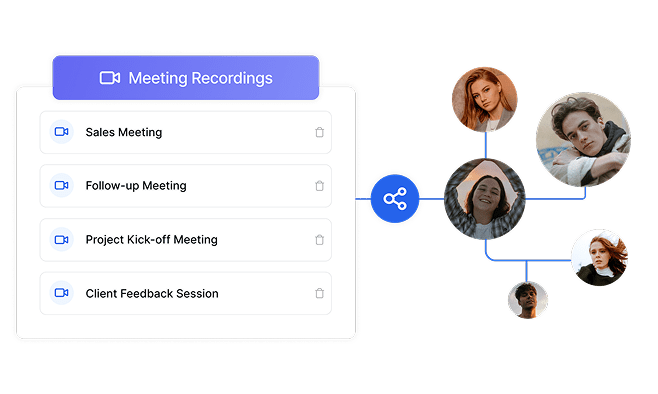
Share Meeting Recordings to Boost Team Alignment
Keep everyone on the same page with shared access to meeting recordings, AI-generated transcriptions, and smart summaries from Transkriptor even for those who could not attend live. Transkriptor's meeting recorder improves team communication by making every recorded conversation searchable, accessible, and easy to follow.
Record Meetings in 4 Simple Steps
- 1STEP 1
Connect Calendar or Enter Meeting URL
- 2STEP 2
Transkriptor Joins and Records
- 3STEP 3
Access AI-Generated Insights
- 4STEP 4
Share or Build Meeting Knowledge Base
Who Benefits Most from AI Meeting Recording

Project Managers
Capture every project update, task, and decision automatically with the meeting recorder.

Sales Professionals
Record client meetings, sales calls, and video conferences with an AI-powered meeting transcription tool.

HR Professionals
Use AI meeting recorder to document candidate interviews, onboarding sessions, and internal discussions.

Executive Assistants
Automatically record and transcribe online meetings with the AI-powered meeting recorder.
All-in-One Meeting Recording Solution

Record Any Meeting with URL or Calendar Integration
Schedule recordings in advance by connecting Transkriptor to your Google or Outlook Calendar or simply enter any meeting URL for immediate capture. This flexible integration works with Teams, Zoom, and Google Meet, automating your entire recording workflow from joining to sharing with participants.
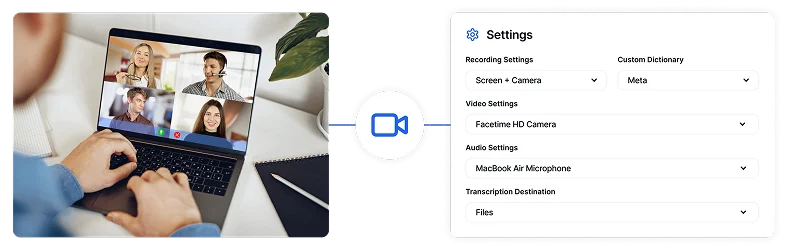
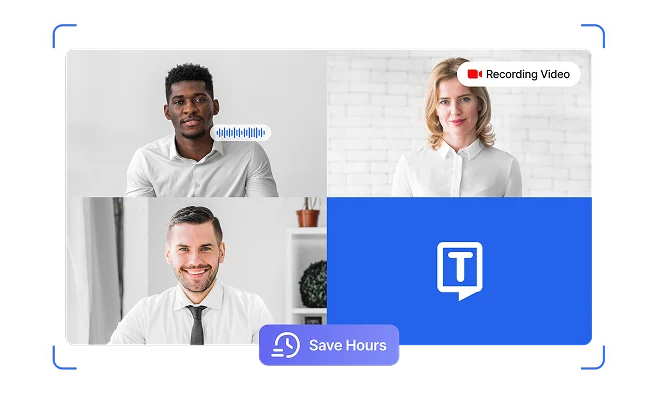
Advanced Meeting Recording and Audio Settings
Customize your meeting recording experience with flexible audio and video settings. Choose to capture microphone input, system audio, or both while recording with options for video quality and camera selection. You can also record your meetings like this instead of a meeting assistant.

AI-Powered Meeting Intelligence
Transform recorded meetings into actionable intelligence with Transkriptor's comprehensive AI analysis. Get automatic summaries of key points and decisions, access categorized content through intelligent filters (questions, objections, tasks), and interact with your meeting data through AI chat to extract specific information.
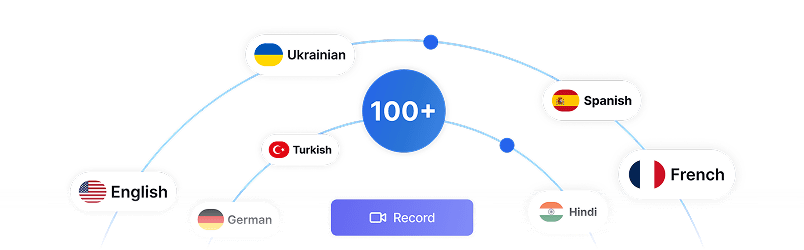
Record Online Meetings in 100+ Languages
Capture and convert speech to text in over 100 languages with Transkriptor's advanced meeting recorder technology. This multilingual transcription capability ensures accurate documentation regardless of participants' nationalities or preferred languages, making it ideal for global teams and international collaborations.
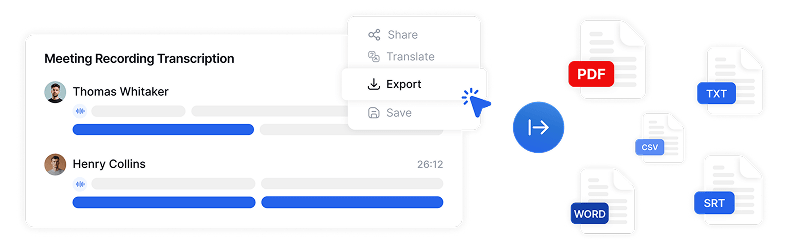
Share Meeting Recordings with Secure Links
Distribute meeting content easily by exporting in multiple formats (PDF, Word, SRT, TXT, CSV) or sharing via secure links. Transkriptor's flexible sharing options include customizing exports with timestamps and speaker names, while secure link sharing enables controlled access for team members without requiring them to create accounts.
Enterprise-Grade Security
Security and customer privacy is our priority at every step. We comply with SOC 2 and GDPR standards and ensuring your information is protected at all times.


What Our Users Say
Frequently Asked Questions
The best way to record a meeting is using Transkriptor, which offers two flexible options: a meeting assistant that automatically joins your Zoom, Microsoft Teams, or Google Meet sessions via calendar integration, or an inbuilt recorder that captures meetings directly without joining the call.
The best meeting recorder is Transkriptor, offering both automatic recording via Zoom, Teams, or Meet integration and an in-built recorder that captures meetings without requiring a join. It provides accurate transcriptions, AI summaries, and searchable content to save time and boost productivity.
A meeting recorder captures the audio or video of a meeting and saves it for future reference. Transkriptor goes a step further by automatically recording online meetings, transcribing them with high accuracy, generating AI-powered summaries, and turning conversations into searchable, shareable content.
Yes, Transkriptor's meeting recorder supports over 100 languages with high accuracy. It automatically detects and transcribes different languages spoken during your meetings, making it perfect for international teams and multilingual conversations.
Absolutely. When connecting Transkriptor to your calendar, you can set preferences for which meetings should be recorded automatically. This allows you to selectively record important meetings while skipping personal or confidential conversations.
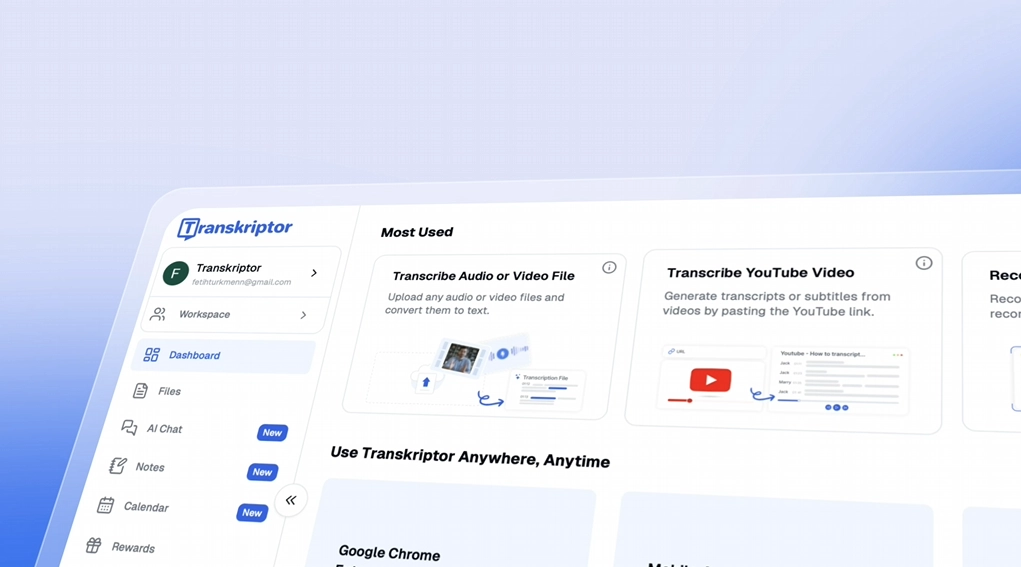
Access Transkriptor Anywhere
Record live or upload audio & video files to transcribe. Edit your transcriptions with ease, and use the AI assistant to chat with or summarize transcriptions.